
There’s a moment that happens in a home gym that never happens in a commercial one.
It’s 5:47 AM. The gym is quiet. The bar is loaded. Nobody’s waiting for the rack. Nobody’s watching. It’s just you, the weight, and the decision to show up — which you already made by walking down the hall.
That’s not a small thing. That consistency, compounded over months and years, is what separates people who transform their health from people who talk about it.
I experienced and expanded my first gym at 16 in my parents’ basement. A door frame pull-up bar, adjustable dumbbells, and a Bowflex I barely knew how to use. Nothing impressive. But that space planted a seed that has defined my entire adult life — a career as a certified personal trainer, well over a decade of consistent training, and a deep conviction that the environment you train in matters as much as the program you follow.
A home gym isn’t just a convenience in my opinion. It’s a commitment made physical. And when it’s built right, it removes every excuse between you and the best version of your body.
This guide gives you a certified trainer’s complete blueprint for setting up a home gym in 2026 — regardless of your budget, your space, or your experience level. By the end, you’ll know exactly what to buy, where to put it, how much to spend, and what mistakes will cost you money before you make them.
You’ll learn:
✅ How to define your fitness goals to choose the right equipment
✅ How to assess and maximize your available space (even in tiny apartments)
✅ Budget-smart approaches for every price range ($300 to $5,000+)
✅ Exactly which equipment to buy based on your training style
✅ How to choose flooring that protects your space and equipment
✅ Layout strategies that optimize safety and workout flow
✅ Design tips to create a motivating, energizing environment
Whether you’re a complete beginner who’s never touched a barbell or an experienced lifter looking to ditch your commercial gym membership, this guide has you covered.
The best time to build a home gym was five years ago. The second-best time is today.
Let’s get started.
Step 1: Define Your Fitness Goals
Before you buy a single piece of equipment or measure a square foot of space, you need to answer one critical question: What do you actually want to achieve?
Before you pick up your laptop or hop in your car to go on a home gym shopping spree- if you can’t answer this one, simple question, you might as well cancel your plans. That question is this: What do you want to achieve in your home gym?
Without answering this properly, you’ll fall prey to the biggest pitfall of the home gym set-up: having useful tools with no use for them. This trap is all too common. Most victims see a deal on a treadmill or a friend’s Instagram-worthy setup and start buying equipment without a clear plan. Six months later, they have a expensive clothes rack and unused gear collecting dust.
Listen very carefully: Your fitness goals aren’t just goals- they’re the blueprint of every purchase/ decision from this point forward. The equipment you buy, how much space you’ll need, what food you buy, how much time you allot to training; your goals come with a price and only you can determine whether that investment will benefit you or go to waste.
Why Goal Clarity Matters
If you want to see how much a lack of clearly defined goals will cost you, pay attention to the following scenarios:
Without clear goals:
- “This adjustable dumbbell set looks cool” → $600 spent
- “Maybe I should get a rowing machine too?” → $900 spent
- “I might want to do yoga someday” → $150 spent
- Result: $1,650 spent on equipment that doesn’t work together
With clear goals (example: building strength):
- “I need progressive overload for compound movements” → Power rack + barbell + plates = $800
- “I need a bench for pressing variations” → Quality adjustable bench = $300
- “I need dumbbells for accessory work” → Adjustable dumbbells = $400
- Result: $1,500 spent on a cohesive system designed for your specific goal
See the difference? Same budget, but one creates a functional gym while the other creates clutter.
The Four Primary Goal Categories

Goal 1: Build Strength & Muscle
What this means:
You want to get stronger, add lean muscle mass, and improve your physique through progressive resistance training.
Essential equipment:
- Power rack or squat stand (for safe heavy squats, bench press, overhead press)
- Olympic barbell (the foundation of strength training)
- Weight plates (bumper or iron; start with 300+ lbs if you’re serious)
- Adjustable bench (flat and incline positions for pressing variations)
- Adjustable dumbbells (for accessory work and unilateral training)
Space: 100-200 sq ft ideal
Budget: $800-2,500
Training style: Compound lifts with progressive overload, 3-5 days/week

Goal 2: Lose Weight & Improve Cardio
What this means:
Your primary focus is burning calories, improving heart health, and shedding body fat through consistent cardio work combined with resistance training.
Essential equipment:
- Cardio machine (treadmill, stationary bike, rowing machine, or air bike)
- Resistance bands or adjustable dumbbells (to maintain muscle during weight loss)
- Quality exercise mat (for floor work and stretching)
- Jump rope (incredibly effective, very affordable)
Space requirements: Small to medium (50-150 sq ft)
Budget range: $300-1,800 depending on cardio equipment choice
Training style: Higher frequency (4-6 days per week), moderate duration (30-60 minutes), mix of steady-state cardio and resistance circuits, emphasis on calorie burn and consistency.
Goal 3: Functional Fitness & Mobility

What this means:
You want to move better, reduce injury risk, improve flexibility and mobility, and develop well-rounded fitness for sports or daily life activities.
Essential equipment:
- Quality yoga mat (thick enough for comfort during floor work)
- Resistance bands (multiple resistance levels)
- Foam roller (for self-myofascial release)
- Kettlebells (one or two to start; versatile for swings, Turkish get-ups, carries)
- Medicine ball or slam ball (for dynamic, explosive movements)
Space requirements: Small to medium (50-120 sq ft)
Budget range: $200-800 for a comprehensive mobility setup
Training style: Variable—could be daily yoga and mobility work, 3-4 days of functional training circuits, or sport-specific conditioning. Sessions typically 30-60 minutes focusing on movement quality over pure load.
Goal 4: General Health & Maintenance
What this means:
You want to stay active, maintain a healthy weight, preserve muscle and bone density as you age, and have the flexibility to try different types of training without specializing.
Essential equipment:
- Adjustable dumbbells (the most versatile single purchase)
- Resistance bands (full set with varying resistances)
- Exercise mat (for stretching, core work, yoga)
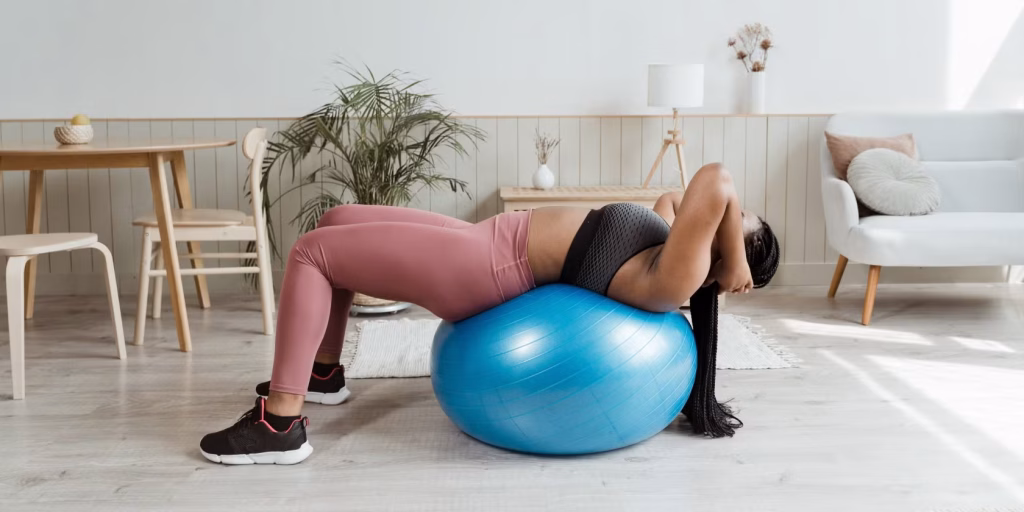
- Stability ball (for core training and stretching)
- Jump rope or compact cardio solution
Space requirements: Small (25-100 sq ft)
Budget range: $200-1,000 for a well-rounded setup
Training style: Maximum flexibility—mix strength training, cardio, yoga, HIIT, and recovery work. Typically 3-5 days per week, 30-45 minutes per session. The goal is sustainable, enjoyable movement.
Quick Self-Assessment: What’s Your Priority?
Answer these questions honestly:
1. If you could only work out 3 days per week, what would you do?
- Heavy lifting → Strength focus
- Running or cycling → Cardio focus
- Yoga or movement practice → Mobility focus
- A mix of everything → General fitness
2. What gets you most excited about working out?
- Hitting PRs and getting stronger → Strength
- Feeling energized and burning calories → Cardio
- Moving well and feeling flexible → Mobility
- Variety and trying new things → General fitness
3. What’s your biggest frustration with past workout attempts?
- Couldn’t progressively overload at home → Need strength equipment
- Got bored with limited cardio options → Need engaging cardio solution
- Felt stiff, tight, or injury-prone → Need mobility work
- Lost interest due to monotony → Need variety in equipment
4. Five years from now, what do you want to be able to do?
- Deadlift 400 lbs or do 20 pull-ups → Strength priority
- Run a 5K in under 25 minutes or bike 50 miles → Cardio priority
- Touch your toes, do the splits, or move pain-free → Mobility priority
- Maintain independence, play with grandkids, hike mountains → General fitness
Your answers will point you toward your true priority. Trust your gut—the equipment that supports what genuinely motivates you is the equipment you’ll actually use.
Trainer’s Perspective: In ten years of personal training, the clients who build the most effective home gyms aren’t the ones with the biggest budgets — they’re the ones who can answer the goal question specifically. Not ‘get fit’ but ‘deadlift twice my bodyweight’ or ‘get through a 30-minute session four days a week without stopping.’ The specificity of your goal determines the specificity of your gym. Vague goals produce undefined, cluttered gyms.
Goal-Setting Action Step
Before moving to the next section, write down:
My primary fitness goal is: ___________________________
My secondary goal is: ___________________________
Based on my goals, my home gym will prioritize: ___________________________
The one piece of equipment I’m most excited to use is: ___________________________
Having this clarity will make every decision in the following sections 10x easier.
Step 2: Assess Your Available Space
You’ve done the important work of defining your goals and getting your priorities straight. Now we get to the practical bit: figuring out where this home gym is supposed to go!
This part for many people can be a little discouraging. In a world that glorifies excess, it feels like you need more space to have a great gym. The good news: no matter how much space you’re working with, you can still create a fitness area suited for your goals. You don’t need a massive basement or three-car garage to build an effective home gym. Some of the most functional training spaces I’ve seen are in spare bedrooms, converted closets, or even dedicated corners of living rooms.
The key isn’t having tons of space—it’s using your available space intelligently.
So this section is dedicated to helping you analyze what you’re working with to maximize every square foot.
Why Space Assessment Matters (And What Happens If You Skip It)
I’m going to be real with you- this may seem boring and unnecessary to you. You’re likely fired up after clearly defining your goals and itching to jump into equipment research. However I’ll show you why researching your own space is essential.
So here’s a very real story: A guy bought a beautiful power rack online—$800, great reviews, perfect for his goals. When it arrived, he found himself with two problems:
- His garage ceiling was 7.5 feet tall. The rack needed 8 feet.
- Even if it fit, he couldn’t load the barbell properly because there wasn’t enough clearance on the sides.
The rack sat in his driveway for three weeks before he sold it at a loss. Starting to feel my meaning? Don’t be that person. This process will save you a lot of time and money.

Space Evaluation Process
1. Identify potential locations:
- Spare bedroom (10’x10′ to 12’x14′)
- Garage (240-576 sq ft typical)
- Basement (highly variable)
- Room corner or section (48-120 sq ft)
- Outdoor covered space
2. Measure everything:
- Floor space: length x width
- Ceiling height at lowest point
- Door dimensions (for equipment delivery)
- Obstacles: outlets, windows, vents
3. Calculate usable space:
The 3-Foot Rule: You need 3 feet of clearance around equipment you’re actively using.
Example: 12’x14′ room (168 sq ft total)
- Power rack: 4’x4′ = 16 sq ft
- Required clearance: 10’x10′ zone = 100 sq ft
- Remaining space: 68 sq ft
Quick reference: Minimum space requirements by goal
| Training Style | Minimum Space | Ideal Space | Notes |
| Strength (barbell focus) | 80-100 sq ft | 150-200 sq ft | Need space to load/unload barbell safely |
| Cardio machine + light weights | 50-70 sq ft | 100-120 sq ft | Can use foldable equipment to maximize space |
| Functional/bodyweight training | 40-60 sq ft | 80-100 sq ft | Most space-efficient option |
| General fitness (mixed equipment) | 60-80 sq ft | 120-150 sq ft | Flexibility for multiple training styles |
| Full powerlifting/CrossFit setup | 150-200 sq ft | 250-400 sq ft | Need space for multiple lifting stations |
Critical Considerations
Ceiling height requirements:
- Barbell overhead: 8’0″ minimum (8’6″ ideal)
- Pull-ups: 8’6″ minimum
- Jumping exercises: 8’0″ minimum
- Dumbbell-only: 7’0″ works
Environmental factors:
- Temperature control (heater/fan/AC)
- Lighting (500-1000 lumens per 100 sq ft)
- Ventilation and humidity
- Noise considerations (apartments!)
The Space Assessment Checklist
Before moving to the next section, confirm you have:
✅ Identified your training location(s)
✅ Measured floor space (length x width)
✅ Measured ceiling height
✅ Measured doorways (for equipment delivery)
✅ Noted electrical outlet locations
✅ Assessed temperature/climate control needs
✅ Evaluated lighting situation
✅ Considered noise implications
✅ Checked flooring condition
✅ Calculated your realistic usable space (accounting for clearance)
✅ Created a rough floor plan or layout sketch
Write it down:
My home gym will be located: _________________________
Dimensions: _____ ft x _____ ft = _____ total sq ft
Ceiling height: _____ ft _____ inches
Usable training space (after clearance): _____ sq ft
Primary space limitation: ___________________________
One modification I need to make: ___________________________
Trainer’s Perspective: I’ve seen a $800 rack get sold at a loss because the ceiling was 6 inches too low. I’ve seen a spare bedroom turned into a better gym than most people’s garages because the owner measured everything first and bought accordingly. The tape measure is the most important tool in this entire guide. Use it before you open Amazon.
Step 3: Home Gym Setups by Space Type
Your space type determines more than you think. A garage gym and a spare bedroom gym are fundamentally different environments — different flooring needs, different equipment options, different climate considerations, different layout possibilities. Here’s what each space type actually looks like when it’s done right.
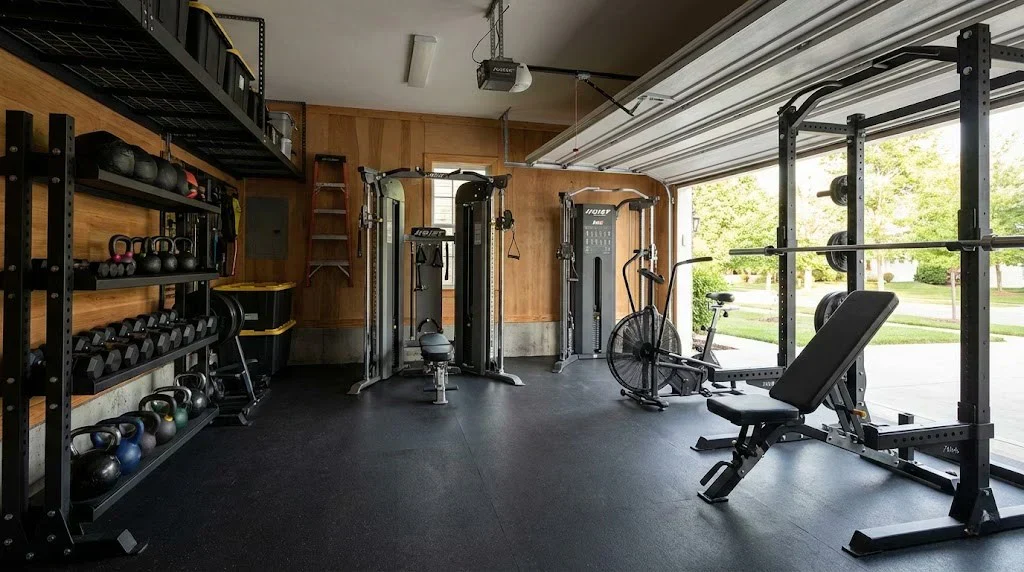
The Garage Gym
Best for: Serious lifting, heavy equipment, larger budgets
The garage is the gold standard for home gyms for a reason — space, high ceilings, and concrete floors that can handle real weight. A standard single-car bay gives you 240+ square feet, enough room for a full power rack setup with room to spare.
What makes a garage gym work: 3/4 inch horse stall mats from Tractor Supply ($45-50 each) are your flooring answer — they’re the best value available and built for exactly this environment. Climate control is the real challenge. A space heater for winter and a fan or wall-mounted AC unit for summer aren’t optional if you want year-round consistency. A garage that’s 15 degrees in January is a gym you won’t use.
Key consideration: Humidity. Garages fluctuate more than interior spaces. A dehumidifier protects your barbell and plates from rust and extends equipment life significantly.
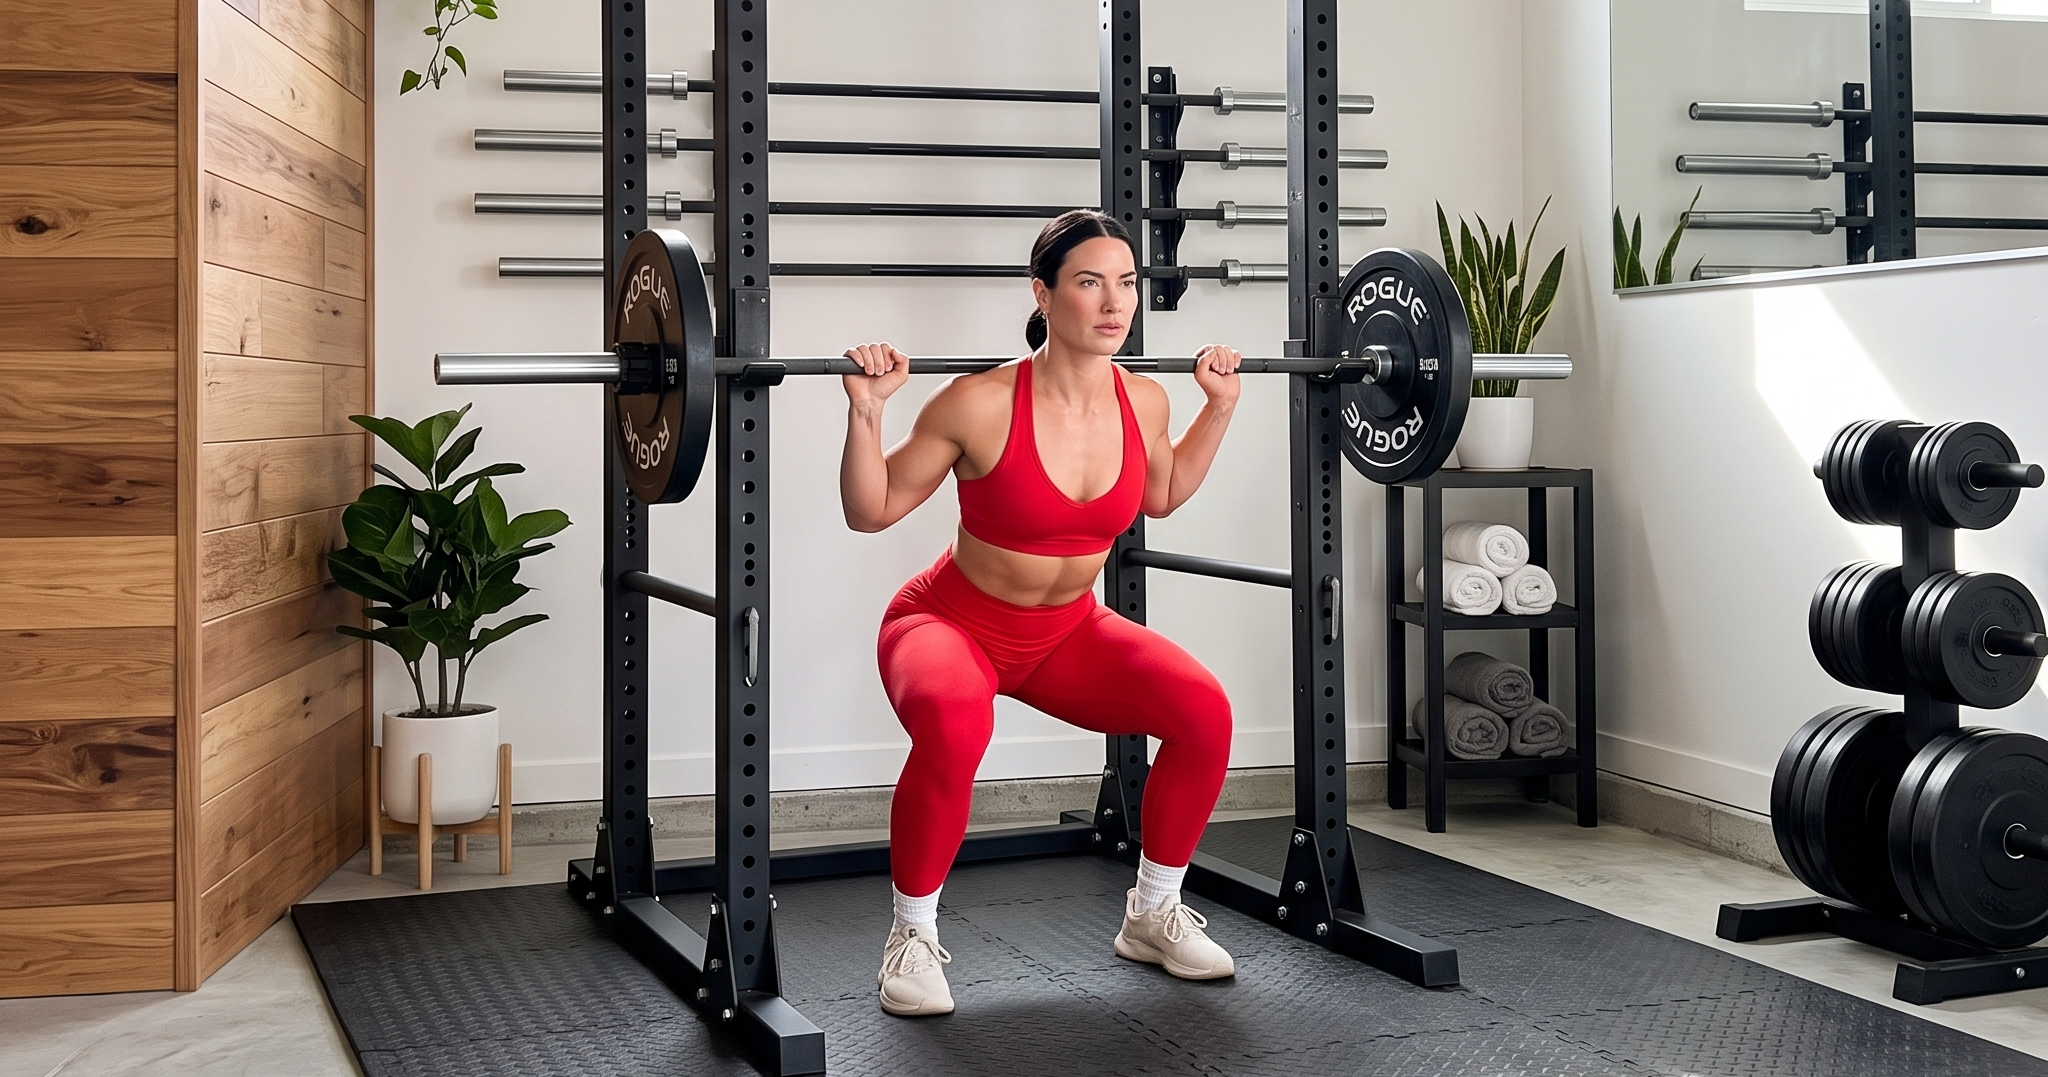
The Spare Bedroom Gym
Best for: Dedicated training space, climate-controlled, dual-purpose use
The spare bedroom is underrated. It’s climate controlled, private, has good lighting options, and can be designed to look intentional rather than improvised. A standard 10×10 or 10×12 spare bedroom gives you 100-120 square feet — enough for a wall-mounted folding rack, a foldable bench, and a set of adjustable dumbbells with room for floor work.
The key to a spare bedroom gym is the wall-mounted folding rack. When folded, it sits 8-12 inches off the wall and reclaims the entire floor space. This also makes it the best dual-purpose option — a guest room that converts to a gym in 30 seconds. Measure your doorway before ordering anything large. Standard interior doors are 32 inches wide.
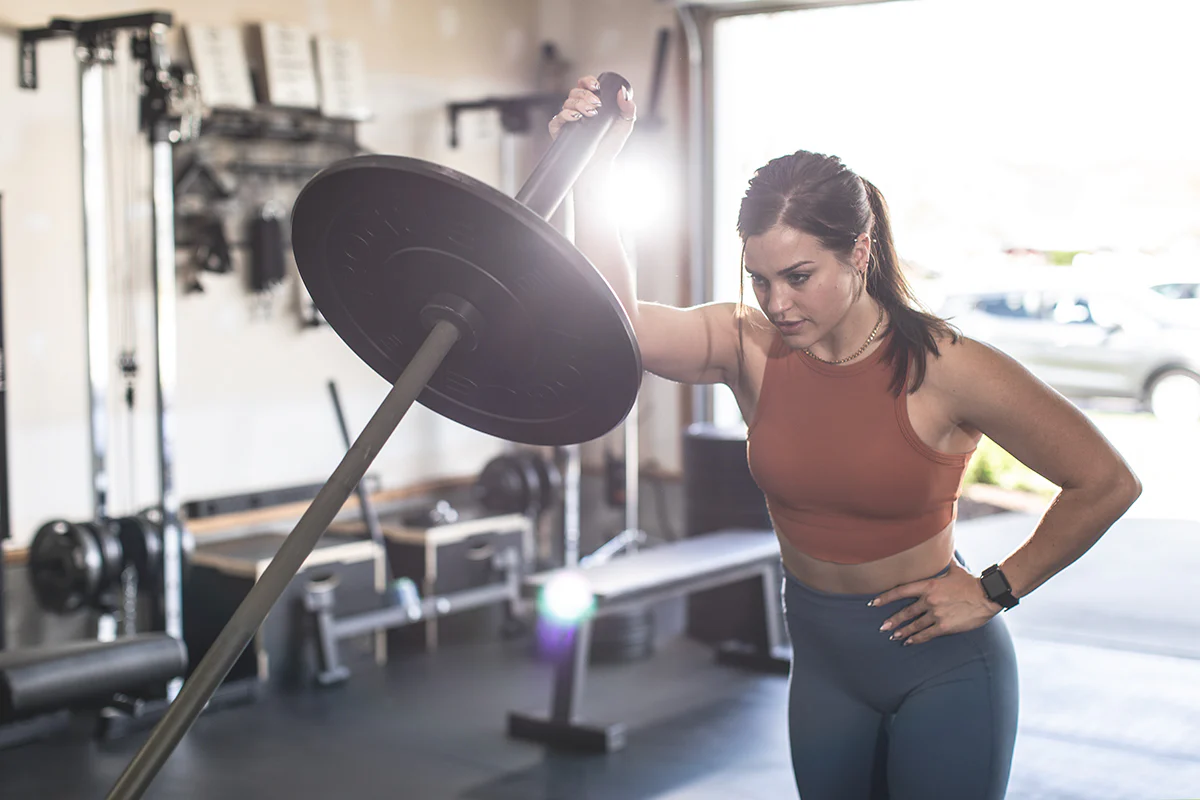
The Apartment Gym
Best for: Renters, noise-sensitive buildings, minimal footprint
An apartment gym is a constraint problem — and constraints produce creativity. The best apartment home gyms I’ve seen work because the owner accepted what the space is rather than fighting it. You’re not building a powerlifting platform. You’re building a consistent training environment that fits your life.
The non-negotiables: rubber-coated dumbbells (not iron — noise and floor protection), a resistance band set, a quality mat, and a doorway pull-up bar. These four items cover 90% of training goals and store in the corner of a room. No dropped weights. No jumping movements. No noise complaints.
The flooring question in apartments is simpler than garages — interlocking rubber tiles over a 6×8 foot area give you a defined training zone, noise dampening, and floor protection without permanent modification.
The Basement Gym
Best for: Dedicated training, heavy equipment, climate stability
The basement is where this site started — literally. A 16-year-old with a pull-up bar and a Bowflex in a New England basement is the origin story of SOMA.FITNESS. Basements offer real advantages: temperature stability, privacy, and typically enough ceiling height for serious training. The challenges are moisture and lighting.
Address the moisture problem first, before any equipment goes in. A dehumidifier running continuously in a basement gym is non-negotiable — humidity accelerates rust on barbells and plates, grows mildew on rubber flooring, and makes the space feel unpleasant. Waterproof your walls if there’s any seepage history. Then address lighting — basements are notoriously dim and poor lighting kills motivation. LED shop lights on the ceiling cost $40-60 each and transform the feel of the space.
The Shared Family Space
Best for: Couples, families, multiple training goals
A shared gym works when the equipment is adjustable and the zones are defined. Adjustable dumbbells rather than fixed sets. An adjustable bench. A rack with safeties that accommodate different height athletes. These aren’t compromises — they’re smart investments that serve everyone without buying duplicate gear.
Zone the space deliberately: a strength area and a cardio or floor work area with clear visual separation. This allows two people to train simultaneously without interference and makes the space feel intentional rather than chaotic.
Step 4: Budget Smart

You know your goals. You’ve measured your space. Now comes the question everyone asks when learning how to set up a home gym: “How much is this actually going to cost?”
The answer? Anywhere from $200 to $20,000+ depending on your goals, space, and equipment choices.
But here’s the reality: you don’t need to spend thousands to get started. Some of the most effective home gyms I’ve seen cost less than three months of a commercial gym membership.
This section will break down exactly how to set up a home gym at every budget level, show you where to invest versus where to save, and help you avoid the expensive mistakes that drain your bank account without improving your results.
The Home Gym Budget Philosophy: Buy Once, Buy Right
Before we dive into specific budget tiers, understand this principle: cheap equipment that breaks or frustrates you is more expensive than quality equipment that lasts decades.
It’s a dangerous game attempting to build a home gym on a budget, mistakenly buying the absolute cheapest option for everything. Only to replace the same equipment half a year later because they broke down after a few sessions of light lifting.
Budget Tier 1: Starter Setup ($200-$500)
This setup is for the fitness rookies, small spaces, people dipping their toes in the home gym system, and functional fitness goals.
What you can accomplish: Full-body strength training, cardio conditioning, mobility work, fat loss, muscle maintenance.
Core equipment:
| Equipment | Cost Range | Why It’s Essential |
| Adjustable dumbbells (5-25 lbs or 5-50 lbs) | $150-$350 | Replaces 10-20 pairs of fixed dumbbells; allows progressive overload |
| Resistance band set (with door anchor) | $30-$60 | Infinite exercise variety; perfect for travel; minimal storage |
| Quality exercise mat (6mm+ thick) | $40-$80 | Floor work, stretching, yoga, core training |
| Jump rope | $10-$25 | Highly effective cardio; portable; costs less than lunch |
| Pull-up bar (doorway or wall-mounted) | $25-$60 | Back and bicep development; bodyweight progression |
| Foam roller | $15-$40 | Recovery and mobility work |
Total investment: $270-$615
Optional additions within budget:
- Stability ball ($20-$35)
- Ab wheel ($10-$20)
- Workout bench (basic, non-adjustable: $60-$100)
- Kettlebell (single, 25-35 lbs: $40-$70)
Budget Tier 2: Serious Home Gym ($500-$1,500)
This is for the committed lifters, those with dedicated space, people serious about strength gains, anyone with a little money to fully commit to learning how to set up a home gym properly.
What you can accomplish: Serious strength training with barbell compounds, progressive overload for years, comprehensive full-body development.
This is the sweet spot for most people figuring out how to set up a home gym. You get the essential big equipment without going overboard.
Core equipment:
| Equipment | Cost Range | Why It’s Essential |
| Power rack or squat stand | $250-$600 | Safe squatting, benching, overhead pressing; the foundation of barbell training |
| Olympic barbell (7ft, 45 lbs) | $150-$350 | The single most versatile piece of equipment; lasts a lifetime if quality |
| Weight plates (300 lbs total) | $300-$600 | Progressive overload capability; iron or bumper plates |
| Adjustable bench | $150-$350 | Flat and incline pressing; increases exercise variety 5x |
| Adjustable dumbbells OR fixed dumbbell set | $200-$400 | Accessory work, unilateral training, muscle balance |
| Rubber flooring (100 sq ft) | $100-$200 | Protects floors, reduces noise, creates dedicated training zone |
| Barbell collars | $20-$50 | Safety essential; keeps plates secure |
Total investment: $1,170-$2,550
Most people target: $1,200-$1,500
Budget Tier 3: Premium Setup ($1,500-$3,500)
This is the kind of budget where things get serious. This is for the seasoned lifters, people with larger spaces, those who want commercial gym quality at home, anyone committed to mastering how to set up a home gym at a high level.
What you can accomplish: Virtually anything. This price point is where you stop making compromises and build exactly what you want.
Core equipment:
| Equipment | Cost Range | Why It’s Worth It |
| Heavy-duty power rack (1000+ lb capacity) | $600-$1,200 | Rock-solid stability; safety for heavy lifting; integrated pull-up bar |
| Premium Olympic barbell | $300-$500 | Better knurling, higher weight capacity, better spin, lasts forever |
| Weight plates (400-500 lbs, bumper or calibrated) | $700-$1,200 | Enough weight for years of progression; bumpers for Olympic lifting |
| Quality adjustable bench (flat/incline/decline) | $300-$600 | Commercial-grade stability; multiple angle options |
| Adjustable dumbbells (5-75 lbs or 5-90 lbs) | $400-$600 | Heavy enough for advanced lifters; space-efficient |
| Cardio machine (rower, bike, or treadmill) | $800-$2,000 | Quality cardio option; built to last thousands of hours |
| Rubber flooring (150-200 sq ft) | $200-$350 | Full coverage; professional appearance |
| Cable machine or functional trainer (optional) | $800-$1,500 | Adds 50+ exercises; perfect for muscle isolation and variety |
Total investment: $3,100-$7,950
Most people target: $2,500-$3,500
Hidden Costs to Budget
- Shipping: $100-500
- Assembly: $0-300 (DIY saves money)
- Flooring: $100-500
- Climate control: $0-1,000
- Mirrors: $50-300
- Storage: $50-300
Add 10-15% to equipment budget for extras.
Smart Shopping Strategies
What to buy used (safe bets):
✅ Weight plates (iron or bumper)—they’re just metal, hard to ruin
✅ Power racks and squat stands—inspect welds carefully
✅ Benches—check for stability and padding condition
✅ Cardio machines (rowers, bikes)—test before buying
✅ Dumbbells—fixed dumbbells are nearly indestructible
✅ Kettlebells—solid chunks of iron last forever
What to buy new (worth the investment):
❌ Barbells—used bars may have bent shafts or damaged knurling
❌ Adjustable dumbbells—mechanisms can break, no warranty
❌ Resistance bands—rubber degrades over time
❌ Mats and pads—hygiene concerns
❌ Smart/electronic equipment—limited or no warranty
Where to find used equipment:
- Facebook Marketplace (best selection, local pickup)
- Craigslist (negotiate prices, inspect in person)
- OfferUp and Letgo apps
- Garage sales and estate sales (incredible deals sometimes)
- Local gym equipment stores (trade-ins and refurbs)
- Rogue Boneyard (Rogue’s scratch-and-dent section—new equipment at 20-30% off)
Trainer’s Perspective: My basement gym at 16 cost less than $300 in today’s dollars. I built more consistency, more strength, and more discipline in that space than in any commercial gym I’ve trained in since. Budget isn’t what limits home gym effectiveness. Clarity of purpose is. A $500 gym used four days a week produces more results than a $5,000 gym used when you feel like it.
“learn more about budget home gym options” →Best Budget Home Gym Equipment Under $600
“best adjustable dumbbells” →Best Adjustable Dumbbells in 2026: Trainer-Tested and Ranked
“best resistance bands for home gyms” →Best Resistance Bands for Home Gyms in 2026
“home gym flooring guide” →Best Home Gym Flooring: Rubber vs Foam vs Mats
Step 5: The Incremental Build: Why Phasing Your Gym Makes You More Consistent
The most common home gym mistake I see isn’t buying cheap equipment. It’s buying everything at once.
People get inspired, set a budget, spend it all in one weekend, and then feel obligated to use every piece of equipment they bought — whether it serves them or not. The gym becomes a source of pressure rather than motivation. Equipment sits unused. Guilt builds. Training frequency drops.
The better approach is a phased build. Start with your absolute essentials — the minimum equipment that supports your primary goal. Train consistently with just those pieces for 8-12 weeks. Then add equipment based on what you actually reach for and what you genuinely miss not having.
Phase 1: Foundation (Week 1-12)
Goal: Prove your consistency before expanding your investment.
For strength training: Adjustable dumbbells + pull-up bar + resistance bands + flooring. This is a complete training system for most beginners and costs under $400.
For general fitness: Mat + resistance bands + jump rope + adjustable dumbbells. Full-body training with zero excuses, maximum flexibility.
Train this setup for 12 weeks before buying anything else. If you’ve trained consistently, you’ve earned the next phase. If you haven’t, more equipment won’t fix that.
Phase 2: Expansion (Month 3-6)
Goal: Add what you’ve actually missed, not what you imagined you’d want.
This is where most people add a bench, upgrade to heavier dumbbells, or add a pull-up station if they haven’t already. The key word is ‘missed’ — you should have felt the absence of this equipment during Phase 1.
Phase 3: Complete System (Month 6+)
Goal: Build the gym that supports where you actually are now.
Six months of consistent training tells you more about what gym you need than any planning session can. By now you know your favorite movements, your weak points, and exactly what equipment gap is holding you back. This is when a power rack, barbell setup, or cardio machine makes sense — because you’ve proven you’ll use it.
| Phase | Strength focus | General fitness focus |
| Phase 1 (0-3 months) | Adj. dumbbells + pull-up bar + bands + flooring (~$350) | Mat + bands + jump rope + adj. dumbbells (~$280) |
| Phase 2 (3-6 months) | Adjustable bench + heavier dumbbell range (~$300) | Kettlebell + foam roller + heavier bands (~$150) |
| Phase 3 (6+ months) | Power rack + barbell + plates + bumper flooring (~$1,200) | Cardio machine + complete dumbbell set (~$600-1,000) |
Step 6: Choose the Right Equipment

Affiliate Disclosure: This article contains affiliate links to products. We may receive a commission for purchases made through these links at no additional cost to you. All recommendations are based on quality, value, and suitability for home gym use.
This is where learning how to set up a home gym gets exciting—and potentially overwhelming.
Walk into any sporting goods store or browse Amazon for “home gym equipment” and you’ll find thousands of options. Adjustable dumbbells with 47 different mechanisms. Seventeen brands of barbells. Power racks ranging from $200 to $2,000. Resistance bands in every color imaginable.
How do you know what’s actually worth buying?
This section will cut through the noise and give you specific, actionable equipment recommendations based on your goals, space, and budget. We’ll cover what makes quality equipment worth the investment, what features actually matter (and which are marketing gimmicks), and exactly what to look for when shopping.
By the end of this section, you’ll know precisely what equipment belongs in YOUR home gym—and what you can skip without regrets.
The Equipment Selection Framework
Before we dive into specific categories, understand this principle: Every piece of equipment you buy should pass the 3-question test:
- Does this directly support my primary fitness goal?
- Will I actually use this at least 2x per week?
- Is this the best use of my limited space and budget?
If you can’t answer “yes” to all three, don’t buy it yet. You can always add equipment later, but you can’t un-clutter a gym filled with impulse purchases.
When figuring out how to set up a home gym, prioritize equipment that offers:
- Versatility (multiple exercises possible)
- Durability (will last 5-10+ years with proper care)
- Progressive overload (allows you to increase difficulty as you get stronger)
- Safety (especially for heavy or complex movements)
A. Strength Training Equipment
Dumbbells
PowerBlock Pro Series (5-50 lbs or 5-90 lbs)
- Cost: $400-$700
- Pros: Most compact design, extremely durable, expandable, lifetime warranty
- Cons: Unique shape takes getting used to, can’t drop them
- Best for: Serious home gym owners who value space efficiency

NÜOBELL Adjustable Dumbbells (5- 50 lbs or 5- 80 lbs)
- Cost: $600-$900
- Pros: Most durable adjustable option, can drop them, feels like traditional dumbbells
- Cons: Manual plate changes (slower than dial systems), heavier footprint
- Best for: Advanced lifters who want traditional dumbbell feel

EOAT Adjustable Dumbbells(40-200 lbs per pair)
- Cost: $150-$350
- Pros: Extremely affordable, traditional screw-collar design
- Cons: Slow to adjust, takes up more space, collars can loosen
- Best for: Tight budgets where quality is less critical

Barbells
- Cost: $150-$200
- Weight capacity: 700-1,000 lbs
- Pros: Affordable, gets the job done for beginners
- Cons: Basic knurling, mediocre spin, may bend under heavy deadlifts

- Cost: $169
- Weight capacity: 1,500 lbs
- Pros: Excellent knurling, smooth spin, durable finish, lifetime warranty
- Cons: Higher upfront cost
- Best for: Serious home gym owners who want quality

Weight Plates
- Cost: ~$1.00-1.25/lb
- 300 lbs set: $300-$375
- Pros: Cheapest option, gets the job done
- Cons: Will mark/damage floors if dropped, loud
- Requires: Rubber flooring to protect floors

- Cost: $2.00-2.50/lb
- 230 lbs set: $460-575
- Pros: Can drop from overhead, quieter, and protects flooring
- Cons: Takes up more space on the bar sleeve than iron

Power Rack vs. Squat Stand
- Cost: $300-$350
- Weight capacity: 800 lbs
- Pros: Affordable entry into power racks, includes lat pulldown attachment
- Cons: Not as sturdy under heavy loads, limited long-term expandability
- Best for: Beginners learning how to set up a home gym on a budget

Mid-Range: Rep Fitness PR-1100
- Cost: $450-$550
- Weight capacity: 700 lbs
- Pros: Great value, solid construction, upgradeability
- Cons: Smaller footprint means less stable than larger racks

Weight Bench
Must-haves:
- 1,000+ lb capacity
- No gap between seat and back pad
- Stable base (won’t tip)
- Easy adjustment mechanism
- Cost: $154
- Weight capacity: 800 lbs
- Pros: Affordable, multiple angles, decent padding
- Cons: Gap between seat and back pad, wobbly at steep inclines
- Best for: Beginners when learning how to set up a home gym

- Cost: $250-$350
- Weight capacity: 1,000 lbs
- Pros: No gap design, stable, excellent value
- Cons: Heavier (harder to move around)
- Best for: Most home gym owners

B. Cardio Equipment
Overall value: Concept2 Rower ($1,100, often $700-850 used)
- Full-body, low-impact, stores vertically, indestructible
Ideal for joints: Stationary bike ($300-1,000)
- Zero impact, can multitask
Best for budget: Jump rope ($15-25) + bodyweight cardio
- Minimal space, maximum results
For runners: Quality treadmill ($1,000-2,000+)
- Only if running is your passion and you have budget/space
C. Mobility & Recovery
Essentials when learning how to set up a home gym:
- Exercise mat (6mm+ thick): $40-80
- Foam roller: $20-40
- Resistance bands: $30-60
- Pull-up bar: $25-60
Nice to have:
- Massage gun: $150-400
- Yoga blocks: $15-30
Step 7: Flooring — The Foundation

Flooring is one of the most overlooked decisions when learning how to set up a home gym—but it’s critical. The right flooring protects your equipment, reduces noise, prevents floor damage, and provides a stable lifting surface. The wrong flooring leads to damaged subfloors, angry neighbors, and unsafe training conditions.
Why Flooring Matters
Protection: Prevents dumbbells and plates from damaging your concrete, hardwood, or carpet
Noise reduction: Dampens impact sounds (critical for apartments)
Safety: Non-slip surface reduces injury risk
Equipment longevity: Absorbs shock that would otherwise damage equipment
Resale value: Protects your home’s floors from permanent damage
Defined space: Creates a dedicated training zone psychologically
Flooring Options Compared
| Flooring Type | Cost per sq ft | Best For | Pros | Cons |
| Horse Stall Mats | $2.00-$3.00 | Serious lifting, budget-conscious | Extremely durable, cheap, 3/4″ thick | Heavy, initial rubber smell, cutting required |
| Interlocking Foam | $1.00-$2.00 | Light cardio, yoga, low-impact | Easy install, comfortable, portable | Not durable for heavy weights, dents easily |
| Interlocking Rubber | $2.50-$4.00 | Mixed training, easy install | Modular, easy to replace pieces, good durability | Seams can separate, slightly less stable |
| Rubber Rolls | $2.00-$4.00 | Large spaces, commercial look | Seamless appearance, durable | Difficult to install, hard to cut |
| Lifting Platforms | $200-$500 (DIY) | Olympic lifting, deadlifts | Maximum floor protection, stable | Expensive, permanent, takes space |
Flooring protects equipment, reduces noise, prevents floor damage, and provides safe lifting surfaces.
The Winner for Most Home Gyms: Horse Stall Mats
Cost: $50-$75 per mat (4′ x 6′ = 24 sq ft)
Where to buy: Tractor Supply Co., local farm stores
Thickness: 3/4″ (perfect for weight training)
Weight: ~100 lbs per mat (very heavy)
Why they’re ideal when learning how to set up a home gym:
- Indestructible (used in horse stalls—can handle anything)
- Cheapest quality option ($2-$3 per sq ft)
- Dense rubber absorbs impact perfectly
- Can drop weights without damage
- Won’t compress or dent under heavy equipment
The only downside: Strong rubber smell for 1-2 weeks (airs out completely)
Flooring Action Steps
✅ Measure your training area (length x width = sq ft needed)
✅ Add 10% for waste/cuts
✅ Locate nearest Tractor Supply or farm store
✅ Rent truck or borrow vehicle (mats are heavy and large)
✅ Buy mats and let them air out in space for a week
My flooring choice: ___________________
Square footage needed: _____ sq ft
Estimated cost: $_____
Where I’ll buy: ___________________
Step 8: Design Your Layout
Once you know your equipment and flooring, it’s time to plan your layout. A well-designed layout makes workouts flow smoothly, prevents injuries, and maximizes your limited space. A poorly planned layout creates frustration and safety hazards.
The Three-Zone Approach
When learning how to set up a home gym, organize your space into functional zones:
Strength Training (Primary)
- Power rack or squat stand
- Barbell and plates
- Weight bench
- Requires most space and safety clearance
Accessory & Cardio
- Dumbbells and storage
- Cardio machine (rower, bike)
- Can be more compact
Mobility & Floor Work
- Open floor space (minimum 6′ x 6′)
- Mat storage
- Foam rollers, bands
- Stretching area
Essential Layout Rules
Safety clearances:
- 3 feet minimum around power rack when lifting
- 2 feet behind rack for plate loading
- 6 feet in front of rack for walkout space
- Leave clear path to exit (emergency egress)
Equipment placement:
- Heaviest equipment against walls (stability)
- Cardio machines near entertainment (TV, window views)
- Mirrors placed where you check form (front/side of rack)
- Dumbbells near rack for supersets
Traffic flow:
- Don’t block doorways with permanent equipment
- Create clear walking paths between zones
- Keep frequently used items accessible
Small Space Layouts (Under 100 sq ft)
8′ x 8′ Apartment Corner:
- Wall-mounted foldable rack OR squat stand
- Adjustable dumbbells on small rack
- Vertical plate storage
- Mat rolls up when not in use
- Pull-up bar over doorway
Maximize vertical space: Wall-mounted storage, pegboards for bands and accessories
Medium Space Layouts (100-150 sq ft)
10′ x 12′ Spare Bedroom:
- Power rack along one wall (4′ x 4′ footprint)
- Bench stores under rack when not in use
- Dumbbell rack on adjacent wall
- Rower or bike in corner (can be moved for floor work)
- Mirror on wall facing rack
Large Space Layouts (150+ sq ft)
12′ x 16′ Garage Gym:
- Power rack centered or against back wall
- Dedicated bench position
- Full dumbbell rack
- Cardio station with TV/tablet mount
- 8′ x 8′ open floor space for mobility
- Plate trees for organized storage
- Wall-mounted accessories
Layout Checklist
✅ All zones defined (strength, cardio, mobility)
✅ 3-foot safety clearance around primary lifting area
✅ Clear path to exit from any position
✅ Mirror placement planned for form checks
✅ Storage solutions identified for all equipment
✅ Lighting assessed and improved if needed
✅ Climate control plan if temperature extremes expected
✅ Layout tested with tape or paper before equipment arrives
My layout priority: ___________________
Biggest space challenge: ___________________
Storage solution needed: ___________________
Designing a Gym That Looks as Good as It Performs
Function matters more than aesthetics in a home gym. But aesthetics matter more than most people admit.
The environments we spend time in affect how we feel in them. A gym that looks intentional — that has good lighting, a coherent color palette, clean storage, and a visual identity — motivates you to show up differently than a cluttered garage corner with exposed concrete and tangled cables.
You don’t need to spend thousands to make your gym look good. You need to make deliberate choices.
Lighting: The Fastest Way to Transform Any Space
Poor lighting makes a gym feel like a storage unit. Good lighting makes it feel like a training facility. The fix is inexpensive. LED shop lights on the ceiling ($40-60 each) provide 4,000-5,000 lumens of bright, even light. Aim for 500+ lumens per 100 square feet of training space. Avoid warm yellow tones — cool white (5000-6500K) is more energizing and better for seeing what you’re doing.
Color: How Your Walls Affect Your Training
Color psychology is real in training environments. High-contrast colors — deep grays, blacks, navy blues — create intensity and focus. Lighter colors make small spaces feel larger. Avoid warm beige or cream in a gym — they read as ‘bedroom’ rather than ‘training space’ and subtly affect your mindset.
One accent wall in a bold color is a simple, inexpensive way to define the space and give it an identity. A matte dark gray or slate blue on the wall your rack faces gives the gym a visual anchor.
Mirrors: Functional, Not Vanity
Mirrors in a home gym serve two purposes: form feedback during lifts and the visual expansion of small spaces. Both are legitimate. Position mirrors on the wall facing your primary lifting area — never behind it, where you’d have to turn your head mid-lift. Full-length mirrors from IKEA or similar run $60-120 and wall-mount securely.
One critical note: mirrors behind a power rack during squats are a distraction and a safety hazard. Mirrors belong in front of you or to the side.
Storage: The Aesthetic That Actually Matters Most
A gym where everything has a home looks better, trains better, and motivates more consistently. Dumbbells on a proper rack. Plates on a tree. Bands on hooks. Accessories in bins. The difference between a space that looks like a gym and one that looks like a cluttered garage is almost entirely storage.
Pegboards are the highest ROI aesthetic upgrade in a home gym — $30-50 installed, holds bands, straps, collars, jump ropes, and anything else that would otherwise end up on the floor. Mount one on any available wall and everything gets a dedicated place.
Step 9: Common Mistakes to Avoid

Learning how to set up a home gym involves trial and error—but you can skip the expensive mistakes by learning from others. Here are the most common pitfalls people encounter and how to avoid them.
Mistake #1: Buying Too Much Too Soon
The problem: You buy every piece of equipment you think you’ll “eventually” need, spending $3,000+ before your first workout.
Why it’s bad:
- Equipment sits unused (guilt and clutter)
- You haven’t proven consistency yet
- May buy wrong equipment for your actual needs
- Wastes money on items you’ll never use
The fix:
- Start with essentials only for your primary goal
- Train consistently for 2-3 months
- Add equipment based on what you actually miss, not what looks cool
Smart approach when learning how to set up a home gym: Buy $500-1,000 of core equipment, prove you’ll use it, then expand strategically.
Mistake #2: Ignoring Space Measurements
The problem: You buy a power rack that doesn’t fit through your door, or a barbell you can’t fully load because there’s not enough wall clearance.
Why it’s bad:
- Can’t return assembled equipment easily
- Stuck with unusable gear
- Wasted money and frustration
The fix:
- Measure doorways (height and width)
- Measure ceiling height at lowest point
- Measure wall-to-wall distances
- Account for 3 feet of clearance around lifting areas
- Check equipment dimensions before buying
Pro tip: Use painter’s tape to mark equipment footprints on your floor at actual size. Walk through movements before buying.
Mistake #3: Cheaping Out on Foundational Equipment
The problem: You buy the cheapest barbell, bench, or rack to save $100-200, then replace it within a year because it’s unsafe or frustrating to use.
Why it’s bad:
- Wobbly benches are dangerous under heavy weight
- Cheap barbells bend permanently
- Low-quality racks feel unstable (kills confidence on heavy lifts)
- You spend MORE money replacing than if you’d bought quality initially
The fix:
- Invest in quality for: Barbell, rack/stand, bench (your foundation)
- Save money on: Plates, accessories, storage
Budget allocation when learning how to set up a home gym:
- 60% on barbell, rack, bench
- 30% on plates and dumbbells
- 10% on accessories
Mistake #4: Forgetting About Flooring
The problem: You start lifting on bare concrete, hardwood, or carpet—then damage your floors, equipment, or both.
Why it’s bad:
- Cracked concrete from dropped weights
- Dented hardwood floors (expensive to repair)
- Compressed carpet (permanent damage)
- Damaged equipment from hard impacts
- Noise complaints from neighbors/family
The fix:
- Budget $100-300 for rubber flooring
- Install BEFORE equipment arrives
- Minimum: Cover lifting area + 3 feet around it
Quick solution: Horse stall mats from Tractor Supply ($50-75 each) are perfect.
Mistake #5: Poor Equipment Placement = Safety Hazards
The problem: Rack too close to wall (can’t load barbell), mirror behind you (distraction during squats), or no clear exit path if you fail a lift.
Why it’s bad:
- Injury risk if you can’t safely escape failed lifts
- Frustration loading/unloading weights in tight spaces
- Inefficient workouts (constantly moving equipment)
The fix:
- 3 feet minimum around power rack
- 2 feet behind rack for plate loading
- Clear path to exit from any lifting position
- Mirrors in front or side—never behind lifting area
Mistake #6: Skipping Climate Control Planning
The problem: You set up your gym in an unheated garage or un-air-conditioned space, then avoid training during extreme weather.
Why it’s bad:
- Metal equipment painful to touch when freezing
- Heat exhaustion risk in summer
- Rust and corrosion from humidity
- You stop training consistently
The fix:
- Plan for temperature control: Space heater ($50-150), fan ($30-100)
- Address humidity: Dehumidifier ($200-400) for basements/garages
- Or: Choose climate-controlled space from the start
The Mistake Avoidance Checklist
Before making any purchase when learning how to set up a home gym:
- Does this equipment serve my primary goal?
- Will I use this 2+ times per week?
- Have I verified it fits my space (measured)?
- Is this quality equipment or am I cheaping out?
- Do I have a storage plan for this?
- Have I accounted for flooring needs?
- Is my layout safe with proper clearances?
- Have I considered noise implications?
- Is this an impulse buy or planned purchase?
- Can I return this if it doesn’t work out?
If you can’t answer “yes” to most of these, pause before buying.
The Purchase Checklist
Before buying anything when learning how to set up a home gym:
- Serves my primary goal?
- Will use 2+ times per week?
- Fits my space (measured)?
- Quality equipment (not cheapest)?
- Storage plan exists?
- Flooring needs addressed?
- Layout is safe?
- Noise considered?
- Not impulse buy?
- Can return if needed?
The Last Thing I’ll Say About Your Home Gym
Socrates said it over two thousand years ago:
| “No man has the right to be an amateur in the matter of physical training. It is a shame for a man to grow old without seeing the beauty and strength of which his body is capable.”— Socrates |
SOMA is the Greek word for body. The infinity symbol in our logo represents something I genuinely believe: the potential of a committed human body is without ceiling. Not at 25. Not at 45. Not at 65.
But potential without the right environment stays potential. The home gym you build isn’t just a place to exercise. It’s a statement about what you think your body is capable of becoming. Build it right — with intention, with purpose, with the willingness to start simple and grow over time — and it will return more than any piece of equipment ever could.
That’s the whole point of SOMA.FITNESS. Not the gear reviews. Not the affiliate links. The belief that your physical potential is worth taking seriously — and that the environment you train in is the first expression of that belief.
Whether you’re setting up your first corner gym or upgrading a serious training space — have faith, be patient, trust the process. You’ll be in for a body, an environment, and a lifestyle worthy of your true potential.
Be Well,
Micah Le’Gare
Certified Personal Trainer | Fitness Nutrition Specialist | Founder, SOMA.FITNESS
FAQ
Q. How much does it cost to set up a home gym?
A. $200-500 for basic functional fitness, $800-1,500 for serious strength training, $2,500-3,500 for premium setups. Most pay for themselves in 12-24 months versus gym memberships.
Q. What is the minimum space needed?
A. 25-50 sq ft for dumbbells/bands, 80-120 sq ft for barbell training. You can train effectively in surprisingly small spaces with smart equipment choices.
Q. Is a home gym worth it?
A. Yes. Beyond financial savings, you gain convenience, 24/7 access, privacy, and equipment that lasts 10-20+ years. Home gym owners train more consistently than gym members.
Q. What equipment do I need to start?
A. For strength: barbell, plates, rack, bench, flooring. For general fitness: adjustable dumbbells, bands, mat, jump rope. Start with your primary goal’s essentials.
Q. Should I buy new or used equipment?
A. Buy used: plates, racks (inspect), benches, cardio machines. Buy new: barbells, adjustable dumbbells, bands, mats. Used can save 30-50%.
Q. What’s the best home gym flooring?
A. Horse stall mats: 3/4″ thick, $50-75 per 4’x6′ mat, indestructible, perfect for dropping weights. Buy at Tractor Supply Co.
Q. Can I build a home gym in an apartment?
A. Yes. Focus on adjustable dumbbells, bands, mat, quiet cardio (rower/bike). Thick flooring reduces noise. Avoid dropping weights and high-impact work.
Q. Adjustable vs. fixed dumbbells?
A. Adjustable saves 95% space and costs less ($300-700 vs $1,000-3,000). Fixed dumbbells better for commercial feel and quick changes. Most home gyms should choose adjustable.
Q. Power rack or squat stand?
A. Racks ($400-1,500) are more stable, safer, have more features. Stands ($150-400) save space and money. Choose rack if budget/space allows; stand if constrained.
Q. How do I stay motivated?
A. Start small, prove consistency, invest gradually. Create dedicated organized space. Set specific training times. Track progress. The habit builds the motivation, not the other way around.
Leave a Reply