
Home gyms have exploded in popularity over the past few years, and it’s easy to see why. Whether you’re tired of commuting to the gym, want more flexibility in your workout schedule, or simply prefer the privacy of exercising at home, setting up your own training space offers incredible convenience. More people than ever are converting spare bedrooms, garages, and basements into personal fitness havens.
However this option comes with a cost. While home gyms are less expensive long term, the initial cost of equipment can be steep. In the excitement of creating your dream workout space, it’s very easy to fall into financial pitfalls that could cost you thousands of dollars. It could be from gear that that isn’t right for your home gym, your fitness goals, or even your actual workout routine. Home gym set up mistakes are quite common and are liable to take the wind out of the sails of your fitness goals and your home gym budget.
There is an upside in the fact that these common missteps can be avoided easily with preparation and a good strategy. Fortunately this article can provide the good strategy- we’ll cover the main costly mistakes of home gym setups, and show you how to avoid them. By the end you’ll have the blueprint for a smart, cost effective setup that suits both your fitness goals and your wallet.
Table of Content
- Mistake 1: Failing to Plan the Space Properly
- Mistake 2: Overspending on Equipment You Don’t Need
- Mistake 3: Ignoring Equipment Quality and Safety
- Mistake 4: Neglecting Flooring and Noise Control
- Mistake 5: Forgetting About Storage and Organization
- Mistake 6: The Lack of Ventilation, Lighting, and Ambiance
- Mistake 7: Not Setting a Realistic Budget or Plan
- Mistake 8: Ignoring Maintenance and Long-Term Care
- Mistake 9: Forgetting Recovery and Safety Gear
- How to Fix These Mistakes (Quick Recap Section)
- Conclusion
Mistake #1: Failing to Plan the Space Properly
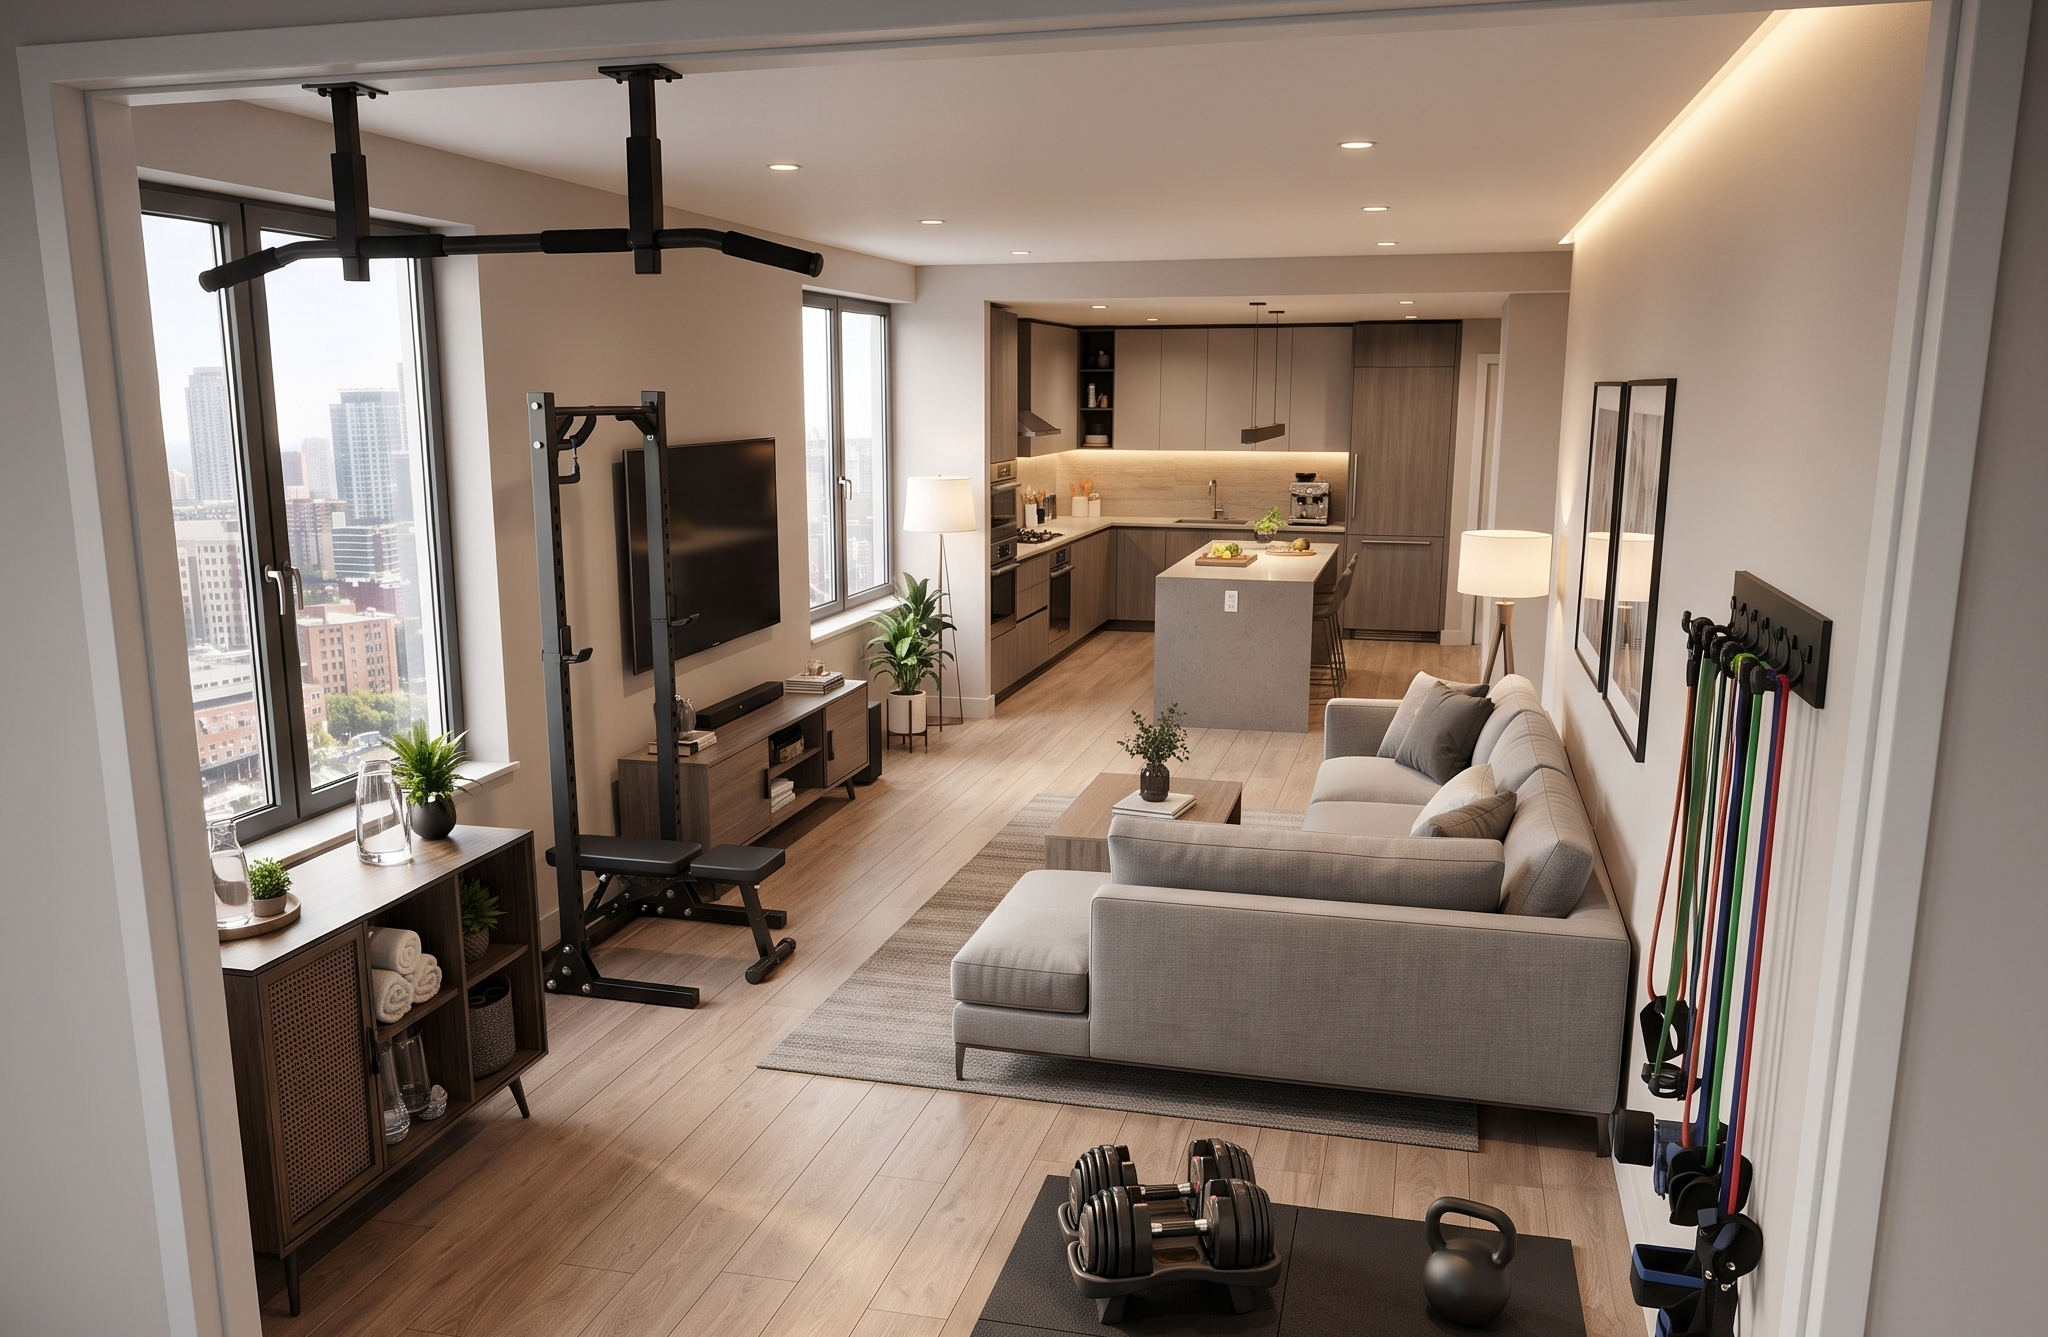
The first of the home gym setup mistakes to address is jumping straight into buying equipment without understanding the space you’re working with. It sounds very vague, maybe even unimportant, but trust me when I say it can be very costly. At first it’s very tempting to think about the potential of your home gym; picturing a squat rack, row machine, a full rack of dumbbells. However if you haven’t assessed your space first, you’ll likely end up with something closer to a cramped storage closet than a functioning gym.
The issues start to add up quickly when space planning is ignored. You could find yourself trying to squeeze between bulky equipment which isn’t just inconvenient but also a potentially dangerous tripping hazard. Poor ventilation is another overlooked issue many forget about until they’re dripping with no air circulation. There is also the issue of storage space. Without a gameplan for storing smaller items like resistance bands, yoga mats, or foam rollers clutter will drain the space of its potential.
Before you spend a single dollar on home gym equipment, take the time to measure your space. Write down the dimensions—length, width, and ceiling height. Then map it out. Sketch a basic floor plan or use a free online room planner to visualize where each piece of equipment will go. Think about the flow of your workouts. Will you need space to do floor exercises? Room to swing a kettlebell? Clearance for a barbell overhead press? These gym setup tips might seem tedious upfront, but they’ll save you from expensive returns and awkward equipment arrangements later.
Mistake #2: Overspending on Equipment You Don’t Need
This is where a search for fitness equipment designed to reach your health goals can spiral into a useless shopping spree if you’re not intentional from the start. It’s a mesmerizing experience to search for home gym equipment online—those sleek rowing machines, multi-station cable systems, and high-tech smart bikes all look amazing. But the truth is that rookies to the world of home gyms (and fitness in general) are spending way too much money for equipment that often ends up collecting dust in a few months.
Honesty and practicality are winning policies when creating your set up. Be honest with yourself: why convince yourself you’ll need a $3000 treadmill knowing full well you prefer running outside? Why would you splurge on an expensive leg press machine knowing you’d rather swim across a shark-infested English Channel than do a leg day? These are decisions based on excitement rather than honest reflection– and they’ll be a constant reminder to you of how to waste money.

Assess What You Need
The better route is to identify the essentials based on your specific fitness goals. If your style is strength training, a cardio machine can wait. If your passion is bodyweight exercises and flexibility work, a smith machine probably has little value to you. That being said, I recommend you:
- Take time to get familiar with what you want to achieve fitness-wise
And
- Get familiar with the most effective (and cost effective) home gym equipment to get you there.
This is where the concept of a “progressive build” becomes your best friend. Instead of trying to create the ultimate gym all at once, start small with the basics and upgrade over time as you figure out what you actually need. This approach not only saves money upfront but also prevents buyer’s remorse when you realize certain equipment doesn’t fit your routine. You can always add more later—but you can’t get back the money spent on gear that sits unused.
Begin With the Essentials
So what should beginners actually start with? Here’s a solid foundation that won’t break the bank:
- Adjustable dumbbells: Incredibly versatile and space-efficient. You can hit almost every major muscle group with just a pair of adjustable dumbbells.
- Resistance bands : Affordable, portable, and perfect for warm-ups, accessory work, or travel workouts.
- Yoga mat: Essential for floor exercises, stretching, and core work. Don’t skip this one.
- Pull-up bar: A doorway pull-up bar costs around $30 and opens up tons of upper body exercises.
- Kettlebell: One or two kettlebells in appropriate weights give you endless workout options, from swings to Turkish get-ups.
This basic setup can cost you a few hundred dollars instead of a few thousand, and honestly? It’s more than enough to get started and see real results. Once you’ve been consistent for a few months and know exactly what’s missing from your routine, then you can strategically add equipment. That’s how you avoid wasting money on a home gym.
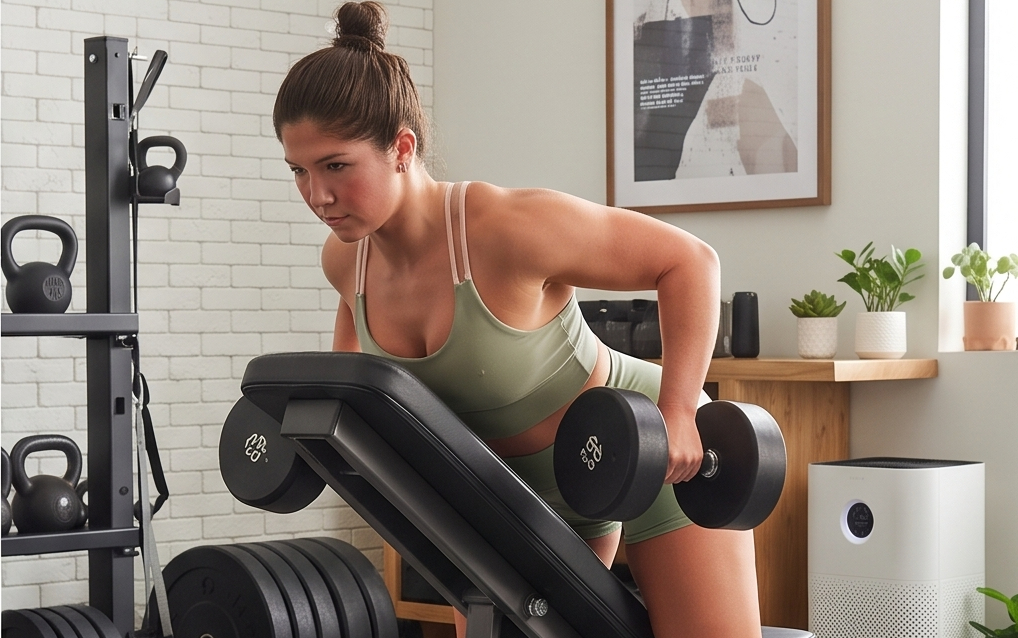
Mistake #3: Ignoring Equipment Quality and Safety
One thing you never want to do during this process is compromise quality for affordability. Trust me I understand the thought process; with a home gym budget it’s tempting to stretch your money so you can purchase more stuff to achieve your goals. But sometimes choosing the “cheapest option” can be a dangerous game– literally and financially.
A barbell on that unknown website for $50, a wobbly bench with hundreds of one-star reviews– they’ll save you money upfront. However, keep in mind that cheap, low-quality gear often ends up costing you more in the long run, either through replacements or, worse, through injuries.
The Issue With Bargains
The problem with bargain-basement home gym equipment: it breaks. Imagine; the flimsy resistance band you bought last week? Snaps mid-rep. The adjustment pin on your discount bench? Gives out while you’re pressing. The welds on that budget squat rack crack under load. These aren’t just inconveniences—they’re legitimate safety hazards. When you’re lifting heavy weights or pushing yourself through intense workouts, the last thing you need is equipment failure. An injury from faulty gear can sideline your fitness journey for weeks or months, not to mention potential medical bills that far exceed whatever you “saved” buying cheap equipment.
So if the answer is quality goods, what should you look for in durable, safe equipment?
Focus first on stability and weight capacity. Quality racks, benches, and bars should always feel solid, with no wobbling or flexing under load (be sure to check the reviews). Check the weight ratings and make sure they exceed what you’ll actually be lifting—this ensures you have a safety margin. Check the materials: steel frames should be thick and well-welded, not thin and shaky. For items like benches and racks, pay attention to padding quality and adjustment mechanisms. They should lock firmly into place, not slip or wiggle.
Warranties
Warranties matter more than most people realize. Reputable brands stand behind their products with solid warranties—often lifetime warranties on frames for quality equipment. If a company won’t warranty their gear, that tells you something about their confidence in its durability. Do a little research on brand reputation too. You don’t always need the most expensive name brand, but sticking with companies that have track records for quality and customer service will save you headaches down the road.
Here’s the gym setup tip that’s worth repeating: invest in quality over quantity. It’s better to have three pieces of rock-solid, reliable equipment than ten cheap items that’ll frustrate you or put you at risk. If budget is tight, start with fewer high-quality essentials and add more as you can afford it. Your future self—and your body—will thank you for not cutting corners on safety.
Mistake #4: Neglecting Flooring and Noise Control
Flooring might not be the most exciting part of your home gym setup, but skipping it is one of those home gym setup mistakes that comes back to bite you quickly. Whether you’re setting up in a garage, basement, or spare room, proper flooring protects your space, your equipment, and potentially your relationship with anyone living below you.
The Price to Pay
Remember that the flooring you neglect today can be the dropped weights tomorrow that crack tile or dent hardwood. Even if it’s not as dramatic as a single incident, heavy equipment left for long periods of time or dropped repeatedly can leave permanent indentations in multiple types of flooring. Sweat can potentially seep into concrete and creates slippery, unsanitary conditions. And if you’re in an apartment or have roommates or family on a lower floor? Every barbell drop, every jump, every kettlebell set-down becomes a noise complaint waiting to happen. Trust me, angry neighbors or annoyed family members can kill your motivation to work out faster than anything else.
The good news is that solving this doesn’t have to break your home gym budget. Rubber mats are the gold standard for home gyms—they’re durable, shock-absorbing, and easy to clean. Interlocking rubber tiles or rolled rubber flooring both work great. You can typically cover a decent workout area for a couple hundred dollars, and they’ll last for years. They protect your floor from damage, cushion dropped weights, and significantly reduce noise and vibration.
Foam tiles are another option, especially if you’re focused on bodyweight exercises, yoga, or lighter weight training. They’re softer underfoot, more affordable than rubber, and still provide decent protection. Just know they’re not ideal for heavy deadlifts or Olympic lifts—you’ll want the extra durability of rubber for that.

Noise Control Strategy
If noise is a major concern—maybe you work out early in the morning or late at night—consider adding sound-dampening solutions on top of your base flooring. Horse stall mats (¾-inch thick rubber mats available at farm supply stores) are incredibly popular in the home gym community because they’re heavy-duty and excellent at absorbing impact. You can also layer mats or add acoustic underlayment for extra sound control.
Proper flooring isn’t just about comfort—it’s about safety and longevity for both your home and your gear. It prevents injuries from slipping, protects your equipment from cracking on hard surfaces, and keeps your workout space functional for years to come. Don’t let this seemingly minor detail become a major headache. Factor flooring into your initial setup, and you’ll be glad you did.
Mistake #5: Forgetting About Storage and Organization
So you’re on the right track; you’ve acquired your equipment, your flooring is getting set up, and you think it’s time to train. But reality starts to sink in; after a few weeks of working out your floors become a mess! Dumbbells are thrown all over the place, resistance bands are scattered and disorganized, and you can hardly find a room to workout comfortably. If this scenario sounds familiar you’re likely familiar with the lack of two important keys: storage and organization.
This is an easy situation to prevent by simply planning to incorporate storage from the beginning. Storage options such as wall racks and bins should be just as important to your search as the fitness equipment you need.
Wall Racks
Wall racks are a great way to save floor space, and when oriented thoughtfully, can be quite aesthetically pleasing. A simple wall-mounted dumbbell rack keeps your weights organized and off the floor, taking up minimal space. Barbell holders or horizontal bar racks mounted to the wall make storing bars and specialty barbells easy and safe. If you’ve got kettlebells, a tiered kettlebell rack—either freestanding or wall-mounted—keeps them accessible without creating floor clutter.

Shelving Units
Shelving units work wonders for all the smaller stuff. A basic metal shelving unit from a hardware store costs around $50 and can hold resistance bands, jump ropes, yoga blocks, lifting straps, chalk, and whatever other accessories you accumulate. Having designated spots for everything means you can quickly grab what you need and get to work.

Vertical Storage
Vertical storage is an option that should be explored whenever possible. There are useful forms such as pegboards that allow you to hang resistance bands, jump ropes and belts. You can also incorporate larger tools such as hooks or brackets to house a variety of tools like foam rollers, yoga mats and exercise balls.

And here’s the best part: you don’t need to spend a fortune on fancy storage solutions. Budget-friendly DIY storage hacks can work just as well. PVC pipe cut and mounted to the wall makes excellent barbell storage. Cinder blocks and wood planks create cheap, sturdy plate storage. Old milk crates can organize smaller equipment. Even tension rods in doorways or between walls can hold bands and light accessories. Browse some home gym forums or YouTube, and you’ll find endless creative, low-cost storage ideas that people have built for next to nothing.
Key point: Prioritize organization from day one by adding storage options to your shopping list. You don’t need a lot, but making cleanliness your focus from the beginning will help keep your home gym floors clear and also boost your fitness morale.
Mistake #6: The Lack of Ventilation, Lighting, and Ambiance
A very overlooked reality is that the environment you create in your home gym is just as vital to your success as the equipment you use. If you’ve ever experienced this; think about a commercial gym where there’s no ventilation in the middle of summer, or where the gym is poorly lit. I can tell you as someone who’s been through this that I haven’t been back since. Now think about a home gym; there’s already enough temptation to slack in the comfort of your own home- could you imagine how much less motivated to train you’d be if your home gym was a dark, stuffy dungeon?
It should go without saying, but in fitness there are a lot of barriers to success. Some barriers are internal such as ones habits and mindsets, but others can be smaller, less noticeable details like your environment that can just as easily trip you up
Our goal is to create an environment that you actually want to workout in. A space that’s as comfortable and inviting as possible to keep you focused and motivated during your fitness journey.
Prioritizing Airflow
Let’s start with ventilation. When you’re pushing through a tough set, your body generates serious heat. Without proper airflow, that spare bedroom or garage turns into a sauna—and not in a good way. Poor ventilation doesn’t just make workouts uncomfortable; it can actually affect your performance and recovery. You’ll fatigue faster, feel sluggish, and probably cut your sessions short just to escape the stuffiness.
You’ve got to keep ventilation in mind from the very beginning. If your gym space has windows, use them. Open them during workouts for natural ventilation. If windows aren’t an option or aren’t enough, invest in a good fan—or better yet, multiple fans. A box fan costs around $20 and makes a massive difference. For garage gyms in hot climates, a standing oscillating fan or even a wall-mounted industrial fan can be a game-changer. In colder months, a small space heater keeps things comfortable without overheating. The goal is to maintain a temperature where you can work hard without feeling like you’re suffocating.

Lighting
Finding the right gym lighting is important as well. Harsh fluorescent overhead lights? Depressing. A single dim bulb casting weird shadows? Even worse. Poor lighting can ruin motivation early in the game. You want your space to feel energizing, not like you’re working out in a basement storage room (even if you technically are).
Natural light is ideal if you can get it. Windows bring in sunlight, which improves mood and energy levels naturally. But if natural light is limited, good LED lighting is your friend. LEDs are energy-efficient, long-lasting, and come in various color temperatures. Go for daylight or cool white bulbs (around 5000K) for that bright, energizing feel. Avoid warm yellow lights—they’re great for relaxing spaces but can make a gym feel dull. If you really want to level up, consider adding adjustable LED strips or smart bulbs that let you control brightness and even color to match your workout vibe.

Aesthetic Pieces
And here’s the bonus section that often gets overlooked: mirrors and aesthetic touches. Mirrors aren’t just for vanity—they’re legitimately useful for checking your form during lifts and exercises. A large wall mirror or a few smaller ones strategically placed can make your space feel bigger while serving a functional purpose. You don’t need expensive gym mirrors; basic frameless mirrors from a home improvement store work perfectly.
Don’t underestimate the power of aesthetic touches to boost your workout energy either. Maybe it’s motivational posters or quotes on the wall. Maybe it’s a Bluetooth speaker for your workout playlist. Maybe it’s just keeping the space clean and painted in colors that energize you. These small details might seem superficial, but they genuinely affect whether you look forward to training or dread walking into that space.
The reality is this: your home gym should feel like a place you want to be, not a place you have to endure. Good ventilation keeps you comfortable. Proper lighting keeps you alert and motivated. Thoughtful touches make the space yours. Don’t skip these elements while chasing the perfect equipment setup. They’re just as important for long-term consistency.
Mistake #7: Not Setting a Realistic Budget or Plan
Thus far we’ve touched on a lot of important points. And if you’ve been taking notes, you have quite a few important items to add to your shopping list. However this brings us to the next essential point– your budget.
It’s not a problem to want nice equipment for your home gym, however, not having a grasp on your financial limitations and purchasing blindly is. Without a grounded understanding of what you need and what you can spend you’ll likely buy impulsively and regret it later. Or you might get halfway through your setup, run out of money, and end up with an incomplete gym that doesn’t actually meet your needs.
The solution is straightforward: create a budgeting strategy for a gradual setup. Think of your home gym as a long-term project, not a one-time purchase. Break it down into phases based on priority and budget.
Phase 1: Essentials
This is your foundation. Focus on the core equipment you absolutely need to start training effectively. We’re talking adjustable dumbbells, a mat, resistance bands, maybe a pull-up bar or kettlebell. Keep this phase lean and functional. Budget: $200-$500 depending on what you choose.
Phase 2: Upgrades
Once you’ve been consistent for a few months and know what’s actually missing from your workouts, start adding strategically. Maybe that’s a barbell and plates, a quality bench, or a squat rack. This phase is about filling gaps based on real experience, not guesses. Budget: $500-$1,500 depending on your goals.
Phase 3: Nice-to-Have
This is where you add the fun stuff that enhances your setup but isn’t essential. Specialty bars, cable machines, additional cardio equipment, better storage solutions, or upgraded accessories. Only move into this phase when the first two are solid and you’ve got the budget for it. Budget: Whatever makes sense for your financial situation.
This phased approach keeps you from blowing your entire home gym budget upfront while ensuring you’re always working with functional equipment. It also gives you time to research, test things out, and make informed decisions rather than impulse buys.
Money Saving Strategies
Speaking of research, here’s a gym setup tip that can save you hundreds or even thousands: compare prices and check secondhand options. Home gym equipment holds its value pretty well, which means the used market is full of quality gear at significant discounts. Check Facebook Marketplace, Craigslist, OfferUp, or dedicated fitness equipment resale sites. You’d be amazed how many people buy expensive equipment, barely use it, and sell it for 50% off a few months later.
When shopping new, don’t just buy from the first site you find. Compare prices across multiple retailers. Sign up for email lists to catch sales. Black Friday, New Year’s, and end-of-summer sales often bring serious discounts on home gym equipment. Sometimes waiting a few weeks can save you 20-30% on the exact same item.
One more thing: be honest about your actual budget, not your aspirational one. If you’ve got $500 to spend, build the best $500 gym you can. Don’t convince yourself to spend $2,000 because you’ll “definitely use it” or “it’s an investment.” Yes, quality equipment is an investment, but only if you can afford it without financial stress. A modest setup you can actually afford will serve you far better than an expensive one that creates money anxiety.
Remember that a realistic budget and phased plan help avoid wasting money on a home gym upfront and gradually turns it into reality. You’ll build a better gym, make smarter decisions, and actually enjoy the process instead of stressing about the cost.
Mistake #8: Ignoring Maintenance and Long-Term Care
Imagine you’ve invested into building your home gym, you’ve planned everything out and configured your ideal layout– does this mean the work is over? Hardly! Because the mistake of ignoring maintenance and long-term care can cost you just as much as you spent to create your ideal home gym. Remember that a relationship with anything long term (whether that’s a car, a person, etc.) requires maintenance and upkeep. How long do friendships last when you don’t hang out or communicate? How long do cars last when they aren’t taken for routine checks? If you want your home gym to serve your goals AND stand the test of time, you have to take care of your equipment regularly.
Barbells need their sleeves lubricated to spin smoothly. Benches and racks need bolts checked and tightened. Rubber and upholstery need cleaning to prevent degradation and bacteria buildup. Cables and pulleys need inspection for fraying. Neglect these simple tasks, and you’re looking at rust, squeaks, wobbly equipment, and eventually, complete failure of parts that could have lasted years longer.

Consider the cost of your physical health if you refuse to maintain your space. A loose screw on a squat rack isn’t just a functional issue, it’s a potential accident waiting to happen. A frayed cable on a pulley system could snap mid-rep. Rust on a barbell sleeve can damage your hands or compromise the structural integrity of the bar. These scenarios aren’t about being pessimistic, they’re about recognizing that gyms are by nature very dangerous places, and limiting maintenance issues in a preventative strategy for reducing the risk of injury.
The upside is that proper maintenance doesn’t require a lot of work or expertise when performed regularly. Here’s a basic home gym maintenance checklist to get you started:
Monthly Tasks:
- Wipe down all equipment with a damp cloth to remove sweat, dust, and grime
- Check benches, racks, and stands for loose bolts; tighten as needed
- Inspect weight plates for cracks or damage
- Clean rubber flooring with a mild cleaner or vinegar solution
- Check resistance bands for tears or weak spots
Quarterly Tasks:
- Lubricate barbell sleeves with 3-in-1 oil or a specialized barbell lubricant
- Deep clean upholstered surfaces on benches with appropriate cleaner
- Inspect cables and pulleys for wear; replace if fraying is visible
- Check adjustment mechanisms on benches and racks for smooth operation
- Tighten all hardware throughout your entire setup
Yearly Tasks:
- Inspect welds and joints on racks and frames for cracks or stress
- Replace worn grips or handles
- Assess whether any equipment needs professional servicing
- Refresh paint or protective coatings on metal surfaces if rust is developing
None of these tasks are complicated or time-consuming. You can easily set a reminder on your phone, spend 15 minutes once a month doing a quick check, and you’ll catch problems before they become expensive replacements. Think of it as protecting your investment—because that’s exactly what it is.
One more tip: as mentioned in a previous point, store your equipment properly. Consider storage and organization an extension of maintenance and upkeep. Small storage habits make a big difference in longevity.
Maintenance isn’t glamorous, but it’s one of the smartest gym setup tips you’ll find. A little preventive care now saves you from having to replace equipment—or worse, dealing with an injury from faulty gear—down the road.
Mistake #9: Forgetting Recovery and Safety Gear
When people plan their home gym equipment list, they’re usually laser-focused on the stuff that builds muscle and burns calories: weights, bars, benches, machines. But here’s a home gym setup mistake that can literally sideline your progress: forgetting about recovery and safety gear. These aren’t optional extras—they’re essential components of an efficient, sustainable workout routine.
Think about it. You can have the most impressive collection of weights and machines in your garage, but if you’re constantly dealing with tight muscles, nagging injuries, or workout-related aches that keep you off your feet, what’s the point? Missing essentials like foam rollers, yoga mats for stretching, or even a basic first-aid kit can lead to unnecessary injury and downtime. And downtime means you’re not making progress, which defeats the entire purpose of having a home gym in the first place.
Recovery isn’t a luxury—it’s part of the process. Your muscles don’t grow during your workout; they grow during recovery. Proper recovery tools help reduce soreness, improve flexibility, prevent injury, and keep you training consistently. Yet so many people skip this category entirely when building their setup, only to realize months later that they’re constantly sore, inflexible, or dealing with preventable issues.

So what recovery and safety essentials should you actually include? Here’s what belongs in every home gym:
foam roller
Absolutely non-negotiable. Self-myofascial release helps work out muscle knots, improves blood flow, and speeds up recovery. A basic foam roller costs $15-30 and will get used before or after almost every workout.
yoga mats or stretching mats
Even if you lift heavy, you need to stretch. A dedicated mat for floor work, stretching, and mobility exercises is essential. Don’t skip this.
resistance bands (light)
Yes, we mentioned these for workouts, but lighter bands are fantastic for warm-ups, mobility work, and rehab exercises. They’re perfect for shoulder health, hip activation, and injury prevention.
lacrosse ball or massage ball
For targeting specific tight spots that a foam roller can’t quite reach. Your feet, glutes, and upper back will thank you.
first-aid kit
Hopefully you’ll never need it, but having basic supplies on hand is just smart. Band-aids, athletic tape, ice packs, antiseptic wipes, and pain relievers should be easily accessible. Accidents happen, and you don’t want to be hunting through your house for supplies when you’ve got a scraped shin or twisted ankle.
ice packs and heating pads
For managing acute injuries or chronic aches. Reusable gel packs that can be frozen or microwaved are versatile and inexpensive.
mirror (yep, again)
We mentioned this for ambiance, but it’s genuinely a safety tool. Watching your form helps prevent injury by catching improper technique before it becomes a problem.
Here’s the thing: you don’t need to drop a fortune on recovery gear. In fact, most of it is remarkably affordable, especially compared to major equipment purchases. But the value it provides—keeping you healthy, mobile, and consistently training—is massive. Avoiding a single injury that sidelines you for weeks easily justifies the small investment in recovery tools.
And let’s be real: part of avoiding wasting money on a home gym is making sure you can actually use it long-term. What’s the point of a $3,000 setup if you’re constantly injured and can’t train? Recovery and safety gear might not be exciting, but they’re what keep you in the game. Don’t overlook them when planning your space.
How to Fix These Mistakes (Quick Recap Section)
Alright, we’ve covered a lot of ground on home gym setup mistakes. Let’s bring it all together with a quick, actionable recap you can reference anytime you’re planning, building, or improving your space. Think of this as your cheat sheet for creating a smart, cost-effective home gym that actually works.
Do’s:
- Do measure and plan your space before buying a single piece of equipment. Know your dimensions and visualize the flow.
- Do start small with essential equipment and build progressively as you identify real needs.
- Do invest in quality over quantity. Fewer pieces of durable, safe gear beat a pile of cheap stuff every time.
- Do install proper flooring to protect your space, equipment, and sanity (especially if you have neighbors below).
- Do plan for storage and organization from day one. Wall-mounted solutions and vertical storage are your friends.
- Do prioritize ventilation and lighting. Make your gym a place you actually want to spend time in.
- Do set a realistic budget and stick to a phased approach. Compare prices and don’t sleep on the secondhand market.
- Do maintain your equipment regularly. A little preventive care goes a long way.
- Do include recovery and safety gear in your setup. Foam rollers, stretching mats, and first-aid supplies aren’t optional.
Don’ts:
- Don’t impulse-buy equipment just because it looks cool or is on sale. Ask yourself if you’ll genuinely use it.
- Don’t sacrifice safety for savings. Cheap equipment that breaks or causes injury costs way more in the long run.
- Don’t skip flooring, even if you think you can get away with it. You can’t.
- Don’t let clutter take over. Disorganized spaces kill motivation and increase injury risk.
- Don’t ignore the environment. A stuffy, poorly lit gym will make every workout feel like a chore.
- Don’t try to build Rome in a day. Rushing to complete your setup often leads to overspending and buyer’s remorse.
- Don’t forget maintenance. Equipment left uncared for will fail sooner than it should.
- Don’t neglect recovery tools. They’re the difference between consistent progress and constant setbacks.
Conclusion
Building a home gym doesn’t have to drain your bank account or fill your space with unused equipment. The key takeaway? A smart home gym is about planning, not spending. It’s about making intentional decisions based on your actual goals, available space, and realistic budget—not getting swept up in excitement and impulse buying.
The home gym setup mistakes we’ve covered are incredibly common, but they’re also completely avoidable. Whether it’s failing to plan your space, overspending on gear you don’t need, skipping flooring and ventilation, or forgetting recovery tools—these missteps happen when enthusiasm overrides strategy.
So take an honest look at your current setup or your plans if you’re just starting out. Where can you improve? The good news is you don’t need to overhaul everything at once. Small, strategic changes add up. Maybe you organize your equipment this weekend, invest in quality flooring next month, or sell unused gear and redirect that money toward what you’ll actually use.
Remember, the best home gym isn’t the one with the most equipment or the highest price tag—it’s the one you consistently use. Focus on creating a well-planned, well-organized space tailored to your needs. Stick to a realistic home gym budget, prioritize quality and safety, and build gradually over time.
Ready to dive deeper? Check out our related guides:
Make smart choices, avoid these common pitfalls, and you’ll build a space that serves you well for years to come.


Leave a Reply