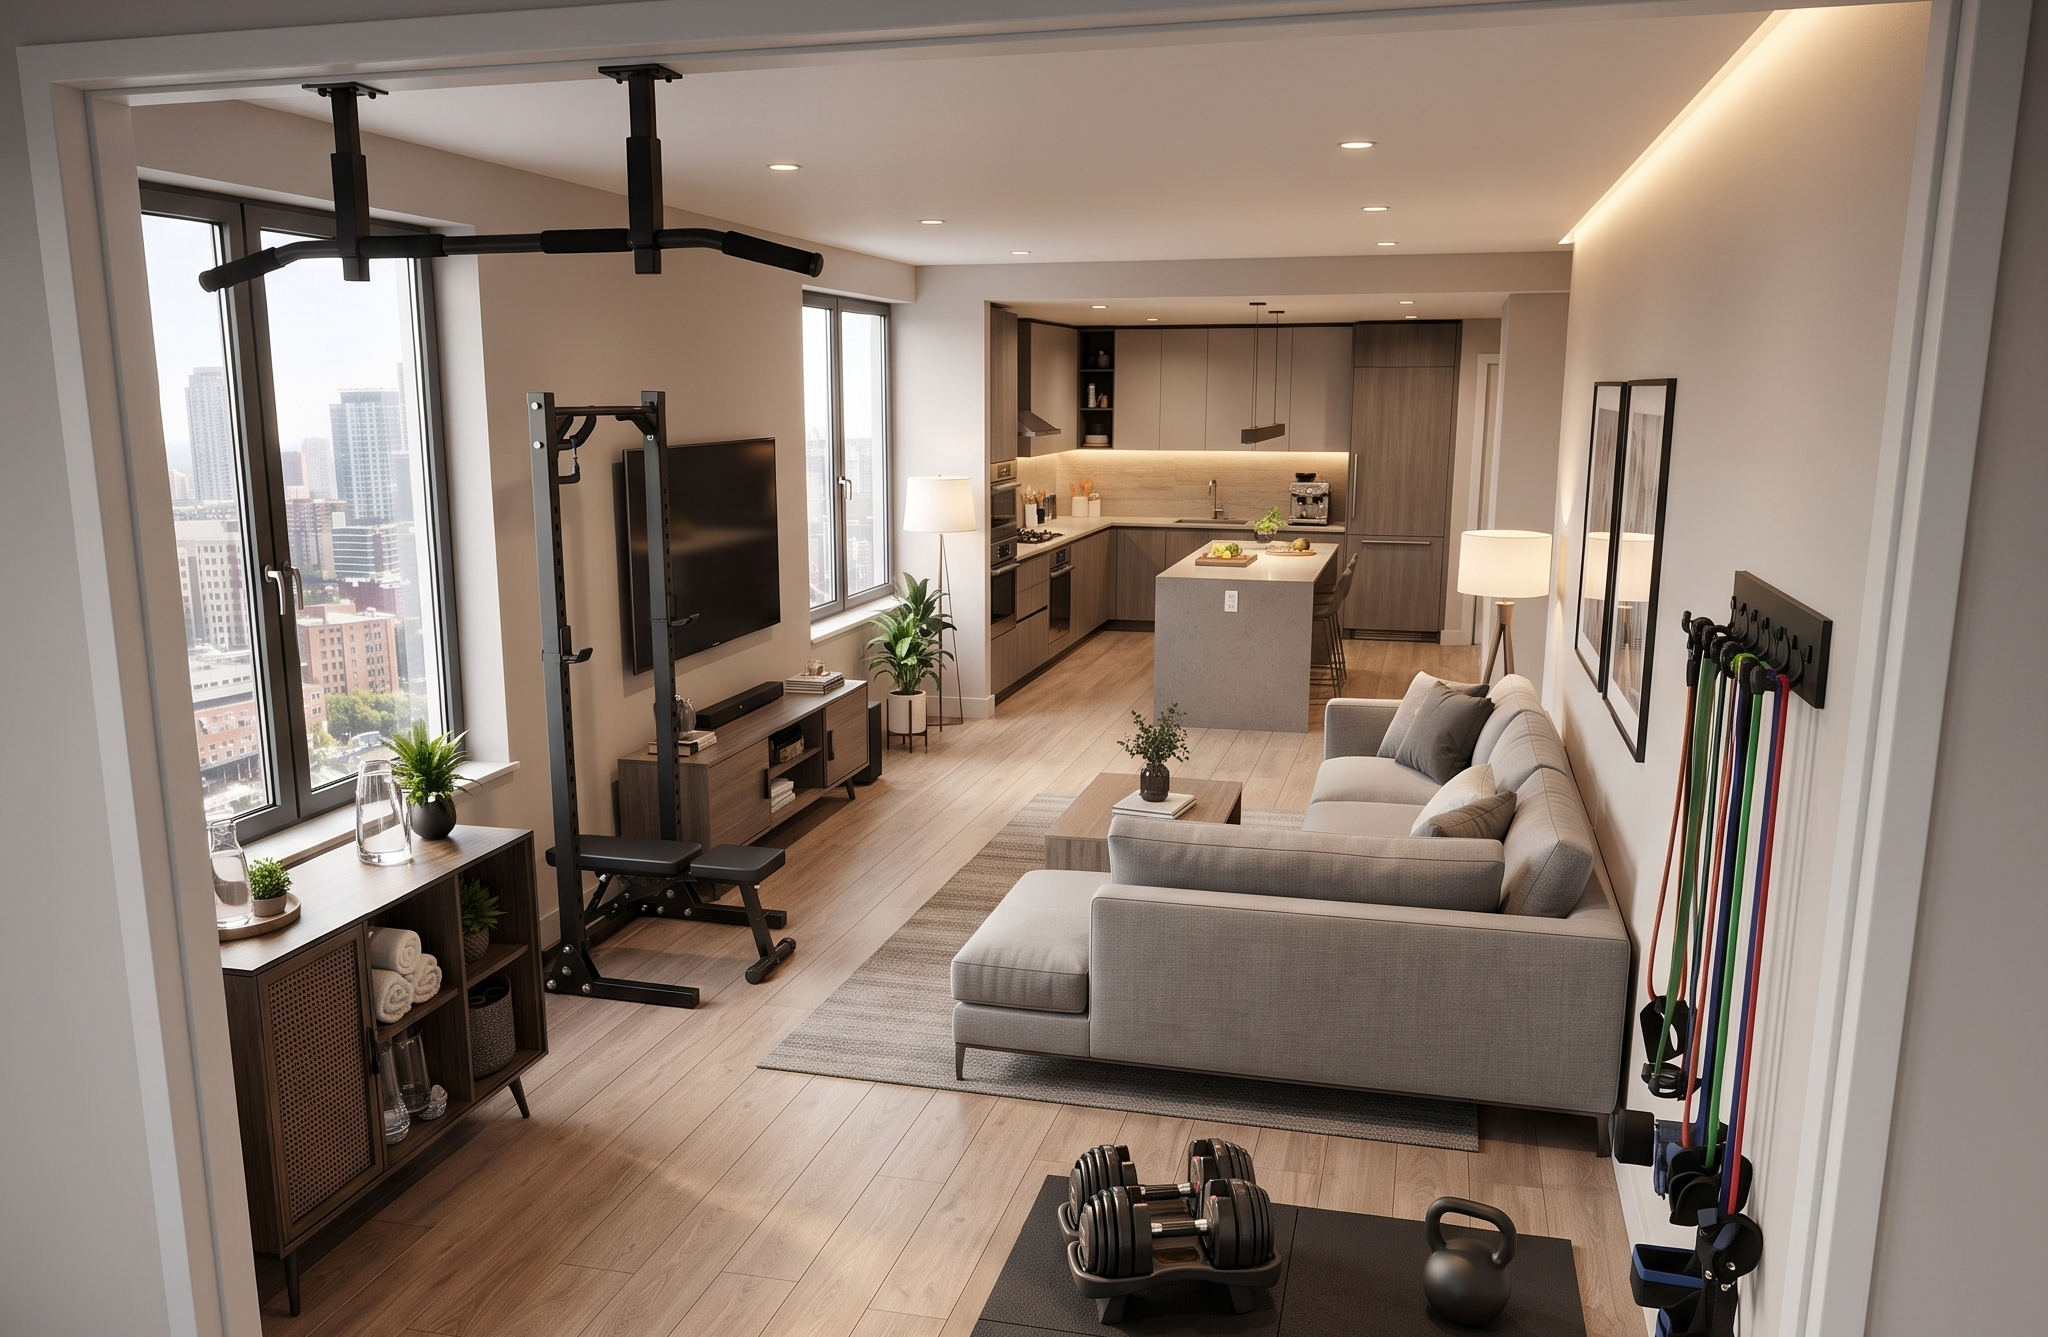
Lighting is one of the most crucial (and overlooked) elements for creating an exceptional gym experience, be it a commercial or home gym. Whether you’re an influencer chasing the most flattering lighting or a gym regular in need of an energizing atmosphere- lighting makes all the difference.
Most of us focus on gym equipment, and rightly so- you wouldn’t have much of a gym without gym equipment. However, consider the role atmosphere plays in workout adherence. You could have the best equipped home gym in the world, but if the atmosphere is less than motivating, workouts become infrequent and your investment under-utilized.
An inviting ambience is everything, and the glue that holds it all together is proper lighting. In this guide, we’ll break down why lighting matters, what to look for, and how to choose the best setup for your space and budget.

Why Lighting Matters in a Home Gym
There are very practical reasons why every home gym owner should invest in proper lighting, some of which may change how you prioritize them entirely going forward.
Visibility and Preventing Injury
Good lighting isn’t about looking the best while you train– it’s also a matter of health and safety. A truth about gyms is that they present a very unique and very real risk of injury while lifting substantial weight, leaping onto boxes, or navigating around scattered equipment. This risk is only multiplied with poor lighting that can increase the chances of tripping, misjudging distances or losing footing. Proper illumination ensures you can see your form in the mirror, read equipment displays, and move confidently through your workout.
Mood, Focus, and Workout Intensity
Like the backdrop to a play, lighting sets the energetic and psychological stage for each workout. Bright, cool lighting evokes a state of heightened awareness and energy which works well for early morning workouts or high intensity training. Warmer, softer lighting can create a calming atmosphere for yoga, stretching, or cool-downs. The wrong lighting can leave you feeling sluggish or distracted, while the right setup primes your brain for performance.
Consistency and Overall Training Experience
The best home gyms are the ones that are actually used (whether you want to be there or not). A well-lit fitness zone is a powerful tool for increasing consistency and increasing the likelihood of program success. It can, in essence, make the difference between tolerating a workout that feels like a chore in a space you dread or completing a vitalizing fitness regimen in a positively charged environment regularly.
What to Look for in Home Gym Lighting
I know several good points have been made in favor of home gym lighting and that you’re ready to go on a rigorous shopping spree– but please wait a minute!! This process is about more than filing your cart with a bunch of bulbs and hoping for the best. There’s an art and a science to proper home gym lighting- and in this section we’ll uncover some key principles that will enrich your search and knowledge base.
Brightness (Lumens)
The first order of business is understanding the principles of proper lighting, starting with how it’s measured. Lumens measure how much light a bulb actually puts out—and this is where a lot of people get it wrong. You don’t want to guess based on wattage or assume that one overhead fixture will cut it.
For a home gym, you’re generally looking at 50 to 100 lumens per square foot, depending on what you’re doing. A 100-square-foot garage gym might need anywhere from 5,000 to 10,000 lumens total. If you’re lifting heavy, doing technical movements, or recording workout videos, aim for the higher end. If it’s mainly cardio or yoga, you can get away with a bit less.
Here’s a rough guide:
- Low-intensity workouts (yoga, stretching): 50–70 lumens per square foot
- General strength training: 70–85 lumens per square foot
- Heavy lifting, technical work, or filming: 85–100+ lumens per square foot
The main point is to avoid relying on one light source to provide these numbers. Having multiple light sources will help evenly distribute light and reduce the presence of drastic shadows.
Color Temperature (Warm vs. Cool)
As mentioned earlier, the brightness of your light source isn’t the only thing you’ll have to consider but the temperature (warm vs. cool) as well. The color temperature is measured in Kelvin (K), and can have more influence on your training than you might expect.
- Warm white (2700K–3000K): Soft, yellowish light. Great for winding down or low-key sessions, but it can feel a little too cozy for intense training.
- Neutral white (3500K–4100K): Balanced and versatile. Works for most home gyms without being too harsh or too dim.
- Cool white/daylight (5000K–6500K): Bright, bluish light that mimics natural daylight. This is what most commercial gyms use because it promotes alertness and energy. If you train early in the morning or want that “wide awake” vibe, this is your range.
A majority of home gym owners prefer 4000K to 5000K as the happy medium, bright but not too artificial/ clinical. However, if you’re a late night athlete who has trouble winding down from a long day, I would avoid super cool tones or opt for dimmable lights so you can adjust to the time of day.
Reducing Glare and Shadows
While not a deal-breaker, both glares and shadows can be annoying and potentially dangerous. They can hinder your perception of depth and distance and throw off your form.
Glares occur when light shines directly into your eyes– especially when a bare bulb hangs right in your line of sight when you’re on the bench press. To keep this from happening, I’d recommend using a diffuser or frosted cover. There’s also the option to position lights so they’re not directly overhead while you’re lying or looking up.
Shadows present their own problems because they’re usually the product of too few light sources. A ceiling light can be as bright as you like, but if it’s the only light source it will inevitably cast shadows behind equipment, under benches, or in corners. How do you fix this?: add multiple light sources that are evenly distributed throughout the gym floor. Overhead lighting combined with wall mounted fixtures or task lights will cover more ground and help reduce shadows and glares evenly.
Remember that if you have mirrors, be mindful of how and where light reflects from through them. You want to light the room, not create a blinding spotlight every time you glance at your form.
Matching Lighting to Room Size
A 10×10 space has different needs than a 20×30 garage conversion. Bigger rooms need more fixtures, more lumens, and more thoughtful placement to avoid dead zones.
For smaller spaces (under 150 square feet), two to four overhead fixtures plus some targeted task lighting is usually enough. For larger spaces, you’re looking at six or more fixtures, potentially supplemented with track lighting, LED strips, or additional wall-mounted options.
Also consider ceiling height. If you’ve got low ceilings, flush-mount or recessed lights work best. High ceilings (10+ feet) might need more powerful bulbs or additional fixtures since the light has farther to travel. And if you’re working with an unfinished basement or garage, you might need industrial-style fixtures that can handle the environment and provide enough punch to light the space properly.
Best Types of Lighting for Home Gyms
Overhead Lighting
Overhead lighting will likely be your go-to lighting source. It illuminates the greatest amount of surface area, making the room visible from all corners. Without a dependable overhead light, there will always inevitably be a side or corner of the room that will be dim.
The most common options are:
- Flush-mount or semi-flush-mount fixtures: Great for standard or low ceilings (8–9 feet). They sit close to the ceiling and spread light evenly without hanging down into your workout space. Look for fixtures with multiple bulbs or integrated LEDs to maximize output.
- Recessed lighting (can lights): Sleek, modern, and out of the way. These are installed directly into the ceiling, so they don’t interfere with overhead movements like pull-ups or medicine ball slams. You’ll need several of them spaced evenly across the ceiling—typically one every 4 to 6 feet depending on brightness.
- High-bay LED fixtures: If you’re working with a garage or warehouse-style space with high ceilings, these industrial fixtures pack a serious punch. They’re designed to light large areas from a distance and are built to last in tough environments.
- Track lighting: Adjustable and flexible. You can aim each light where you need it, making track lighting a solid choice if your gym layout changes or if you have specific zones (cardio area, lifting area, stretching corner) that need different lighting angles.
It wouldn’t hurt to have a combination of these options- guaranteeing an evenly lit gym floor.
Task Lighting for Equipment Areas
Task lighting’s primary function is to emphasize specific areas that need more visibility. Picture a secondary light source that manages details overhead lights miss.
Common task lighting applications:
- Above the squat rack or bench press: Having a light above this equipment will help you see everything; your form, the bar, any stray equipment on the floor- all while removing unnecessary shadows.
- Close to the dumbbell rack or storage: This strategic placement will make grabbing proper weight easy and make any potential tripping hazards very easy to see.
- By mirrors: Lights near mirrors will not only give your physique a flattering image but also help you zero-in on proper form.
- Workout mats and stretching areas: Illuminating your dedicated mobility zone with softer task light will create a calmer, more focused space perfect for the quiet, contemplative nature of yoga, stretching, etc.
You can use adjustable wall sconces, clamp-on work lights, or even small LED shop lights mounted under shelving. The goal is precision—lighting exactly where you’re working without over-lighting the whole room.
Accent and Ambient Lighting (LED Strips, Smart Lighting, Dimmable Options)
This is where you can get a little creative and make your gym feel less like a garage and more like a legit training facility—or whatever vibe you’re going for.
- LED strip lights: These are affordable, easy to install, and surprisingly versatile. Run them along the edges of the ceiling, behind mirrors, under shelves, or along the baseboards for a modern look. Many come with color-changing options, so you can switch between white light for training and colored accents for ambiance. Some people even sync them to music, which is… a vibe, if that’s your thing.
- Smart lighting: Brands like Philips Hue or LIFX let you control brightness, color temperature, and even scheduling from your phone. You can program your lights to gradually brighten in the morning to help you wake up for early workouts, or dim them automatically for evening sessions. It’s overkill for some, but if you’re particular about your environment, it’s worth considering.
- Dimmable fixtures: Even if you don’t go full smart-home, having dimmable lights gives you flexibility. Bright and energizing for heavy lifts, softer and calmer for cooldowns or stretching. You can install dimmer switches on your existing fixtures or buy bulbs and fixtures with built-in dimming capabilities.
Accent lighting isn’t essential, but it can take your space from purely functional to genuinely motivating. And let’s be honest—if your gym looks and feels good, you’re way more likely to actually use it.
Natural Light and How to Manage it

If you’re blessed with windows/ natural lighting in your home gym- use it! It’s to your advantage to enjoy all the benefits it has to offer; boosting your mood, balancing your circadian rhythm, and saving precious energy during the day. It’s not all sunshine and rainbows- there are some downsides to this form of lighting.
Challenges and solutions:
- Glare: Unfortunately when the sun is out, its streams of light will invariably create harsh glares in the mirror. The only ways to combat this is by diffusing it with blinds, shades or frosting film to limit the flow of light.
- Heat: When the sun is magnified by windows, rooms tend to heat up regardless of the season. To gain a measure of temperature control, try using blackout shades or reflective window film to minimize heat gain. If this isn’t sufficient in reducing the heat, you may have to resort to additional fans or AC.
- Light Distribution (inconsistency): Natural light changes position and intensity regularly, so having a source of artificial light will definitely come in handy. Use natural lighting as a secondary bonus rather than your primary light source.
If your home gym has no windows, it’s not the end of the world. There are plenty of artificial lighting options that mimic natural sunlight.
Choosing the Right Bulbs for Your Home Gym
Why LEDs are Usually the Best Choice
In 2020’s, the search for the king of home gym lighting ideas inevitably ends with LED lights. Gone are the days of harsh, sterile fixtures– they’ve revived their image for well deserved reasons.
Here’s why LEDs win for gym lighting:
- Tough: LEDs are as sturdy as they come, free of fragile filaments or glass tubes that easily break. They also manage vibrations well, which is essential for athletes inclined towards box jumps, slamming weights, or sprinting heavily on a nearby treadmill.
- Instant brightness: Opposed to CFLs (compact fluorescents) that require time to warm up, LEDs light up fully as soon as you hit the switch. When you’re ready to train, your lighting will be just as ready to go.
- No flickering: Quality LEDs provide steady, flicker-free light. Cheaper fluorescents can flicker, which is not only annoying but can cause eye strain and headaches during longer workouts.
- Better light quality: Modern LEDs offer excellent color rendering (CRI of 80+, ideally 90+), meaning colors look natural and accurate. This matters more than you’d think—it affects how you see yourself in the mirror, how your equipment looks, and the overall feel of the space.
- Dimmable options: Many LEDs are compatible with dimmer switches, giving you control over brightness and mood without swapping bulbs.
The main downside? Upfront cost. LEDs are pricier than incandescent or halogen bulbs. But given how long they last and how much energy they save, you make that money back pretty quickly.
Energy Efficiency and Longevity
Let’s talk numbers, because this is where LEDs really shine (pun intended).
A typical 60-watt incandescent bulb puts out about 800 lumens and lasts around 1,000 hours. An LED equivalent uses only 8–10 watts to produce the same 800 lumens and lasts 25,000 to 50,000 hours. That’s 25 to 50 times longer.
To put that into perspective; if you were to workout one hour a day, an LED would continue shining for 68 years! Your children and your children’s children would be working out with the same light before it needed to be replaced. .
The secret behind this longevity is LEDs use of 75-80% less electricity than incandescent bulbs– talk about working smarter rather than harder. And smarter energy is exactly what you’ll need if you decide to run multiple lightbulbs several hours a week in a home gym. This strategic choice could save you $50-$100/ year depending on your setup and local energy rates.
Not only do LEDs burn less energy over time and burn less money in your pocket, they also literally burn less too, emitting less heat than other home gym lighting choices. Picture training in a small, stuffy, poorly ventilated home gym– would you really want hot, searing lightbulbs adding more discomfort to an already grueling workout? Of course not! As you can imagine, LEDs can make quite the difference in illuminating your workouts without the additional physical or financial discomfort of incandescent or halogen bulbs.
Ideal Bulb Specs for Workout Spaces
So with all that being said, here are some important points to look for in your hunt for the best home gym lighting:
- Lumens: Remember to look for bulbs that provide at least 50-100 lumens per square foot. The typical LED bulb generates around 800 to 1,600 lumens. Once you do the math for your own space, you can determine how many lights you need for your home gym.
- Color temperature: A range of 4000K-5000K works for most home gyms. This strikes a reasonable balance of light that is clean and empowering without feeling too cold and artificial. For those who prefer a warm, gentler temperature, 3500K-4000K is best. Any lower in Kelvin (3000K or less) are specifically for chiller, more comfortable cool-down zones.
- CRI (Color Rendering Index): This measures how accurately colors appear under the light. Aim for a CRI of 80 or higher, ideally 90+. Higher CRI makes everything look more natural, which is especially useful if you’re filming content or just want your space to feel inviting.
- Beam angle: For general overhead lighting, you want a wide beam angle (usually 100–120 degrees) to spread light evenly. For task lighting, a narrower beam (30–60 degrees) focuses light exactly where you need it.
- Wattage equivalent: Don’t concern yourself with the wattage of LEDs– what’s important is the “wattage equivalent” label that informs you how it compares to older incandescent bulbs. A “60-watt equivalent” LED provides about the same light output as its 60-watt incandescent counterpart with a fraction of its energy usage.
- Dimmable vs. non-dimmable: If you’re thinking about installing dimmer switches or incorporating smart controls to your home gym, be sure the bulbs you choose are labeled “dimmable”. Some LED lights don’t cooperate with dimmers, and non-dimmable LEDs used on a dimmer circuit can lead to flickering or damage.
- Shape and base type: Obviously you want to ensure your bulb(s) actually fit with your fixtures. Common types include A19 (standard bulb shape), BR30/BR40 (floodlights for recessed cans), and PAR38 (outdoor/high-output floods). Check your fixture specs before buying.
Important: Make sure you buy bulbs from established brands. A cheap LED from an un-heard-of brand with no online reviews could have potentially poor quality, brightness, or shorter lifespans than advertised. A safe bet are companies like Philips, GE, Cree, or even Sylvania– names with products you’ll have a much better experience with.
Budget-Friendly vs. Premium Lighting Setups
One of the best things about home gym lighting is that you can get solid results at just about any price point. You don’t need to drop thousands of dollars to create a well-lit, functional space—but if you want to go all-in, there are definitely upgrades worth considering.
Here’s how different budget levels break down, along with what you can realistically expect at each tier.
Entry-Level Options That Still Deliver Result ($100-$300)
If you don’t have much room to maneuver financially, $100-$300 is more than enough to light your home gym without burning a hole in your wallet.
What this looks like:
- 4–6 basic LED shop lights or flush-mount fixtures from a hardware store
- Standard LED bulbs in the 4000K–5000K range
- Maybe one or two clip-on task lights for specific areas
- No smart features, no dimming, no fancy accents—just solid, functional light
Where to buy: Home Depot, Lowe’s, Amazon, or even Costco often have multipacks of LED shop lights for $20–$40 each. A four-pack of quality LED bulbs runs about $15–$25.
Home Gym Lighting Ideas for a 150-Square Foot Space:
- 4 LED shop lights mounted across the ceiling: ~$120
- 2 clip-on task lights for the mirror or rack area: ~$30
- LED bulbs for any existing fixtures: ~$20
- Total: ~$170
While not the most stylish setup, it will definitely provide enough lighting for you to see everything while training and workout safely. The focus at this price-point is light placement. Be sure to spread your light sources out evenly to prevent dead zones or deep shadows- ideally reaching 50-75 lumens per square foot (at minimum).
Pros:
- Affordable
- Easy to install
- Offers enough light
Cons:
- Very basic design
- Little to no flexibility in variety or setup
- potential for some shadows if placement isn’t perfect
Mid-Range Solutions for Most Home Gyms ($300-$800)
For most home gym owners this price range is the happy medium for aesthetics, price, and lighting variety. You’ll nearly have it all; great quality light, even more coverage, heightened visual appeal, and fun features to play with– all while not breaking the bank.
What this looks like:
- 6–8 recessed LED lights or higher-quality flush-mount fixtures
- Dimmable LED bulbs with good CRI (90+)
- A couple of adjustable task lights or wall sconces
- Maybe some basic LED strip lighting for accent/ambiance
- Potentially a smart bulb or two if you want app control
Where to buy: Still the big hardware stores, but you’re opting for better brands and more thoughtful fixture choices. You might also shop at specialty lighting stores or online retailers like Build.com or Lumens.
Home Gym Lighting Ideas for a 200-Square-Foot-Space:
- 6 recessed LED can lights with high-CRI bulbs: ~$300–$400
- 2 adjustable wall-mounted task lights: ~$80–$120
- 16 feet of LED strip lighting for behind mirrors or along ceiling edges: ~$40–$60
- Dimmer switch installation (DIY or electrician): ~$50–$150
- Total: ~$470–$730
With these options at your disposal, your home gym will look and feel more refined, polished, and aesthetically pleasing. Light will be evenly distributed, the shadows will be insignificant, and you will have a measure of control over the brightness and mood of the space. If you’re truly committed to your home gym and using it long term, this is likely the price point for you.
Pros:
- Excellent light quality
- Refined aesthetic
- Additional functionality
- Reasonably affordable.
Cons:
- More complex installation (you might need an electrician for recessed lights)
- higher upfront cost.
High-End Setups for Dedicated Fitness Spaces ($800-$2,000+)
If you’re building a serious home gym—maybe a converted garage, a finished basement, or a dedicated room—and you want it to look and feel like a commercial facility, this is your tier.
What this looks like:
- 8–12+ recessed LED lights or track lighting systems with premium bulbs
- Full smart lighting integration (Philips Hue, LIFX, or Lutron systems)
- Multiple zones with individual dimming control
- High-quality task lighting with adjustable arms or spotlights
- Extensive LED strip lighting with color-changing options
- Possible integration with voice control (Alexa, Google Home) or programmed scenes
- Professional installation to ensure everything is wired correctly and looks seamless
Where to buy: Specialty lighting retailers, direct from brands like Philips or Lutron, or through a lighting designer/electrician who can create a custom plan.
Home Gym Lighting Ideas for a 400-Square-Foot Dedicated Space:
- 12 recessed smart LED lights with app control: ~$600–$900
- Track lighting system for adjustable coverage: ~$300–$500
- 4 adjustable task lights/spotlights: ~$200–$300
- 40+ feet of color-changing LED strips: ~$150–$250
- Smart dimmer switches and hub: ~$200–$300
- Professional installation: ~$500–$1,000
- Total: ~$1,950–$3,250
There’s no getting around it, for this type of quality lighting you’ll have to pay a decent price. Some don’t feel comfortable with this price and that’s ok. However if you are considering it remember that this is one more worthy investment in a space that you’ve already committed to purchasing only the best equipment, flooring, mirrors, etc. Proper lighting is what will bring it all together, which means there can be no half-measures. Imagine; you’ll have complete control over the mood, color, and brightness of your space. You can even sync lighting to music to create an ambience to rival that of any (and I mean any) commercial gym. The options are nearly limitless!
Pros:
- Complete customization
- Pro-level aesthetics
- Unrivaled flexibility
- Absolute WOW-factor.
Cons:
- Expensive
- Potential headache to install
- Could be a little much for a basic home gym
Which Tier is Right for You?
The answer to this question is solely dependent on the goal, training style and vision you have for your home gym.
If you simply require a lighting setup that allows you to see clearly during a few workouts a week, then there’s nothing wrong with the budget-friendly option. Perhaps you’ve committed to training daily with some form of physical activity but require variety in how those workouts are lit, the medium price range will be fine for you. However if you’ve fantasized about lighting the best home gym possible in a space that you see using long term (and have the money to make it a reality), then go all-in with the highest price point.
The best part about home gym lighting is that it’s scalable which means you don’t have to buy everything up front. Maybe you want the variety in lighting a medium price point offers but can’t justify paying for it all at once– then start with the budget-friendly option and gradually add lights over time. The foundation—good placement and adequate brightness—matters more than the bells and whistles.
Common Lighting Mistakes to Avoid

Even with the best intentions, it’s easy to screw up your gym lighting if you’re not paying attention to a few key details. Here are the most common mistakes people make—and how to avoid them.
Lighting That’s too Dim or Harsh
This is probably the single biggest issue in home gyms. People either underestimate how much light they need and end up squinting through their workouts, or they go overboard and create a blindingly bright environment that feels like an interrogation room.
Too Dim
If you can’t clearly see the plates on the barbell, read the numbers on your dumbbells, or check your form in the mirror without straining, your lighting is too dim. This isn’t just annoying—it’s a safety hazard. You’re more likely to trip, miss a step, or misjudge distances when visibility is poor.
The fix is simple: add more light. Calculate your lumens-per-square-foot needs (50–100, remember?) and make sure you’re actually hitting that number. Don’t just guess. If you’ve already got fixtures installed and they’re not cutting it, swap in higher-lumen bulbs or add supplemental lighting.
Too Harsh
On the flip side, overly bright or poorly chosen lighting can be just as bad. Super cool color temperatures (6500K+) can feel clinical and sterile. Bare bulbs without diffusers create glare. And if every surface in your gym is white or reflective, all that light bounces around and becomes overwhelming.
The fix: Choose bulbs in the 4000K–5000K range for a more balanced feel. Use fixtures with diffusers or frosted covers to soften the light. And if your space feels too intense, consider adding dimmer switches so you can dial it back when needed.
Poor Placement
You can have the best bulbs and fixtures in the world, but if they’re in the wrong spots, your lighting will still suck.
Common Placement Mistakes:
- Single overhead fixture in the center of the room: This creates a hot spot directly underneath and leaves the edges of the room dim. It also casts harsh shadows in every direction. Multiple fixtures spread across the ceiling give you way better coverage.
- Lights directly above where you lie down: If you bench press, do floor work, or use an incline bench, having a bright light directly overhead means you’re staring straight into it. Not fun. Position lights slightly off to the sides or use angled fixtures to avoid this.
- Ignoring corners and edges: Dark corners make your gym feel smaller and less inviting. They’re also where you’re most likely to trip over equipment or miss something you’re looking for. Make sure your lighting plan includes the perimeter of the room, not just the center.
- Task lighting that’s too far away: If you’re adding a light over your squat rack or dumbbell area, it needs to be close enough to actually make a difference. A fixture 10 feet away isn’t going to help much. Position task lights within a few feet of the area they’re meant to illuminate.
The fix: Map out your gym layout before you install anything. Mark where your equipment will be, where you’ll be standing or lying, and where you need the most visibility. Then plan your lighting around those zones. If you’re not sure, start with evenly spaced overhead lights and add task lighting as you figure out what’s missing.
Using Only One Light Source
This ties into placement, but it’s worth calling out separately because it’s such a common mistake.
One ceiling light—even a really bright one—cannot properly light a home gym. It just can’t. You’ll get uneven coverage, harsh shadows, and areas that are either too bright or too dim.
The problem is that a single light source creates directionality. Light comes from one point, hits objects, and casts shadows behind them. Your body blocks light. Your equipment blocks light. The result is a patchwork of bright spots and dark zones that makes it hard to see clearly and harder to stay safe.
The fix: Use multiple light sources. Ideally, you want a combination of:
- General overhead lighting (recessed lights, flush mounts, or shop lights spread across the ceiling)
- Task lighting for specific areas (over racks, near mirrors, by storage)
- Optional ambient or accent lighting to fill in gaps and add atmosphere
Think of it like layering. Each layer serves a purpose, and together they create a well-lit, functional space.
Bonus Mistakes to Watch Out for:
- Buying the cheapest bulbs available: You get what you pay for. Super cheap LEDs often have poor color rendering, shorter lifespans, and inconsistent brightness. Spend a few extra bucks on quality bulbs from reputable brands.
- Forgetting about heat: If you’re in a garage or uninsulated space, extreme temperatures can affect bulb performance and longevity. Make sure your bulbs are rated for the conditions.
- Not testing before committing: If possible, test your lighting setup before permanently installing everything. Live with it for a week or two, work out at different times of day, and see how it feels. It’s way easier to adjust placement or swap bulbs early on than after everything’s hardwired.
- Ignoring switches and controls: Don’t put all your lights on a single switch if you can avoid it. Multiple switches (or smart controls) let you turn on only what you need, save energy, and adjust lighting for different types of workouts.
Final Thoughts
Why Good Lighting is Worth the Investment
If you’ve read this far, you clearly understand something important– quality home gym lighting makes a difference.
It’s not the fanciest piece of cardio equipment, or the prettiest cable machine, but you best believe that no matter how fancy or expensive your home gym is, it will never be “right” without good lighting. A proper light source is the great unifier, and investing in it is worth the time it took to read this article and the money necessary to make it happen. It is the difference between a space you can’t wait to leave and one that energizes your life.
With just a few dollars to start (or at least a modest investment), you can completely change your home gym and the trajectory of your fitness journey. You’re not just purchasing bulbs and fixtures, you’re buying into safety, motivation, consistency, and a training experience that will enrich your life for years to come.
That being said, plan your next steps strategically and make the best choice for your workout space. Measure your area, figure out the necessary lumens, combine lighting options, avoid common mistakes.
Your home gym is your space. Make it one you actually want to use.
If you’d like more tips for setting up other elements of your home gym, check out our other article “How to Set Up a Home Gym: The Complete Beginner’s Guide”


Leave a Reply