The reverse pec deck machine is one of the most effective rear delt exercises in existence — and one of the least accessible for home gym athletes. It’s a large, expensive piece of commercial gym equipment that the overwhelming majority of home gyms simply don’t have. But the movement pattern it creates — horizontal abduction with external shoulder rotation — is entirely replicable with equipment you almost certainly already own. As a certified personal trainer I’ve spent years programming rear delt work for home gym athletes who’ve never touched a pec deck machine, and the alternatives below produce the same upper back development without requiring a single piece of gym-specific equipment.
Reverse Pec Deck Machine
The reverse pec deck machine is a piece of equipment that’s found in most gyms. To be clear, the pec deck machine and the reverse peck deck machine are usually one and the same. It’s just a matter of whether you’re body is facing the seat (reverse) or your back is against the seat (standard). What defines this machine is its use of horizontal flyes which either targets the back and rear delts during the rear pec deck or the chest during the standard peck deck (chest fly).
When using the pec deck machine for reverse peck decks, remember:
- Adjust the handles to the furthest rear settings. At this position, both are nearly touching each other behind the seat. Having them this far back will create a deep stretch in the rear delts and provide full range of motion as you extend your arms.
- The seat’s height should allow your hands and shoulders to be level when gripping the handle. This will help strictly abduct the arms and target your rear delts specifically.
What Does The Reverse Pec Deck Work?
The reverse pec deck targets a variety of muscles in the shoulders and back responsible for external shoulder rotation; the middle and rear delts, infraspinatus, teres minor, and supraspinatus. When rotating the arms backwards, these muscles work together to retract the shoulder blades closer to the spine, creating a deep contraction and definition in the muscles of the upper back.
Deltoids
The deltoid is a large muscle that forms a cap that surrounds the shoulder. It has numerous functions depending on which head of the delts you’re looking at. The anterior (front) fibers raise and internally rotate the humerus. The rear delts on the other hand extend and horizontally rotate the humerus. The trapezius works to fix the shoulder blade as the delts pull on the humerus- so any any movement of the arm on the shoulder blade involves the delts to some degree.
The reverse pec deck is an excellent exercise for targeting and growing the rear delts specifically. It is an axe rise that uses pure horizontal abduction, which means the rear delts are going to do the majority of the work pulling your arms backwards.
Teres Minor
The teres minor is a long slender muscle that stretches from the outer edge of the shoulder blade to the tip of the humerus. This muscle, along with a few others, is responsible for stabilizing the glenohumeral joint. Due to the mobility of the shoulder joint, the teres minor works to keep the ball of the humerus leveled and locked into the glenohumeral capsule during the peck deck.
Infraspinatus
The infraspinatus is a thick, triangular muscle that originates on top of the scapula and inserts on the greater tuberosity of the humerus. This muscle functions primarily as an external rotator of shoulder. Along with the aid of a few other fibers around the rotator cuff region, the infraspinatus provides stability to the shoulder complex.
It’s important to note that the reverse pec deck (and other exercises that use strict external rotation) doesn’t work each of these muscles equally. Some exercises like side-lying external rotation are better for activating the infraspinatus and teres minor. Regardless, using the reverse pec deck will help define these muscles and give the upper back a well-rounded appearance.
How To Perform The Reverse Pec Deck
There are far more complicated exercises than the RPD, but it is an exercise that is often done incorrectly. I would recommend either reading the below steps or taking some time to watch a tutorial on how it’s done properly.
How To:
- Adjust the handles to the furthest setting behind the seat.
- Set the seat’s height so that your mid chest rests comfortably against the cushion. Make sure that your collar bone and shoulders are at the same level as the handle.
- You can grip the handle whichever way feels comfortable, but to really engage the rear delt, I recommend using a neutral grip. As you grip the handle, keep your arms slightly bent and the muscles in your back engaged. Sit tall in the seat so your spine is as erect as possible.
- When ready begin extending your arms away from the body laterally. Continue to move them back until they are almost or just about aligned with your back. What’s important is that your shoulder blades glide closer together and you feel the contraction in your upper back.
- Don’t allow your arms to travel past your back. The key to this is to contract the lateral muscles of the back like the rear delts and infraspinatus. Extending your arms back too far will transfer the work to the medial muscles of the back that draw the shoulder blades closer to the spine such as the rhomboids.
- Hold the extended position briefly and slowly return the weight to the starting position. Keep the pace controlled, allowing the muscles in the upper back to stretch as the handles return to the midline of the body. Do not allow the weight to completely rest at the starting position. The goal is to keep constant tension on the muscles until the entire set is complete. Repeat this process for reps.
Note: If your home gym doesn’t include a pec deck machine — which describes the vast majority of home gym setups — the alternatives section below covers every movement pattern that replicates this exercise with dumbbells, bands, and cables.
Does Hand Positioning Matter?
When it comes down to the small details of some exercises, hand positioning is always a point of contention. The reverse pec deck is definitely no exception. The theory is that changing ones hand position in turn alters shoulder joint rotation. This in turn not only changes the muscles of the shoulder and back worked, but also much they’re activated.
This is the thought process at least. But can it be proven?
Well, in one study researchers put this theory to the test. With a group of 19 resistance trained men, each participant grasped the machine with either a pronated grip or a neutral grip with repetitions to failure at a load of about 75% body weight. The results showed that electromyographic activity in the rear delts were significantly greater in the neutral position opposed to the pronated position. Similarly, there was also greater activity in the infraspinatus with a neutral grip compared to the pronated.
So long story short: use a neutral grip for greater activation of the rear delts (and infraspinatus if you’re really focused on details).
Reverse Pec Deck Alternatives for Home Gyms
Each alternative below replicates the horizontal abduction and external rotation of the reverse pec deck using equipment that belongs in any home gym. The bent-over lateral raise is the closest movement match and requires only dumbbells. The band pull-apart requires only a resistance band and zero setup. The face pull variation using bands gives you the high pull movement pattern without a cable machine. All three can be trained in a garage, spare bedroom, apartment corner, or basement — no machine required.
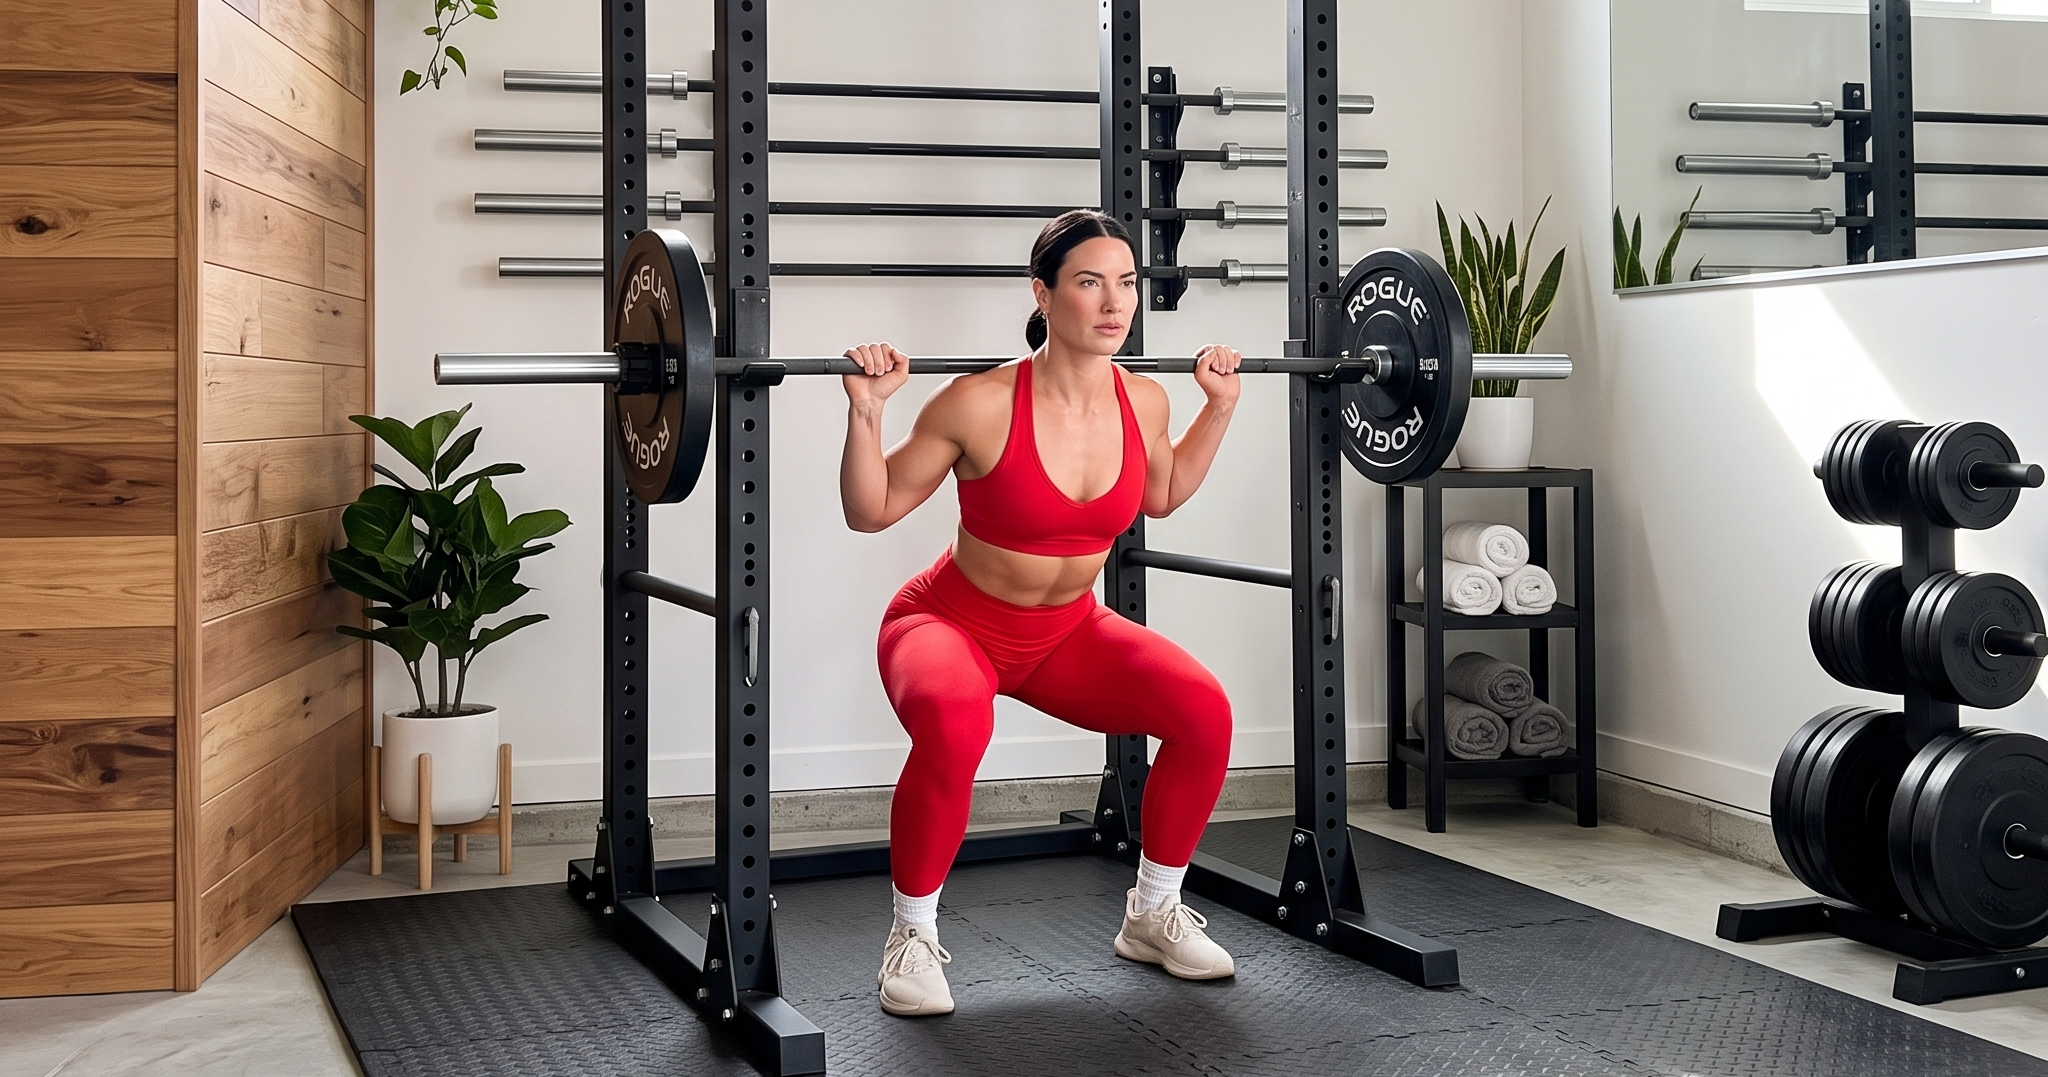
Bent-Over Lateral Raise
The bent over lateral raise is a classic exercise that’s great for anyone’s training arsenal. This lateral raise specifically doesn’t require a machine (only dumbbells), which means it can be done at the gym or at home. Like the reverse pec deck, the BOLR uses horizontal abduction- just performed on a horizontal plane. When doing this exercise I recommend using lighter weight and focusing on form. Without a machine to control the movement path of the arms, the body has a lot more freedom to move (properly or improperly). Focus on feeling the contraction of the rear delts at the top of the movement, and controlling the dumbbells on the way down.
How To:
- Start by choosing dumbbells for the exercise. Generally a lighter weight works well for performing a moderate number of reps with good form.
- Bend forward so that your torso is nearly parallel with the floor. Keep a slight bend in your knees and drive your hips backwards.
- As you grab the dumbbells, let your arms hang directly under your shoulders, maintaining a slight bend in the elbows.
- When ready, begin raising the dumbbells laterally on either side of the body. Squeeze the scapula together at the top of the movement. As the dumbbells travel higher, feel the contraction in your rear delts.
- Raise your hands until they are chest height. Hold this position briefly and then slowly lower your hands to either side of your legs. Don’t rest your arms at the bottom of the movement by straightening them. You want to keep constant tension on them by maintaining a bent arm and keeping your rear delts engaged at all times.
Home gym note: This is your primary reverse pec deck replacement. A pair of adjustable dumbbells at the lighter end of the range handles this movement perfectly — this is one of the few exercises where lighter weight and strict form outperforms heavier loading.
Band Pull-Apart
The band pull-apart is the most home gym-friendly rear delt exercise available — it requires only a resistance band, takes up zero floor space, and can be performed standing anywhere in your gym. Hold a resistance band at shoulder height with both hands about shoulder-width apart, arms extended in front of you. Pull the band apart by driving both arms out to the sides and back, squeezing the rear delts and rhomboids at full extension. Control the return. The movement pattern mirrors the reverse pec deck almost exactly — horizontal abduction against resistance — without any machine required.
How To
- Grab a light resistance band with both hands about shoulder-width apart.
- Stand tall with your feet shoulder-width apart and keep a slight bend in your knees.
- Raise your arms straight out in front of you at chest or shoulder height.
- Keep a soft bend in your elbows throughout the movement.
- Brace your core and keep your ribs down so you don’t arch your lower back.
- Pull the band apart by moving your hands outward in a straight line.
- Focus on squeezing your shoulder blades together and pulling with your upper back—not your wrists or traps.
- Continue pulling until the band reaches your chest and your arms form a “T” shape.
- Pause briefly at the end position while maintaining tension in the band.
- Slowly return to the starting position under control without letting the band snap back.
- Repeat for the desired number of repetitions.
Home gym note: Light to medium resistance bands work best for this movement. The goal is rear delt fatigue, not band strength. Three sets of 15-20 reps as a finisher after compound pulling work is an effective programming approach.
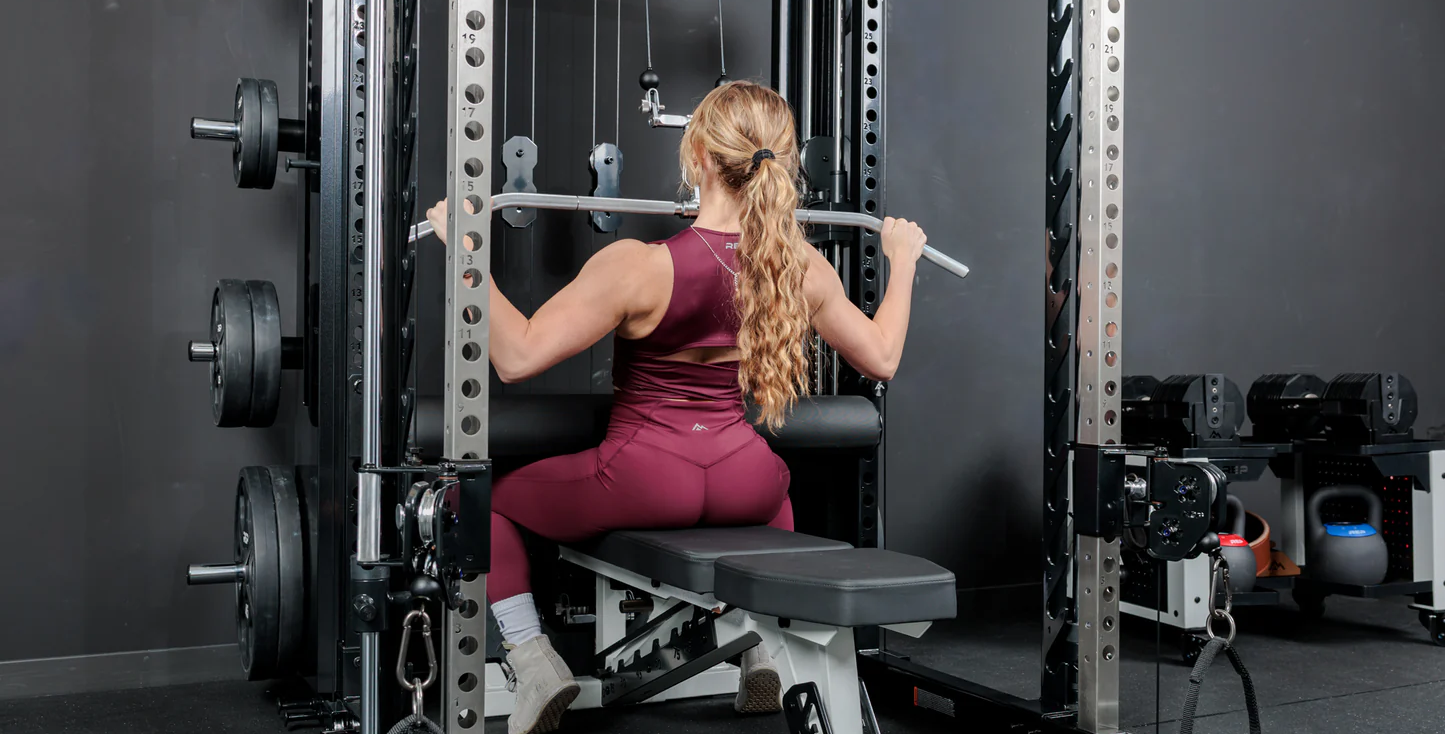
Cable Machine High Pull/ Band Face Pull
If your goal is to refine the muscles of the upper back, the high pull is the exercise for you. It incorporates external rotation like the reverse pec deck, but instead of keeping the aligned with the shoulder the hands pull the cables above the shoulders. This alteration in form activates the traps in addition to the rear delts. I recommend performing this exercise slowly in order to really feel the contraction. It requires a very light amount of weight, so prioritizing form and technique will be more rewarding than simply lifting heavy.
If your home gym includes a cable setup, the high pull is an excellent addition. If not — which describes most home gyms — replace this with a band face pull using a resistance band anchored to a door frame or power rack upright. The movement pattern is identical and the band version is arguably better for shoulder health due to the accommodating resistance.
How To:
- Find a rope attachment and connect it to the high pulley.
- Take hold of both ends of the rope and step back until your arms are fully extended. Set your feet a little narrower than shoulder width apart and allow your torso to lean back slightly.
- Keep your elbows high (a little higher than your shoulders) and pull the rope towards your face. Avoid pulling your arms too far back. Your arms should be aligned with your back at the furthest point.
- Hold this position briefly and slowly return the rope to the starting position
(Band Face Pull) How To:
- Anchor a resistance band at face height — a door anchor works well, as does looping around a rack upright.
- Hold both ends of the band with a neutral grip, step back until there’s tension, and pull the band toward your face with elbows high and wide.
- Squeeze the rear delts at peak contraction and control the return.
Programming Rear Delt Work in Your Home Gym
The rear delts are one of the most chronically undertrained muscle groups in home gym athletes — not because the exercises are difficult or the equipment is unavailable, but because they’re easy to skip. They don’t produce the visible pump that pressing movements do, and they don’t feel as impressive as a heavy row. But neglecting rear delt development creates a postural and aesthetic imbalance that becomes increasingly obvious as the rest of your physique develops.
In a home gym program, I recommend training rear delts twice per week — once as a focused accessory movement after a heavy pulling session, and once as a lighter volume finisher on an upper body day. The bent-over lateral raise and band pull-apart cover both scenarios. Three sets of 12-20 reps with a 2-second hold at peak contraction is more effective than heavy loading with poor form.
If you’re building or refining your home gym setup and want to make sure your training space supports this kind of detail work, the complete setup guide covers everything from equipment priorities to layout planning.
Building a home gym that supports serious upper back development starts with the right equipment foundation. Download the free SOMA Home Gym Starter Kit — trainer-built layouts for 5 space types, a $600 equipment blueprint, and the 7 mistakes checklist. Free download.
Leave a Reply