You already know you want this. The early morning commute to a gym you half-hate, the waiting for equipment, the lost hours — you’ve done that math. What you’re actually trying to figure out is where to start, how much it’s going to cost you, and whether you can do this without making expensive mistakes you’ll regret six months in.
This guide is the answer to all of that. Learning how to build a home gym isn’t just about buying equipment — it’s about making a series of smart, sequenced decisions that result in a space you’ll actually train in, consistently, for years. Done right, your home gym becomes the most reliable training partner you’ve ever had. Done wrong, it becomes an expensive clothing rack.
I’ve helped clients build everything from full basement setups to functional training corners carved out of spare bedrooms. The principles are the same regardless of space or budget. Let’s work through them.
1. Define What You’re Training For Before You Buy Anything
The biggest mistake I see people make when building a home gym is treating equipment selection like a shopping list rather than a training plan. They buy what looks impressive, what’s on sale, or what their favorite fitness influencer uses — and then they find themselves with a garage full of gear that doesn’t match how they actually want to train.
Before you spend a single dollar, answer this question honestly: what does your training actually look like?
If you’re focused on strength and muscle building, you need a barbell, a rack, and a bench — full stop. Resistance bands and adjustable dumbbells are secondary. If your goal is fat loss combined with cardio conditioning, a rower or assault bike and a set of kettlebells might outperform a full rack in terms of results per square foot. If you’re doing hybrid training or following a program like HIIT or functional fitness, your equipment list looks different again.
This matters because every piece of equipment you buy has a footprint — not just physical, but financial and spatial. A power rack is a commitment. A cable machine is a commitment. Buying them without confirming they match your training style isn’t dedication; it’s expensive guesswork.

Before shopping, write out the following:
- Your primary training goal (strength, fat loss, endurance, flexibility, hybrid)
- The specific movements your program requires most often
- Whether you train alone or with a partner (affects safety equipment needs)
- Your realistic weekly training frequency
The answers to those four questions will tell you more about what you need than any equipment review on the internet.
2. Measure Everything — Including the Things Nobody Tells You to Measure
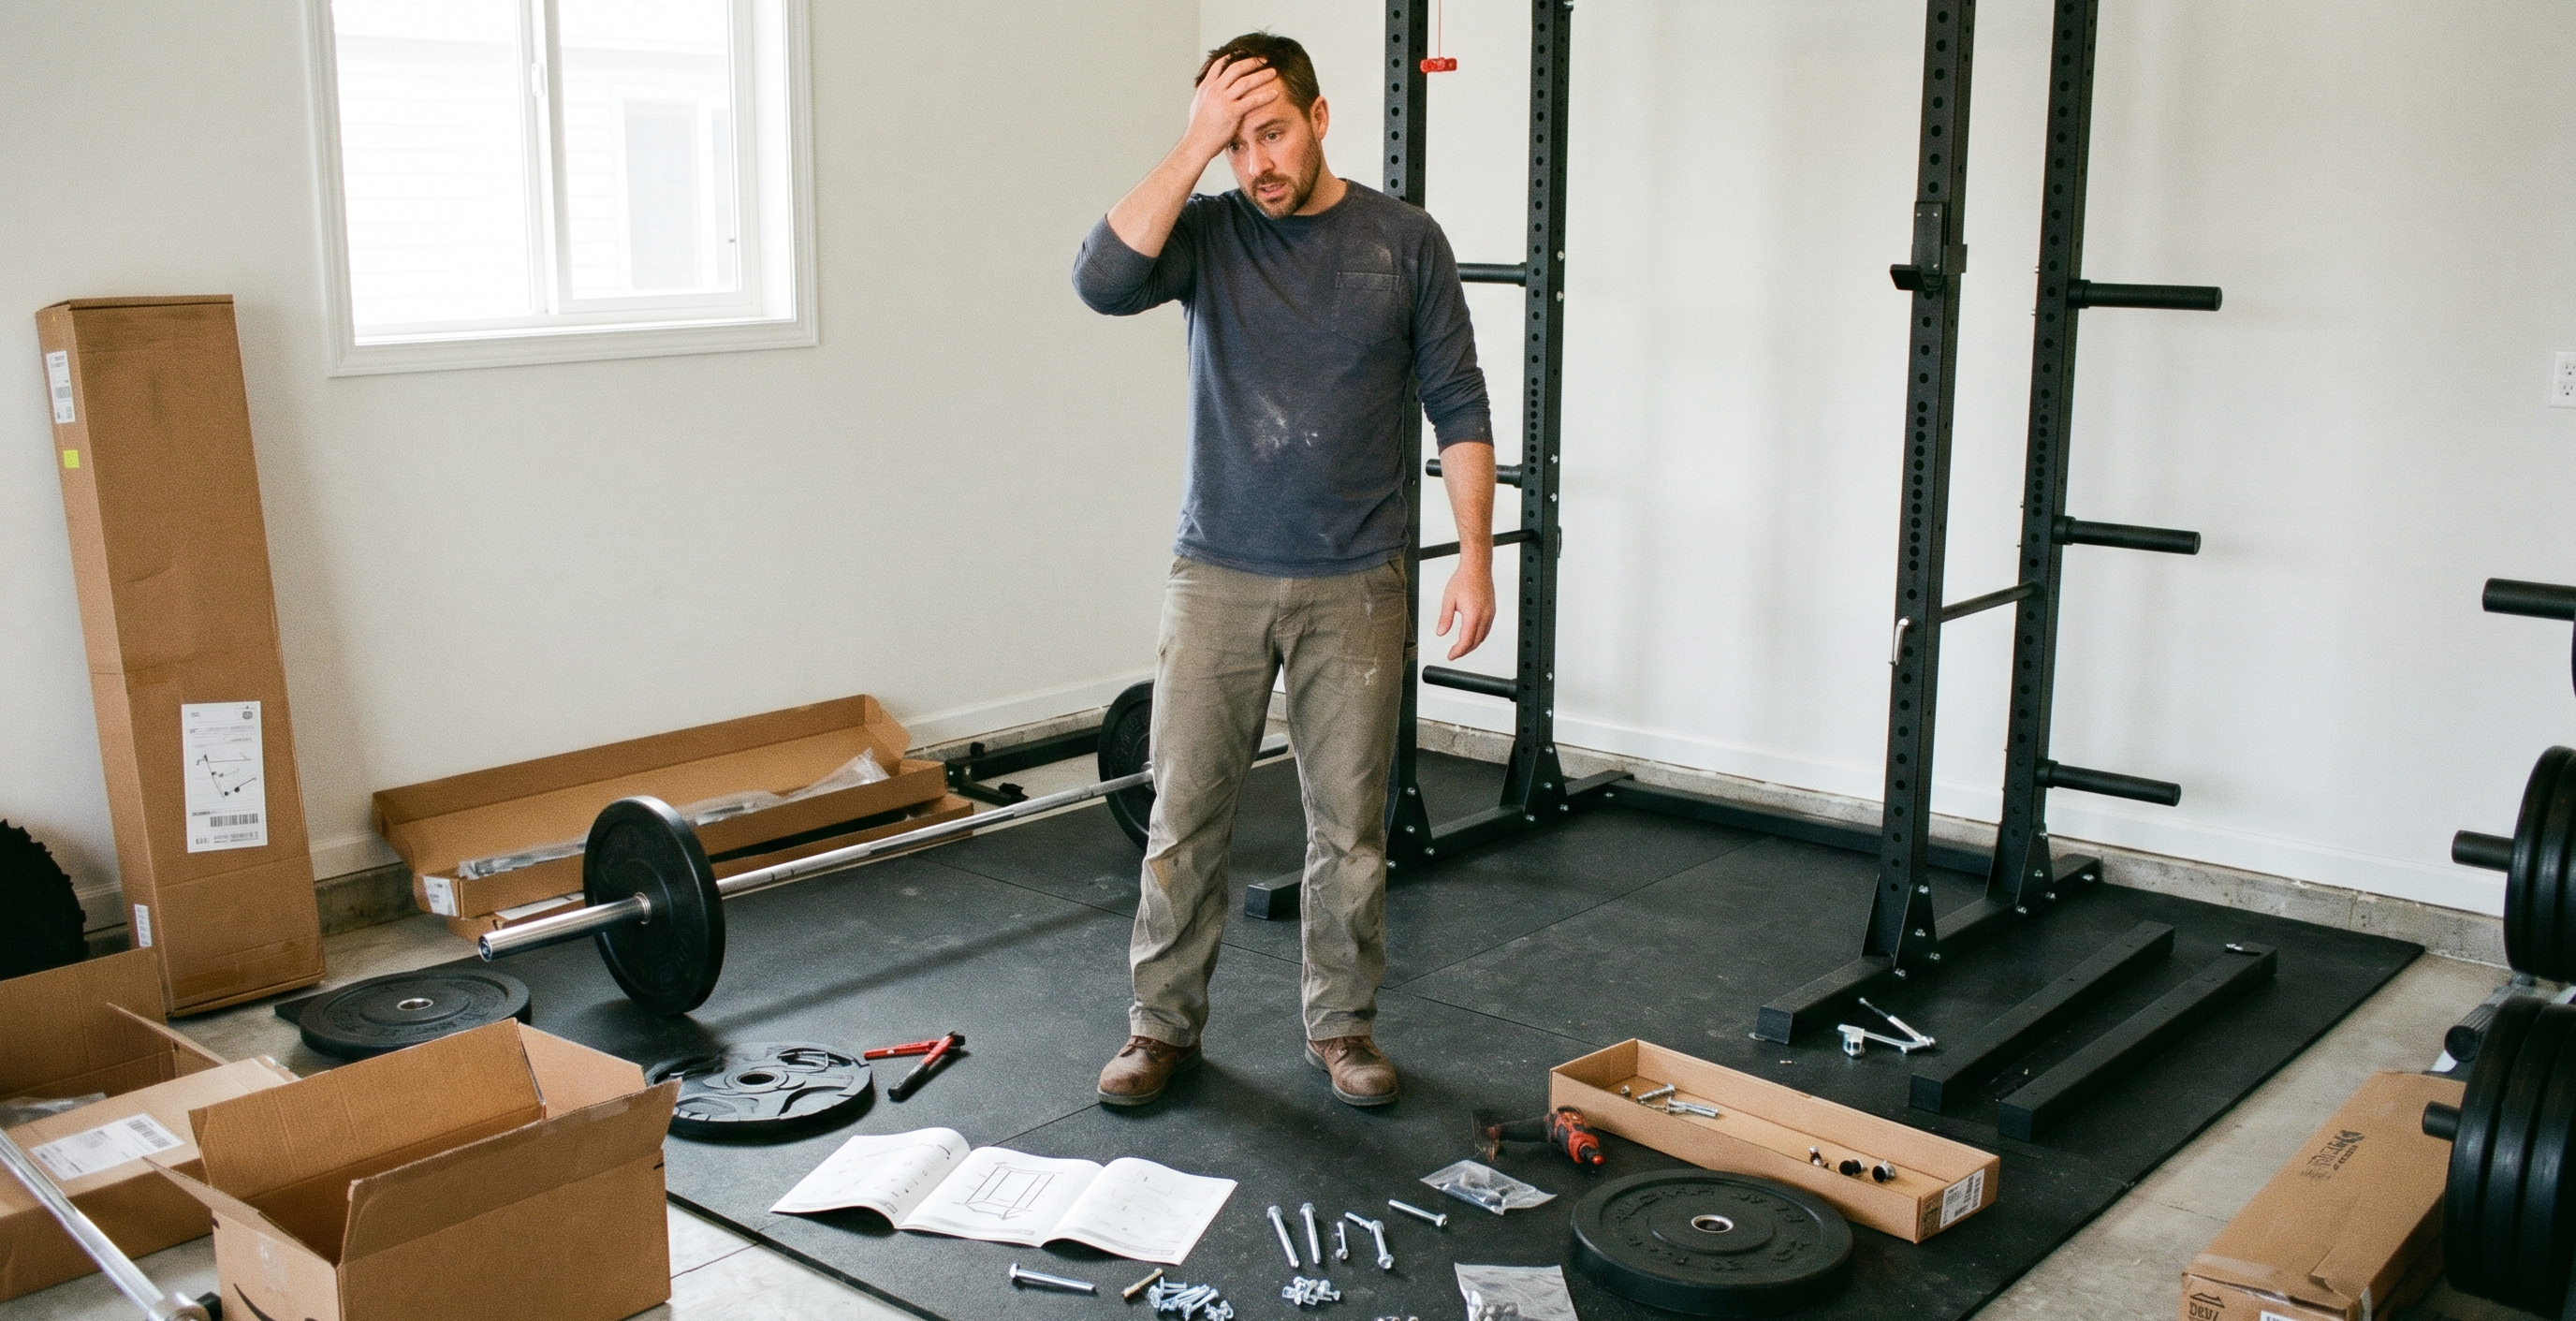
I cannot tell you how many times I’ve talked to someone who bought a squat rack, had it delivered, and then discovered it didn’t fit. Not because their space was too small — but because they only measured the floor footprint and forgot about ceiling clearance. Or they measured the room but didn’t account for the door swing. Or they didn’t think about what happens when you open the barbell collars on both sides.
When you’re figuring out how to build a home gym that actually works in your specific space, measurement is your most important planning tool.
Here’s what to measure:
- Floor dimensions (length × width) — obvious, but also note any awkward corners, support columns, or recesses
- Ceiling height — critical for overhead pressing, pull-ups, and any rack you plan to use. Standard power racks need 8–9 ft minimum; you want at least 12 inches of clearance above a loaded barbell at arm’s length
- Door clearance and swing direction — a door that swings inward into your training zone will become a safety issue
- Barbell width — a standard Olympic barbell is 86–90 inches long. Include this in your footprint planning
- Ventilation and electrical access — if you plan to add a fan, speakers, or a treadmill/bike, you need outlets in the right places
- Egress and emergency clearance — especially relevant for basement gyms. Know where your exits are and never block them with equipment
Practical tip: use painter’s tape to mark the exact footprint of any major equipment on your floor before you buy. It sounds simple, but standing in a taped-out rectangle where your squat rack will live will immediately tell you whether you have enough room to load plates, walk around the equipment, and train safely.
Related Post: How Much Space Do You Really Need For A Home Gym?
3. Set a Real Budget — Then Build a Phased Plan
One of the most honest things I tell my clients is this: you don’t have to build your dream gym on day one. In fact, trying to do it all at once is one of the fastest ways to burn through your budget on the wrong things.
A home gym is a long-term investment in your physical potential. Treat it like one. That means building in phases — starting with what you need to train effectively, and adding to it as you refine your programming and understand how you actually use the space.
Here’s a practical three-phase framework:
Phase 1: Functional Foundation ($500–$1,500)
Flooring, a set of adjustable dumbbells or kettlebells, resistance bands, and a pull-up bar. This setup lets you run a serious training program while you plan the bigger build. Don’t skip this phase to jump to Phase 3.
Phase 2: Core Structure ($1,500–$4,000)
Barbell, weight plates, a power rack or squat stand, and a bench. This is where your home gym becomes a real strength training environment. Buy quality here — a good rack and a good barbell will last you decades.
Phase 3: Expansion ($500–$3,000+)
Cardio equipment, cable attachments, specialty bars, storage solutions, and any additional accessories that your programming actually calls for. By this point, you know how you train. Buy accordingly.
Budget reality check: quality matters in this order — flooring, rack, barbell, bench. These are the things you interact with most and the things most likely to cause injury if they fail. This is not the place to go cheap.
Practical tip: Also factor in hidden costs that often get overlooked: delivery fees (heavy equipment ships at a premium), installation or assembly help if needed, rubber flooring adhesive or underlayment, mirrors, lighting upgrades, and wall-mounted storage.
4. Flooring First — Always
If there’s one non-negotiable in how to build a home gym, it’s this: install your flooring before anything else arrives. Not after. Not “once I figure out the equipment.” Before.
Flooring does three jobs that nothing else can do: it protects your subfloor from dropped weights and heavy equipment, it protects your joints by absorbing impact during training, and it defines your space. When you step onto good gym flooring, your brain registers: this is where I train. That psychological cue is worth more than most people realize.
The right flooring for your space:
- Rubber stall mats (3/4 inch) — the most cost-effective option for most home gyms. Available at farm supply stores, they’re durable, dense, and handle dropped weights well. Expect to spend $1.50–$2.00 per square foot.
- Interlocking rubber tiles — easier to install and customize, ideal for irregular spaces or if you want to cover specific zones. Look for 3/8” to 3/4” thickness depending on use case.
- Foam tiles — suitable for yoga, stretching, and light dumbbell work. Not appropriate under a loaded barbell or for any heavy equipment.
For most strength-focused home gyms, I recommend at least 3/4 inch rubber throughout, with a lifting platform — a wood and rubber composite surface — under your main barbell station. A deadlift platform specifically dampens the impact of dropped weights and protects both your floor and your barbell knurling over time.
Practical note: if you’re in a garage gym in a cold climate, know that rubber flooring becomes stiff in low temperatures. This doesn’t damage it, but it affects comfort underfoot. A heating solution — even a small space heater — is worth budgeting for.
Related Post: Best Home Gym Flooring in 2026: Rubber vs Foam vs Mats
5. Buy Equipment in the Right Order
The order in which you build your home gym matters as much as what you buy. Buying a cable machine before you have a rack, or a cardio machine before you have any strength equipment, is how people end up with gyms that are visually full but functionally limited.
This is the sequence I walk every client through when we figure out how to build a home gym that performs:
Step 1: Flooring
Already covered, but worth repeating as Step 1. Everything else goes on top of this.
Step 2: Primary Strength Equipment
Power rack or squat stand, barbell, weight plates, and a flat/adjustable bench. This is the core of a strength-focused home gym. If your training is primarily bodyweight or kettlebell-based, adjust accordingly, but some form of primary resistance tool comes before anything else.
Step 3: Supplementary Free Weights
Dumbbells or adjustable dumbbell systems, kettlebells, and resistance bands. These expand your exercise library and give you options for accessory work, warm-ups, and higher-rep training.
Step 4: Pull and Push Accessories
Pull-up bar (wall-mounted or rack-attached), dip bars, cable attachments if your rack supports them. These fill the horizontal and vertical pull/push movement patterns that free weights alone don’t fully cover.
Step 5: Cardio Equipment
Rower, assault bike, treadmill, or jump rope depending on your programming. Cardio machines are large, expensive, and often underused. Buy them after you’ve proven consistent training habits in your space.
Step 6: Specialty Items and Upgrades
Specialty bars (safety squat bar, hex bar, cambered bar), a GHD, a leg press, or a cable stack. These are additions that enhance a gym that’s already functional — not substitutes for the fundamentals.
When it comes to the barbell specifically: don’t buy the cheapest one you can find. A quality barbell — something with good knurling, a proper whip, and durable sleeves — will outlive any piece of cardio equipment you buy. Brands worth considering at different price points include Rogue, REP Fitness, and Bells of Steel for mid-to-high range; CAP and Body-Solid for budget builds.
6. Plan Your Layout Before Anything Arrives
A gym that isn’t laid out thoughtfully becomes a gym you don’t enjoy training in. Poor layout creates friction — awkward traffic patterns, equipment that blocks other equipment, zones that fight each other for the same space. And friction kills consistency.
Use graph paper or a free tool like RoomSketcher or Floorplanner to draw your space to scale before anything is ordered. Block out every major piece of equipment, then answer these questions:
- Can you walk 360 degrees around your rack for loading and safety?
- Is the barbell path clear? You need clearance on both sides for loading plates.
- Is your cardio equipment positioned so you can see a TV or phone if that matters to you?
- Is there a dedicated open floor zone for stretching, warm-up, or bodyweight work?
- Is storage integrated or will weight plates and accessories end up on the floor?

Zone-based planning works well for most home gyms. Think of it this way: you have a heavy lifting zone (rack, barbell, platform), a conditioning zone (cardio equipment or open floor for circuits), and a mobility/accessory zone (stretching area, dumbbell rack, bands). Even in a 10×10 foot room, these zones can exist if you’re deliberate about the layout.
One often-overlooked element: where you put your mirror. If you use one, it should face your primary lifting station so you can check form — not positioned where it just reflects the wall. Mount it at eye-height, at a minimum 48 inches wide, ideally extending to about 72 inches from the floor.
Related Post: Home Gym Layout Mistakes (and How to Fix Them)
7. The Details That Separate a Good Gym from a Great One
Everything we’ve covered so far is about building a functional home gym. This section is about building one you’re genuinely excited to train in. Because the environment you train in affects your output — that’s not motivation talk, it’s behavioral science.
When I help clients design their setups, these are the details I always bring up:
Lighting
Most garages and basements are underpowered for training. A dim room affects energy levels and makes it harder to check form. LED shop lights are the best value upgrade you can make — a two-pack of 4-foot LED fixtures from a hardware store costs under $60 and transforms the feel of a garage gym. Aim for at least 50 foot-candles of light in your primary training zones.
Sound
This is personal, but don’t underestimate it. Training to music you actually want to hear in a space with decent sound quality is a different experience than training with earbuds or tinny laptop speakers. A Bluetooth speaker mounted at head height will cost you $40–$150 and pay dividends in motivation for years.
Temperature and Ventilation
If your gym is in a garage or uninsulated space, temperature management isn’t optional — it’s a safety and performance issue. A fan for summer airflow and a small space heater for winter warm-ups is the minimum. If you’re in an extreme climate and serious about your gym, a mini-split system is worth the investment.
Storage
A gym with no organized storage becomes a gym that’s always a mess, and a messy gym is a gym you avoid. Horizontal weight plate storage trees, vertical dumbbell racks, wall-mounted band organizers, and a dedicated shelf for accessories — this infrastructure pays for itself in reduced frustration. Buy it early, not as an afterthought.
Wall Space
Whiteboard for programming notes, a wall-mounted clock or timer for rest periods, motivational artwork or a quote that actually means something to you — these aren’t decoration, they’re functional elements of a space designed for focus and intention.
Safety Equipment
If you train alone — and most home gym users do — this is non-negotiable. Your rack needs proper safeties or spotter arms rated for your working weights. Know how to bail a squat and a bench safely. A first aid kit, kept in the gym, is basic preparedness. For solo lifters: always use safeties, never ego-lift without a spotter, and consider a camera or mirror angled so you can see yourself at the bottom of movements.
Tip: I tried to be as thorough as possible with this post, but if you still want more information on how to build an awesome home gym, check out this other resource- How to Set Up a Home Gym: The Complete Beginner’s Guide. In it I discuss some of the topics we covered, but dive deeper into specific gym layouts, equipment, and essential details to create your ideal “Iron Paradise”– feel free to check it out!
8. The Gym You Build Reflects the Athlete You’re Becoming
There’s a moment every person experiences when they’ve done it right — when they walk into their home gym for the first time and think, this is exactly what I needed. The flooring feels solid underfoot. The rack is exactly where it needs to be. Everything has a place. And training, for the first time in a long time, feels like something to look forward to rather than something to schedule around life.
That’s what this is really about. Not the equipment. Not the square footage. The environment you’re creating — a space that removes every excuse, eliminates every friction point, and quietly tells you every time you walk in: this is who you’re training to become.
Learning how to build a home gym the right way is not about following a perfect checklist. It’s about making intentional decisions that compound over time. You start with purpose (what are you training for?), move through planning (does your space support that training?), and arrive at execution (the right equipment, in the right order, in a space designed for focus).
Your home gym doesn’t have to be finished to be effective. It just has to be thoughtfully started. Every great gym begins with a cleared floor, a few key pieces of equipment, and the decision to stop waiting for the right moment and create the right environment.
If you’re ready to move from planning mode to action, start with the SOMA.FITNESS Free Home Gym Planning Checklist. It walks you through every decision covered in this guide — from space measurements to phased equipment priorities — so you can build your home gym with confidence and without the expensive mistakes that derail most first-time builds. Because when you know how to build a home gym the right way, you’re not just setting up equipment. You’re building the foundation your transformation stands on.


Leave a Reply