If you’re reading this article, it’s most likely not an accident. Whether it was the banging on the ceiling above you in reaction to your loud weight drop, or worse a straight-forward noise complaint from your neighbor– you want to soundproof your home gym. This is understandable; home gyms are great, but they’re no libraries. Whether from continuous jump rope slaps, powerful strides on treadmills, or awesome bass-heavy playlists– home gyms create serious noise. The good news? You don’t need to throw away thousands of dollars or spend weeks on renovations to make this project a reality. Developing a soundproof home gym is definitely achievable, and with the right material and approach, very cost effective too.
This article will help you navigate the most effective budget-friendly methods to reduce noise and vibrations in your home gym, regardless of the room or environment.
Why Home Gyms Are So Noisy (And What You’re Actually Fighting)
Before we jump into solutions, it helps to understand the types of noise you likely deal with in a gym setting:
Airborne noise is the sound that moves through the air; your typical grunting, music, the pounding of a medicine ball, etc. It seeps through walls, doors and ceilings wherever there are gaps or thin materials.
Impact noise creates vibrations that travel through solid foundations, this includes dropped weights, jumping, heavy strides, etc. Because of its potential to travel through even the densest materials, impact noise is a little trickier to solve.
A cheap, soundproof home gym strategy needs to address both. Often budget solutions only have enough resources to cover one, leading to less than satisfactory results– however the techniques below will tackle both.
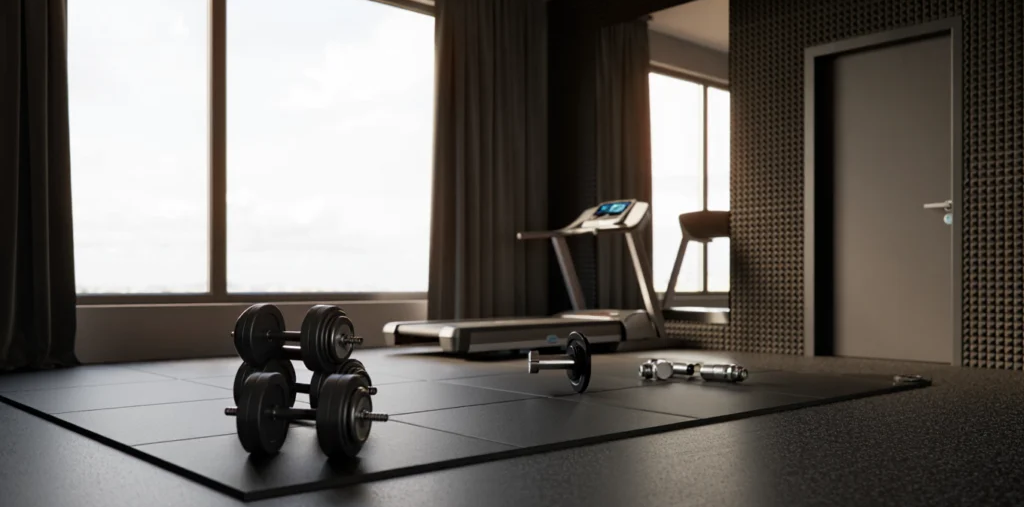
1. Start With the Floor: Rubber Gym Mats and Underlayment
The floor is ground zero for impact noise. Every dropped dumbbell, every box jump landing, every treadmill vibration starts here and radiates outward.
Rubber flooring is the single most impactful investment for a soundproof home gym cheap setup. Interlocking rubber tiles (typically 3/4″ thick) absorb a significant amount of impact vibration before it reaches the subfloor. They’re widely available online for $1.50–$3 per square foot depending on thickness and density.
For even better results, layer a mass-loaded vinyl (MLV) underlayment beneath the rubber tiles. MLV is a dense, flexible material that adds mass to the floor — and mass is the enemy of sound transmission. A layer of MLV under your rubber mats can noticeably reduce how much low-frequency vibration passes through to the room or unit below.
For a dedicated weightlifting platform, consider a DIY stall mat build: two layers of 3/4″ plywood with a horse stall mat on top. This sandwich construction dramatically reduces impact noise from heavy drops and costs a fraction of commercial platforms.
Budget tip: Horse stall mats from farm supply stores (typically sold in 4’x6′ sections at around $40–$50 each) are thicker, denser, and cheaper per square foot than most gym-branded rubber tiles.
Related Article: The Best Flooring for Home Gyms: Rubber, Foam, or Carpet?
2. Seal the Gaps First — Before Anything Else
As they say “the devil is in the details”, and if your goal is to build off of a cheap, soundproof home gym solution, sealing every nook and cranny is just as essential as larger features. Imagine your gym is a cup and sound is water; it doesn’t matter how expensive the cup is– if there are cracks in it, water will leak out.
That being said, inspect your gym floor for any:
- Gaps under the door — a 1/2″ gap under a door can undermine even a well-treated room. Install a door sweep ($10–$20) immediately.
- Electrical outlets and light switches — these are holes in the wall. Foam gasket inserts (sold in packs for a few dollars) go behind the cover plates to seal them.
- HVAC vents — these are sound highways. Flexible duct insulation wrap ($15–$25) can reduce noise transmission through the ductwork.
- Window frames — use weatherstripping foam tape around the perimeter of windows to eliminate air (and sound) gaps.
Sealing gaps costs almost nothing and delivers immediate results, especially for airborne noise. If you want a soundproof home gym cheap, this is where you start.
3. Add Mass to Your Walls With Moving Blankets or MLV
Sound passes through thin, lightweight walls easily. The more mass you add, the harder it is for sound waves to vibrate the wall and pass through.
Moving blankets are the classic budget solution. Hang them on the walls using curtain rods, command hooks, or nail strips. They won’t give you studio-quality soundproofing, but they meaningfully reduce airborne noise — particularly mid and high frequencies — and cost $20–$40 for a pack of several. Great for a soundproof home gym cheap approach when you’re in a rented space or don’t want to modify walls permanently.
Mass-loaded vinyl (MLV) is a definite upgrade from the moving blanket. It can be hung directly on walls or attached behind drywall if you expect to do any renovations. The price point may give some pause at $1–$12 per square foot, however,it still stands as a very effective solution for its price. It is drastically better at restricting sounds, particularly for low-frequency bass from speakers or rumbling cardio.
To get the most out of both, try hanging MLV and then covering it with moving blankets for a two-layer setup that’s still soundproof home gym cheap by any professional standard.
4. Acoustic Panels for Echo and Mid-Range Frequencies
Let’s be clear about what acoustic foam panels and fabric-wrapped acoustic panels actually do: they absorb sound within the room, reducing echo and reverberation. They do not stop sound from leaving the room. That’s an important distinction.
However, they serve two useful purposes in a home gym:
- They improve sound quality inside the gym — your music sounds better, you can talk without shouting, and the overall acoustic environment is less fatiguing.
- They reduce the amount of echo that gets re-amplified by your speakers, which indirectly lowers the volume you need to feel the same impact — meaning less overall sound leaving the room.
DIY acoustic panels using rigid fiberglass insulation (like Rockwool Safe’n’Sound or OC 703) wrapped in breathable fabric are far cheaper than pre-made panels. A 2’x4′ panel with frame and fabric costs roughly $15–$25 to build versus $60–$100 to buy. For a soundproof home gym cheap build, DIY panels on the walls and ceiling make a real difference.
Place them at first reflection points — the spots on walls and ceiling where sound from your speakers hits before bouncing to your ears. You can find these with the “mirror trick”: have someone slide a mirror along the wall while you sit in your typical position; wherever you can see a speaker in the mirror is a first reflection point.

5. Decouple Your Equipment From the Floor
Even with thick rubber mats, some equipment transfers vibration directly into the structure. Treadmills and ellipticals are especially bad for this because their motors run continuously at a frequency that resonates with many building structures.
Anti-vibration pads placed under treadmill feet (available for $10–$30) act as isolators, breaking the direct contact between the machine and the floor. These are different from rubber mats — they’re specifically engineered to absorb motor vibration at specific frequencies.
For cardio equipment, rubber isolation feet or equipment mats with a dense foam core are another inexpensive option. The goal is to interrupt the path that vibration travels — from machine to floor to structure to your neighbor’s ceiling.
Even something as simple as placing your jump rope station on a double layer of rubber mat (rather than single layer) reduces the sharp impact of each landing.
6. The Door: Your Biggest Weak Point
A standard hollow-core interior door is essentially a drum — it’s light, it resonates, and it’s terrible at blocking sound. Short of replacing it, here’s how to address it on the cheap:
- Door sweep + weatherstripping: Seals the gap under and around the door ($15–$30 total).
- Door seal kits: These adhesive strips go around the door frame and create an acoustic seal when the door is closed. Far more effective than basic weatherstripping.
- Mass added to the door itself: You can hang a moving blanket, a sheet of MLV, or even a heavy curtain on the inside of the door. Adding mass makes the door harder to vibrate, which means less sound gets through.
- Double door curtains: A heavy floor-to-ceiling curtain hung a few inches in front of the door creates an air gap and adds another absorption layer.
None of these options make a hollow door as effective as a solid-core door, but combined they get you surprisingly close — and the total cost for all of the above is typically under $60.
7. Don’t Forget the Ceiling
If your gym is above a living area or a neighbor’s apartment, the ceiling is as important as the floor. The problem is that ceiling treatments are more awkward to install without renovation.
Budget-friendly options include:
- Hanging acoustic panels or moving blankets from the ceiling joists using eye hooks and S-hooks. Not glamorous, but effective.
- Resilient channel or hat channel with drywall — if you’re willing to do minor renovation, this decouples the drywall from the joists and dramatically reduces impact transmission. It’s the single biggest ceiling upgrade for noise reduction.
- Green Glue compound between drywall layers — if you’re adding a second layer of drywall, Green Glue applied between layers converts sound energy into heat. A tube costs about $15–$20 and covers roughly 16 square feet.
Even if you only hang a few layers of moving blankets from the ceiling, you’ll notice a reduction in how much high-frequency sound escapes upward.
Putting It All Together: A Soundproof Home Gym Cheap Priority Order
If budget is limited, here’s the sequence that delivers the most impact per dollar spent:
- Rubber floor mats — most impactful single purchase
- Gap sealing (door sweep, weatherstripping, outlet gaskets) — nearly free, huge difference
- Moving blankets on walls — cheap and immediately effective for airborne noise
- MLV underlayment or wall treatment — step up in performance
- Anti-vibration pads for equipment — essential if you run cardio machines
- DIY acoustic panels — improves in-room sound and reduces volume needs
- Ceiling treatment — address last if budget allows
You don’t need to do everything at once. A soundproof home gym cheap build is often an iterative process — tackle the biggest noise sources first and layer from there.
Final Thoughts
Ensuring a soundproof home gym is a matter of strategy rather than spending. When you combine adding mass, filling gaps, and decoupling equipment from structure, a sound-contained gym is possible on a very reasonable budget. Also, when you compound these strategies with the use of rubber mats, MLV, moving blankets, door seals, and anti-vibration pads, you can build a near professional-grade soundproof home gym. You deserve to workout without worrying about noise levels and other people’s complaints. With this information at your disposal, enjoy rocking out and lifting heavy!
Related Article: How to Set Up a Home Gym: The Complete Beginner’s Guide


Leave a Reply