
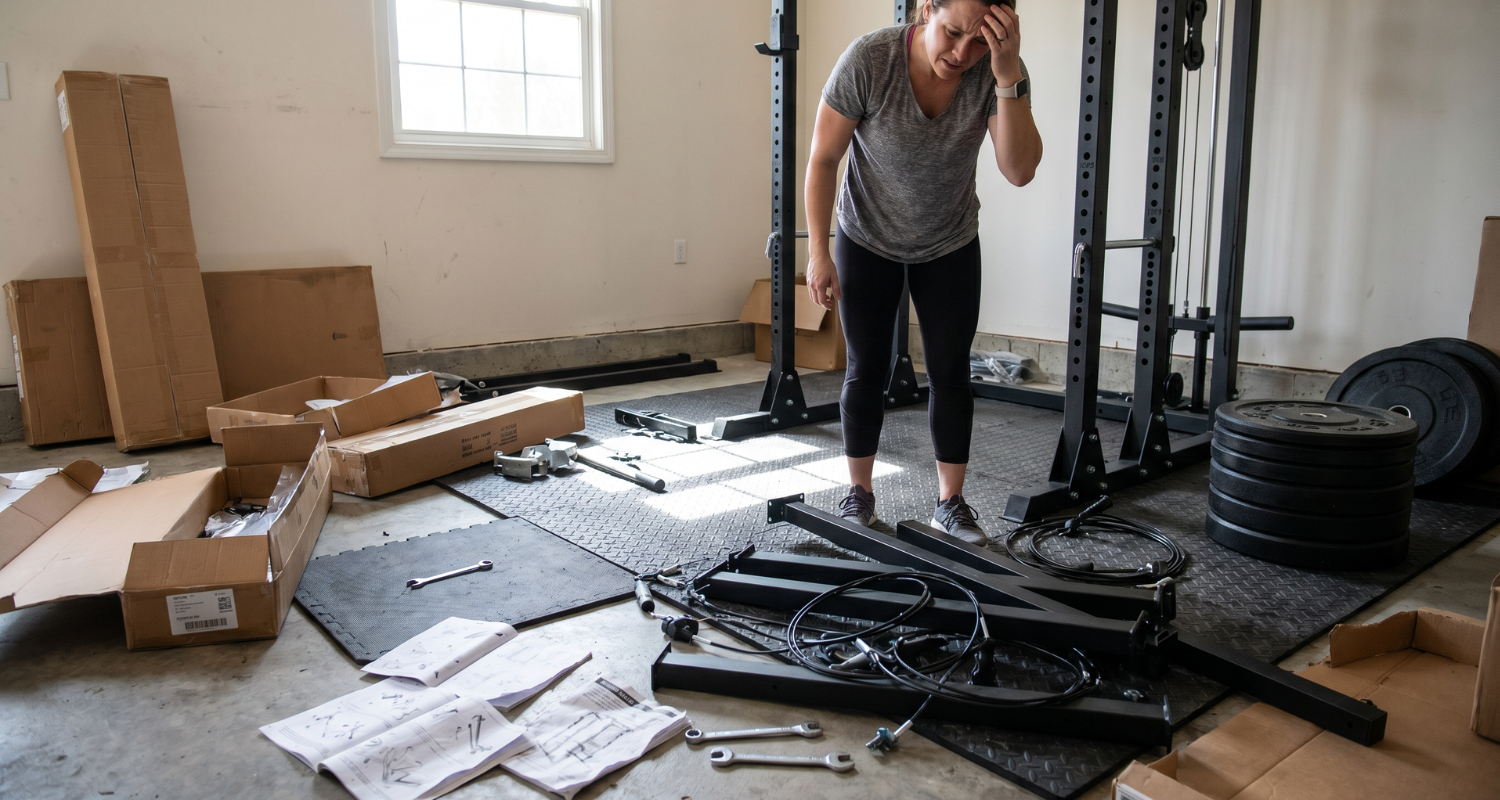
If you’re reading this before you’ve bought anything, you’re already ahead of most people I work with. Because here’s what nobody tells you when you start planning a home gym: the layout mistakes that actually cost you money almost never happen in the room. They happen at your kitchen table, three weeks before the equipment even arrives — in the decisions you make about what to buy first, how much space to commit to, and in what order.
Most home gym layout mistakes get talked about as a measuring problem. Leave more clearance here, angle the rack there. That’s real advice, and it matters — but it’s step two. Step one is the sequence of decisions that determines whether you even need to fix your clearance later, or whether you’re re-buying a bench you already own because the first layout never had a chance.
I’ve watched clients spend more money undoing a home gym than they spent building it the first time. Not because they picked bad equipment. Because they made good equipment decisions in the wrong order. This article isn’t about tape measures. It’s about the seven decisions — made roughly in the order most people actually make them — that quietly turn a home gym build into an expensive do-over.
1. Buying Equipment Before You’ve Committed to a Space
This is the mistake I see most, and it’s the one with the highest price tag attached, because it happens first and everything downstream inherits the problem.
Here’s the pattern: a sale hits, or a piece of equipment gets recommended in a group chat, and it gets purchased before there’s an actual room locked in for it. The buyer has a vague sense of where it’ll go — “probably the garage” — but no measurements, no commitment, no plan. Then the equipment shows up, the garage turns out to have a water heater eating four feet of usable wall, and now there’s a rack that doesn’t fit where it was supposed to and a decision to make: cram it in somewhere worse, eat a restocking fee, or sell it used at a loss.

That’s the real cost of buying-first. It’s not hypothetical — it’s shipping fees back to a retailer, it’s a 20–30% haircut reselling “like new” equipment on the secondhand market, it’s weeks of a garage half-full of boxes because nothing has a home.
What I tell people: the room gets chosen and measured before a single item goes in the cart. Not roughly measured — actually measured, walls, ceiling height, door swing, the works. If you don’t have a tape measure and a sketch of your space before you’re browsing equipment, you’re shopping blind.
Related Post: How Much Space Do You Really Need For a Home Gym?
Action step: Before you buy anything, walk your candidate space with a tape measure and write down four numbers: total floor footprint, ceiling height, the location of every door and window, and any fixed obstruction (water heater, support post, stairs). That sketch — not a wish list — is what should shape your first purchase.
2. Designing for the Equipment You Want, Not the Body You’re Training
This is one of the most common home gym planning mistakes, and it’s rarely about bad taste in equipment. It’s about designing around aspiration instead of behavior.
I see it constantly: someone plans a layout with a squat rack, a cable tower, a full dumbbell set, and a treadmill — because that’s what a “complete” home gym looks like. But when I ask what their last 90 days of training actually looked like, the honest answer is usually three lifting sessions a week and almost no cardio. The layout gets built for the gym they wish they used. The equipment that actually gets touched — the rack, the bench — ends up squeezed into a corner, while a treadmill collects laundry in the zone that got the best spot in the room.
The cost here isn’t always obvious upfront, but it compounds. Money goes toward equipping a zone that’s used once a month, while the zone doing the real work is underbuilt and undersized. And a year in, that treadmill either gets sold at a loss or becomes the most expensive drying rack in the house.
What I tell people: plan your layout around the body you’re actually training, not the one you’re training for. Your current habits are the most honest planning document you have.
Action step: Before laying out a single zone, pull your last 90 days of actual training — an app log, a paper log, or just honest memory. Let that data (not the equipment catalog) decide how much square footage and budget each zone gets.
3. Choosing Flooring After Equipment Instead of Before
This is one of the most expensive home gym setup mistakes, and it’s almost never discussed, because most layout advice skips straight to where equipment goes and assumes the floor underneath is a solved problem. It isn’t.
The pattern looks like this: equipment arrives first, and flooring gets solved piecemeal — a few interlocking mats under the rack, a yoga mat for the floor work corner, maybe a leftover rug under the dumbbells. It works, technically. But mismatched flooring creates tripping lips between sections, uneven surfaces that throw off a barbell’s path during deadlifts, and gaps that never quite get filled because by then, equipment is already sitting on top of them.
Then, six months to a year later, the “real” flooring purchase happens — because the patchwork solution never actually worked — and now flooring has been bought twice. That’s not a small cost. Full-footprint rubber flooring for even a modest space runs into real money, and buying it twice is one of the more avoidable home gym layout mistakes on this list.

There’s a subtler cost too: the wrong flooring choice for your subfloor. Dense rubber laid directly over unsealed concrete in a garage or basement can trap moisture against the slab, which over time damages both the flooring and anything metal sitting on it — plates, rack feet, adjustable benches.
Related Post: Best Home Gym Flooring in 2026: Rubber vs Foam vs Mats (Complete Guide)
What I’d Advise: flooring is infrastructure, not decoration. It gets planned and installed for the whole footprint, before final equipment placement — not patched together as equipment shows up.
Action step: Measure your total floor footprint before ordering anything. Choose flooring rated for your heaviest expected load — a dropped barbell, a loaded plate tree — and confirm it’s appropriate for your specific subfloor (concrete slab, wood subfloor, existing carpet) before installing it wall to wall.
4. Underestimating Structural and Utility Costs Until It’s Too Late
This is the decision that hurts the most, because unlike a flooring redo, structural and utility problems are seriously difficult — and expensive — to fix after a layout is finalized.
Most home gym spaces were never built with training equipment in mind. That becomes a real issue the moment your plans involve anything hanging from the ceiling — a pull-up rig, a TRX anchor, a mounted punching bag — and nobody’s checked what the joists above that spot can actually hold. It becomes a real issue in a converted garage or basement where ventilation was designed for a car or a water heater, not for someone breathing hard through a HIIT circuit in July. Discovering either problem after the layout is finalized turns a planning decision into a construction project.
Powered equipment adds another layer most people underestimate until the breaker trips mid-session. A treadmill alone can pull 15–20 amps — often more than a single household circuit was designed to share with lighting, a fan, and a phone charger.
What I tell people: structural and electrical questions aren’t a “we’ll figure it out” line item — they get answered, and budgeted for, during the planning phase, right alongside the equipment budget.
Action step: Before finalizing anything that mounts, hangs, or draws serious power, get a straight answer on joist load, ceiling height clearance, and outlet/circuit capacity — a quick consult with an electrician or contractor is a small, one-time cost compared to retrofitting after the fact.
5. Building a Layout With No Room to Grow — or Change
Of all the home gym layout mistakes on this list, this is the one that most directly duplicates spend, because it doesn’t just cost money once. It costs money twice.
It happens when a layout is designed to be exactly full on day one — every square foot accounted for, no slack anywhere. That works fine until life does what life does: a training partner joins, an injury shifts your programming toward a modality you don’t currently have equipment for, or you simply outgrow your starting setup faster than expected. When that happens to a layout with zero flex space, there’s no adjustment to make. There’s only a full re-layout — which usually means re-buying equipment that no longer fits the new plan, on top of what you already spent.
This is the single most expensive mistake in raw dollar terms, because it’s not really one purchase gone wrong. It’s a full duplicate build.

What I’d Advise: design the first version of your layout to bend, not to be finished. Favor freestanding, moveable equipment early — pieces on casters, adjustable racks instead of permanently bolted ones — and save permanent installs for once your routine has actually proven itself over months, not weeks.
Related Post: Home Gym Design Ideas (Beautiful and Functional Spaces)
Action step: Reserve 15–20% of your total footprint as flex space from the start, even if it means a slightly smaller initial layout. That reserved space is what lets your gym absorb change instead of requiring a rebuild.
6. Skipping a Scaled Layout Plan and “Eyeballing It”
If you’ve been searching for how to set up a home gym, this is often the exact step that gets skipped — and it’s the one with an immediate, physical cost.
The pattern: equipment gets assembled first, then arranged by feel, directly in the room. It seems efficient — why plan on paper when you can just move things around in real life? But heavy equipment (a loaded rack, an assembled bench, a full weight tree) is genuinely difficult to move once it’s built. When “eyeballing it” doesn’t work — and it usually doesn’t, because a room always looks different with furniture in it than it did empty — that equipment has to be physically relocated after assembly. That’s wasted labor at best, and at worst it’s scraped flooring, scratched paint, or a dinged piece of equipment that was never meant to be dragged across a room.
A scaled plan costs you twenty minutes. A wrong guess costs you an afternoon of moving something that weighs more than you do.
What I Advise: plan to scale before anything gets assembled — it doesn’t need to be sophisticated. Grid paper and a ruler works. Free room-planning apps work. Painter’s tape marking full footprints directly on your floor works, and it has the added benefit of letting you physically walk the space before committing to it.
Action step: Before assembling a single piece of equipment, map your layout to scale using any of the above methods, and walk through it as if you were training. Adjust the plan — not the equipment — until it works.
7. Treating Your Layout as a One-Time Decision Instead of a Budget Line
This is the mistake that ties the whole list together, because it’s the one that determines whether the first six ever get corrected — or whether small problems are left to grow into expensive ones.
Most people plan a home gym as a single project with a start and an end date. Once it’s built, it’s “done,” and any future change — a new section of flooring, an added outlet, a shelving overhaul because storage never quite worked — gets treated as an unplanned crisis expense instead of routine maintenance. The problem is that layouts are living systems. They shift as your training shifts. A storage problem ignored for a year doesn’t stay small; it becomes a full weekend and a bigger check than it needed to be, because it was deferred instead of budgeted.
A New Perspective: the smartest home gym owners I work with treat their layout the way they’d treat any part of their home — something with a small, ongoing maintenance budget, not a single build that’s never touched again.
Action step: Set aside a modest recurring amount — even $25–50 a month — specifically for layout adjustments. Small, planned fixes stay small. Deferred ones don’t.
Planning-First vs. Buying-First: What It Actually Costs You
| Subject | Planning-First | Buying-First |
|---|---|---|
| Initial pace | Slower — measuring, sketching, budgeting before purchases | Fast — equipment ordered immediately |
| Equipment fit | Matched to actual room and training habits | Frequently mismatched, leads to returns or resale |
| Flooring | Installed once, full footprint | Often installed twice (patchwork, then “real”) |
| Structural surprises | Identified and budgeted early | Discovered mid-build, expensive to retrofit |
| 12-month outcome | Layout adapts to life changes | Frequently requires a full re-layout |
| Total cost over 12 months | Equipment + planning time | Equipment + returns/resale losses + redo costs |
The pattern holds across almost every client I’ve worked with: planning-first costs more patience upfront. Buying-first costs more money later.
A Simple Decision Order That Avoids Most of This
If there’s one thing to take from this list, it’s that home gym layout mistakes are rarely about a single bad call — they’re about decisions made out of order. Here’s the sequence I actually walk clients through, and it compresses everything above into something you can follow start to finish:
Audit your real training habits → commit to and measure your space → resolve structural and electrical questions → install flooring for the full footprint → build a scaled layout plan → buy equipment matched to that plan → reserve flex space for what comes next.
Bringing it All Together
Notice what’s not first on that list: buying equipment. That’s intentional. Every home gym layout mistake in this article traces back to skipping ahead in this order — buying before committing, decorating before flooring, assembling before planning to scale. Follow the sequence, and most of the expensive redos simply never get a chance to happen.
Your home gym isn’t just a room with equipment in it — it’s the environment your training, your consistency, and eventually your results get built inside of. Get the decisions right before the equipment shows up, and you’re not just avoiding costly mistakes. You’re building a space that’s actually built to support who you’re working to become.
If you want the exact framework I use to walk clients through this decision order — including budgeting guidance, structural checklists, and a scaled planning template — grab the free SOMA Home Gym Planning Checklist. It’s built to be used before you buy anything, not after.
Once your decisions are locked in and it’s time to place equipment in the room itself, that’s where clearance, traffic flow, and orientation take over — [Related Post: Home Gym Layout Mistakes (and How to Fix Them)] covers exactly that execution layer.

Leave a Reply