You didn’t build a home gym to have an ugly room you dread walking into. You built it — or you’re planning to — because you’re serious about showing up consistently, and a gym membership was never going to make that easy. But here’s what nobody tells you when you start researching equipment: the design of your space is going to determine how often you actually use it.
This isn’t about aesthetics for aesthetics’ sake. The home gym design ideas that actually work are the ones that make training feel inevitable — where you walk in, the environment does something to your nervous system, and you’re ready to move before you’ve even picked up a weight.
I’ve worked with clients who had beautiful spaces they rarely used and clients who trained hard in spare bedrooms with one mirror and a rubber mat. The difference wasn’t the square footage. It was intentionality. And intentionality is something you can build into any space, at any budget.
Let’s get into it.
The Color Psychology Behind Spaces That Actually Motivate You
Color is one of the most underestimated design levers in a home gym. Most people default to white because it’s safe, or they paint the walls whatever they are and call it done. That’s a missed opportunity.

Research in environmental psychology consistently shows that color affects arousal, perceived effort, and even muscular output. Red and orange tones increase heart rate and energize — great for spaces focused on high-intensity training, powerlifting, or anything that benefits from aggression. Blues and greens have a calming, focused effect — ideal for yoga studios, recovery spaces, or training environments where mindfulness matters. Neutral charcoals and deep grays feel serious and grounded, which tends to work well for dedicated strength training spaces.

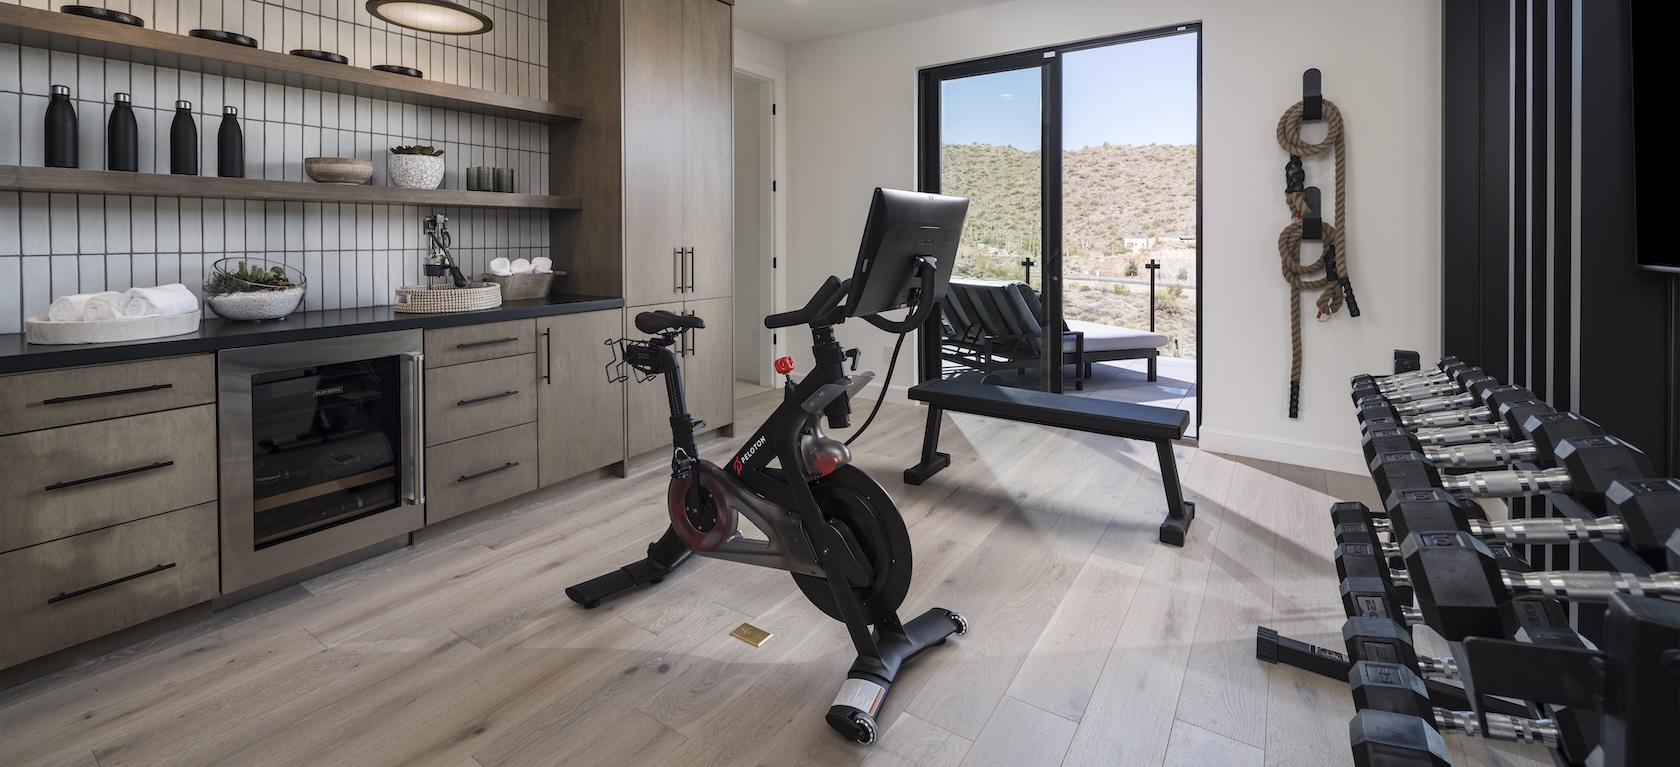
One of the most effective approaches I’ve seen is a base neutral with intentional color through accent walls, equipment choices, or decor. Imagine: dark gray walls with a matte black squat rack and one bold-colored accessory wall — maybe your mirror wall has a warm-toned frame, or your storage shelving is in a deep olive or navy. At the end of the day, the goal is visual coherence that looks intentional, not chaotic.
Actionable takeaway: Before you pick a paint color, answer this question — what does this space need to make me feel? Energized and fired up? Calm and focused? Confident and strong? Be honest with your assessment, because your conclusion may require you to paint your home gym in a color you’ve never used before and one definitely out of your comfort zone. It sounds corny but be honest, be brave, and most importantly be yourself. This is your space, own every corner of it- including its color. Match your palette to that feeling, not to whatever’s “conventionally safe” or trendy on Pinterest.
Lighting Design: The Upgrade That Changes Everything
If we were to walk into any well-designed gym I can guarantee its lighting is doing most of the heavy lifting. Shadows are controlled. The space feels alive and purposeful. This describes the kind of gym that flatters you at every turn, makes you see and believe in the best version of yourself, and most importantly makes you want to come back. This should be (but unfortunately is not) the case for lighting in most home gyms. The lighting in most home gyms, by contrast, is a single overhead fixture that washes everything out and makes the whole room feel like a utility closet.

You don’t need to hire an interior or lighting designer, but you’ll need to understand two things: natural light management and layered artificial light.
Natural light can be your greatest ally, but only when it’s working in your favor. East-facing windows give you morning light — energizing and warm, perfect for people who train early. West-facing windows deliver harsh afternoon sun that can create glare on mirrors and make the space feel overheated. South-facing is the most consistent. If your home gym has windows, consider frosted window film — it diffuses light beautifully, maintains privacy, and eliminates the harsh direct-sun glare that can make afternoon training uncomfortable.
Artificial light requires layering. Having only a single overhead fixture can create problems for two reasons: it creates unflattering downward shadows (which isn’t great when you’re checking form in a mirror), and it gives you zero flexibility. Instead, think in terms of three layers:
- Ambient light — your base illumination. Recessed LED panels are ideal. Aim for color temperatures between 4000K–5000K (cool white) for a clean, alert feel.
- Task light — directional lighting aimed where you’re actually working. Track lighting is excellent for this. You can angle it toward your lifting area, your mirror, your stretching mat.
- Accent light — this is where design magic happens. LED strip lighting behind mirrors or along flooring edges, a backlit motivational panel, or warm-toned Edison bulbs above a recovery corner can completely transform the atmosphere of a space.

Actionable takeaway: Add one lighting layer you don’t currently have. Even a $30 LED strip behind your mirror changes how the space feels immediately. Start there.
Related Article: Best Home Gym Lighting Ideas (And Why They Matter)
Mirror Placement That Works Harder Than You Think
I know for some the idea of mirrors in a home gym sounds like vanity and a waste of money- but I assure you it’s quite the opposite. They are a coaching tool, a safety feature, and a space-multiplying design element. Sadly if some don’t skip this feature entirely, a vast majority place them incorrectly.
The functional purpose of mirrors is form feedback. You need to be able to see yourself during the primary movements you’re training: squats, deadlifts, pressing, lunges. That means your mirror needs to be tall enough (floor-to-ceiling is ideal, but at minimum starting at 12 inches from the floor and reaching at least 6 feet up) and placed where you can actually see yourself during the lift — not behind you, not off to the side.
The most common mistake: a small mirror on the wrong wall. If your primary lifting happens in the center of the room and your mirror is on a side wall, you’re constantly turning to check form instead of seeing it in your natural lifting position. Consider how you train first, then place the mirror where it serves that training.
From a design standpoint, mirrors are one of the most powerful tools in a small space. A full mirror wall — even one wall of a 10×10 room — creates a very satisfying illusion. It doubles the perceived depth of the space and makes even modest square footage feel expansive and intentional. For spaces under 150 square feet, a floor-to-ceiling mirror on the longest wall is one of the highest-ROI design moves you can make.
For aesthetics without the cost of custom mirror walls, consider large frameless gym mirrors with minimal visible hardware, or pre-framed gym mirror panels that tile cleanly. Black metal frames have become popular because they photograph well and hold up to humidity better than wood.

Actionable takeaway: Measure the wall across from your primary lifting position. Even one 48″x72″ frameless mirror panel on that wall will transform your training and your space. Order it this week.
Flooring Aesthetics: Where Function Meets Design
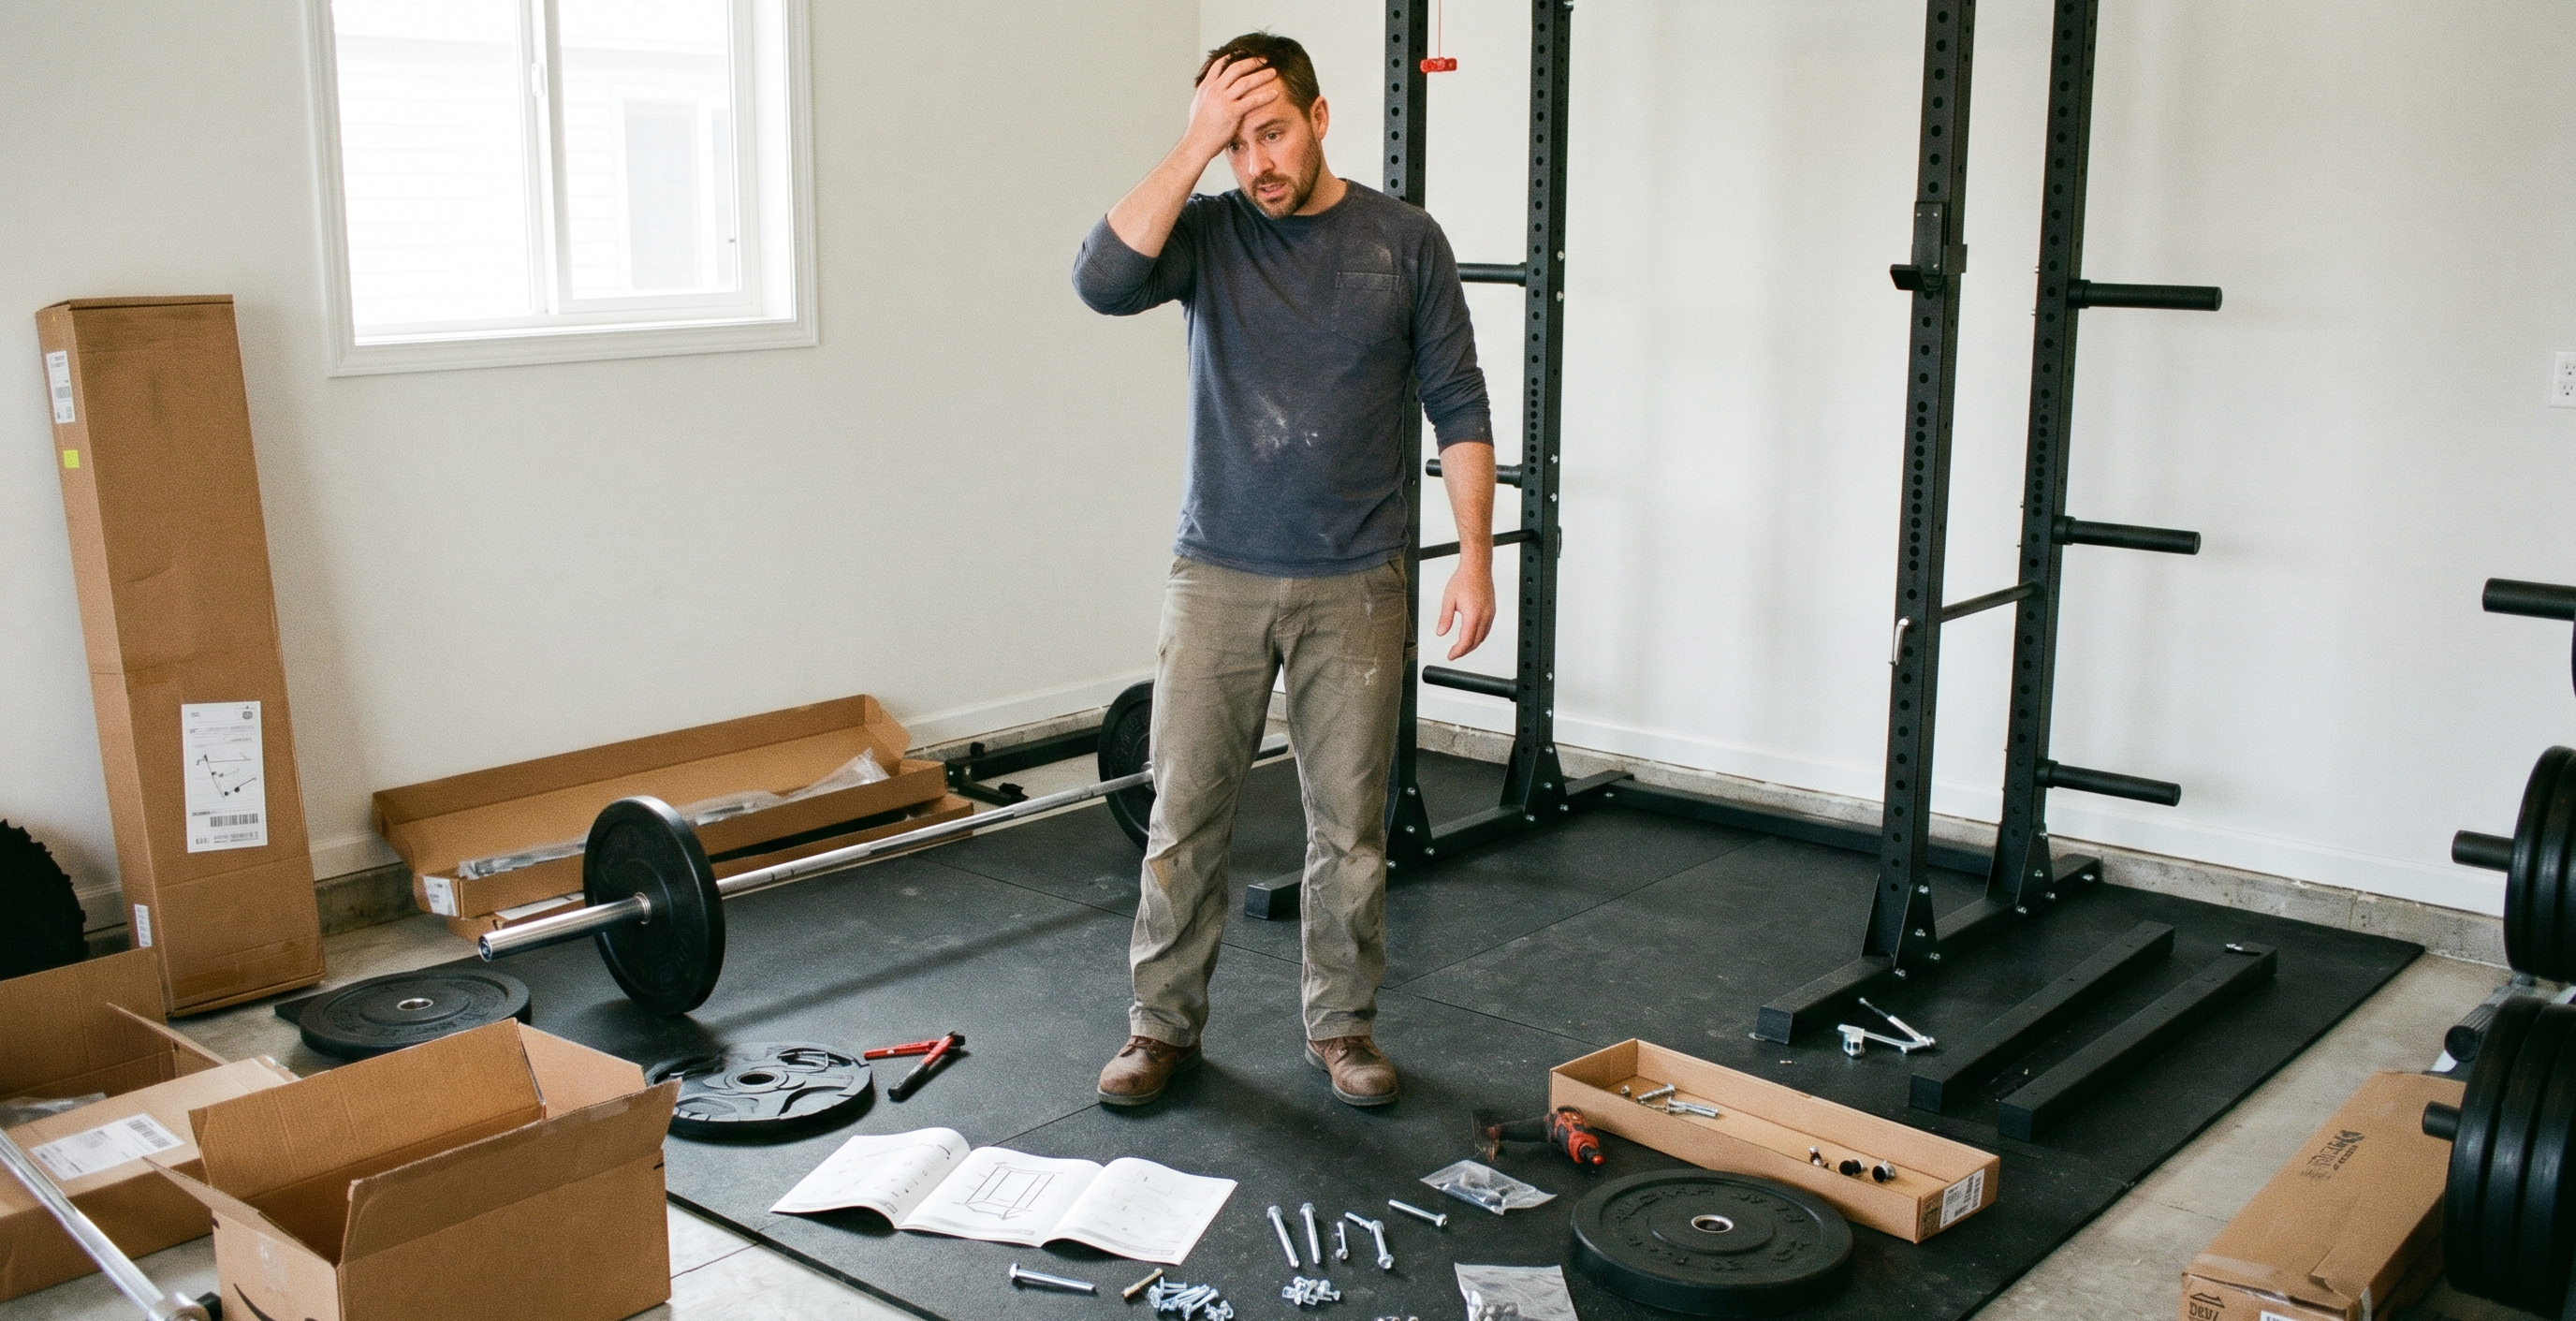
I believe that home gym owners must re-interpret the importance of home gym flooring. Quality flooring isn’t an option anymore, it’s an absolute necessity. If you’re planning to build your home gym without the serious consideration of flooring- you should stop now. I know I sound dramatic, but there’s a good reason.
Flooring is where most home gym design briefs end with “just get rubber mats” and move on. That’s fine advice from a protection standpoint, but it leaves a lot of design potential on the table — and some real functional nuance unaddressed.
The rubber mat default works. It protects your subfloor, absorbs impact, and gives you traction. But rubber flooring comes in more formats and colors than most people realize, and the choice matters aesthetically.

Rolled rubber in black is the workhorse standard — durable, seamless-looking, and relatively affordable. But it reads visually as dark and industrial, which works great for dedicated lifting spaces and less well for multipurpose rooms or lighter, more modern aesthetics.
Rubber tiles give you more design flexibility. Charcoal-flecked gray tiles look dramatically more elevated than solid black. Some manufacturers offer tiles with subtle texture variation that breaks up the visual monotony of a large floor. There are also interlocking options in lighter colors — sand, slate, even soft greens — that look significantly more finished.
The dual-zone floor is one of my favorite design strategies for home gyms over 10×10 feet: a performance zone in rubber (your lifting, HIIT, or cardio area) with a recovery or stretching zone in a contrasting material — foam mat tiles in a lighter color, a large rolled yoga mat, or even a small area rug in a space designated for cooldown and mobility work. The visual contrast creates intentional zones and makes the room feel larger and more thoughtfully designed.
Actionable takeaway: If you’re building new, go with at least 3/8″ rubber for your primary zone — it’s the performance minimum. If you’re upgrading existing rubber, adding one contrast mat or a defined recovery zone immediately elevates how the whole space reads.
Related Article: Best Flooring for Home Gyms: Rubber, Foam, or Carpet?
Storage That Looks Like It Belongs There
Nothing undermines a well-designed home gym faster than equipment dumped in a corner, bands hanging off a rack crossbeam, and plates scattered across the floor. Storage is a design problem masquerading as a logistics problem, and the solution matters both aesthetically and practically. Remember; style and functionality are natural compliments. When you’re designing a space which you’ll use and move things regularly, integrating both will enhance its utility and beauty without having to overcompensate for one or both.
The goal is storage that looks intentional — which means it has to be furniture-quality in finish (even if not in price), properly sized for what you’re storing, and placed with visual purpose.

For dumbbells, wall-mounted horizontal racks in matte black steel read as sleek and intentional rather than commercial. They keep your floor clear, which visually expands the space, and they present dumbbells as part of the design rather than clutter. Compact A-frame racks work well in corners. Avoid the cheap chrome vertical racks that tip forward — they look bad and they’re a hazard.
For resistance bands, jump ropes, and small accessories, a set of uniform hooks on a single board (what’s sometimes called a pegboard or slat wall) is one of the cleanest storage solutions available. Painted to match your wall or mounted with a contrast frame, it looks designed rather than improvised.
For plates and barbells, a vertical barbell holder that doubles as a plate tree keeps your heaviest equipment in one place, off the floor, and organized. Again, matte black finishes photograph and present better than chrome in home settings.
The deeper principle here: uniformity of finish does more for your space than the cost of individual pieces. Four mismatched holders look like an afterthought. Four matte black holders from different brands look like a collection.

Actionable takeaway: Audit your current storage. Pick one zone — dumbbells, accessories, or bands — and replace whatever you have with a wall-mounted solution in a consistent finish. The visual impact is immediate.
Related Article: Best Wall Mounted Home Gym Equipment for Small Spaces
Minimalist vs. Maximalist: Which Design Philosophy Actually Serves Your Training?
This is one of the more interesting design tensions in home gym culture, and both camps have real arguments.
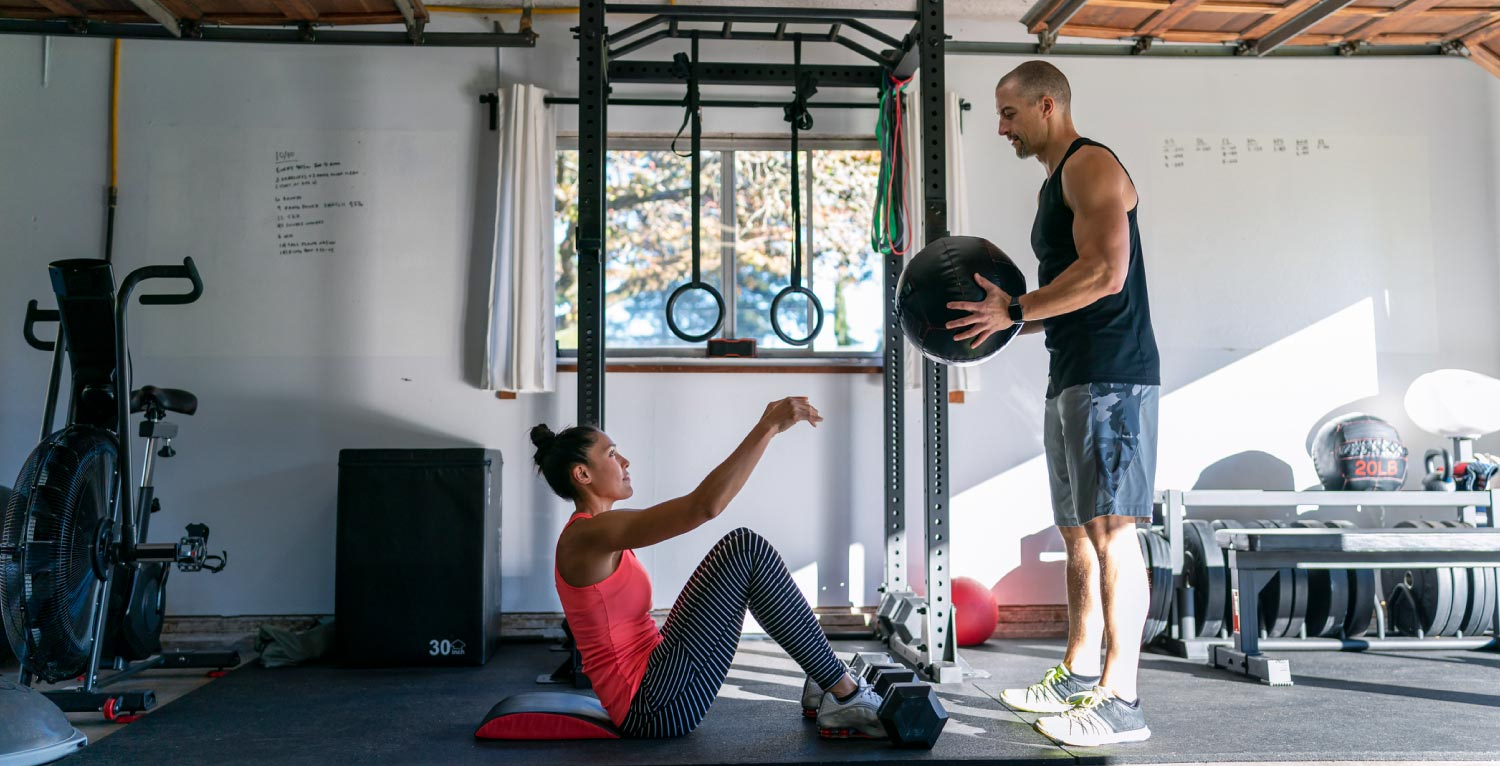
The minimalist home gym — often called a “garage gym” aesthetic even when it’s not in a garage — is built around a tight equipment selection, clean sightlines, and the philosophy that less is more. The appeal is focus: you walk into a space with one barbell, one rack, and a set of plates, and there’s nothing to do but train. The design mirrors the intention. Minimalist gyms tend to age well and photograph consistently — they’re the ones filling up Pinterest with clean, aspirational content.
The trap of minimalism is using it as an excuse to under-equip. If your training genuinely requires variety and you’ve stripped your space down to aesthetic minimalism rather than intentional minimalism, you’ll end up training around limitations rather than through them.
The maximalist home gym embraces abundance — multiple cardio options, a full dumbbell set, cable machine, specialty bars, recovery tools, audio/visual setup, a real flooring system. Done well, it feels like a serious training facility that happens to be in your home. Done poorly, it feels like a commercial gym’s storage room.
The key to maximalism working aesthetically is organization and coherence. When everything has a home, when finishes repeat across equipment, when storage is handled — maximalist can look incredibly impressive. When it’s not handled, it’s just a lot of stuff in a room.

The honest trainer’s take: Most people benefit from a middle path. Buy the equipment your training actually requires, then design the space around that equipment with real intention. Don’t minimize to look good and don’t maximize to feel complete. Start with your training program and work backward.
Actionable takeaway: Write down the five training modalities you do most consistently. Build your equipment list — and your design concept — around those five things first. Anything else is optional.
Related Article: Minimalist Home Gym Setup- Solid Training with Less Equipment
Before and After: What a Real Design Transformation Looks Like
Let me walk you through two client scenarios that illustrate what these principles look like applied in the real world.
Scenario One: The Spare Bedroom Convert (10×11 ft) Starting point: beige walls, carpet, overhead ceiling fan, dumbbells on the floor, a yoga mat rolled in the corner, no mirrors.
After: walls painted a deep charcoal (SW Peppercorn, if you want the exact spec), carpet replaced with 3/8″ black rolled rubber over foam underlayment, a 48×72″ frameless mirror mounted on the long wall, a wall-mounted dumbbell rack in matte black, a single track light above the mirror, LED strip lighting behind the mirror frame. Total transformation cost: approximately $800–$1,100 depending on dumbbell rack selection and whether flooring is DIY’d.

The result doesn’t look like a repurposed bedroom. It looks like a real gym. More importantly, this client went from training two days a week to five — not because the equipment changed, but because the environment changed what walking in felt like.
Scenario Two: The Garage Gym Glow-Up (20×22 ft) Starting point: concrete floor, fluorescent tube lights, scattered equipment, one full mirror on the wrong wall, extension cord running across the floor.
After: rubber tile flooring in the lifting zone, large foam tiles in the stretching/mobility zone, recessed LED panels replacing the fluorescent lights with supplemental track lighting over the squat rack and bench area, mirror repositioned to face the primary lifting direction, slat wall organization panel for accessories, a TV mounted at eye level for programming reference. Total transformation cost: approximately $1,500–$2,500 depending on existing equipment and whether electrical was DIY-eligible.

The takeaway isn’t the specific dollar amounts — it’s that the bones were already there. Both spaces needed curation, not a complete rebuild.
Budget-Friendly Design Upgrades That Actually Move the Needle
Not every upgrade needs a five-figure budget. Here are the changes that consistently deliver the biggest design return per dollar, in rough order of impact:
1. Paint the walls ($30–$80). This is the single highest-impact, lowest-cost change available to almost any home gym. Pick a color that matches the energy of your training, use a satin or semi-gloss finish (easier to wipe down), and do it yourself in an afternoon.

2. Swap your lighting ($60–$200). One LED track light or a set of recessed LED panels will do more for your space’s atmosphere than almost any equipment purchase. Color temperature 4000K–5000K, dimmable if possible.
3. Add one mirror ($80–$300 depending on size). Frameless gym mirrors are significantly more affordable than custom mirror panels. Start with one large piece on your primary wall and add from there.
4. Get your storage off the floor ($40–$150). A wall-mounted dumbbell rack or a single slat wall section with hooks changes the visual noise of a space immediately. The floor clears, the room breathes.
5. Add an LED strip behind your mirror or equipment ($15–$40). This sounds like a small thing. It is not a small thing. It changes the atmosphere of the space at a level that is disproportionate to the cost. Warm white (2700K–3000K) for ambiance. Cool white (4000K) for a more athletic, performance feel.

Actionable takeaway: Pick one item from this list that your current space is missing. Do it this week. These are not “someday when the gym is finished” upgrades — they’re what make the gym feel finished.
Building the Right Environment Is an Act of Commitment
Here’s what I want you to take away from all of this: the design of your home gym is not a finishing touch. It’s a foundation-level decision that shapes how consistently you show up, how hard you push when you get there, and how seriously you take the project of transforming your body.
Every choice in this space — the color on the walls, the placement of your mirrors, the way your storage is organized, the light you train under — is either pulling you toward your potential or nudging you away from it. That’s not hyperbole. Environment is one of the most powerful behavioral levers that exists, and you have direct control over yours.
The best home gym design ideas aren’t the ones that look best on Instagram. They’re the ones that make it harder not to train — that create an environment so intentional, so specific to you and your goals, that walking past the door and not going in starts to feel wrong.
Build that space. Design it with the same intention you bring to your training. Because the environment is the first act of becoming who you’re capable of being.


Leave a Reply