

You didn’t choose a home gym because you have space to spare. You chose it because you’re serious — and you’re working with what you have. Maybe what you have isn’t much- it could be a corner of the garage, a spare bedroom, even a basement that currently looks more like a storage unit. No matter the room type, the question remains the same: how do you develop a space capable of producing real results without it taking up more room than you can spare?
The answer isn’t buying less. It’s buying smarter. Space-saving home gym equipment has evolved far beyond a resistance band on a doorknob — the right setup can match a full commercial gym’s training capacity in a fraction of the footprint. This guide will show you exactly how to build it.
A Common Pitfall Before the First Step
There’s one point that trips most home gym owners before they ever pull out their wallets- can you guess what it is? They buy for the space they have instead of planning for the space they need.
There’s a difference. Think about it for a moment, really process what that means. Buying for the space you have is essentially buying with the “means” in mind; finding sales and acquiring equipment that fits in the space. grabbing whatever’s on sale and cramming it in. Planning for the space you need means you’re strategizing using the “means” (your space and equipment) to achieve your “end” (your ideal fitness level and lifestyle). This means mapping out your training style, your movement patterns, your growth over the next 12 months — and then choosing equipment that fits that plan *and* your square footage.
The result of the first approach? A potentially cluttered room that serves for the occasional and sporadic workout. The result of the second? A training environment you actually want to be in.
Everything in this article is selected on one combined criteria: does it deliver serious training capacity while occupying the smallest possible footprint? Not almost. Both, fully.
1. Adjustable Dumbbells: One Set Where 20 Used to Live
I’ve said this countless times on this site and I’ll continue to do so until it’s not true: the first piece of space-saving equipment in every home gym should be a pair of adjustable dumbbells. Period. The math is almost embarrassing when you lay it out: a traditional dumbbell rack covering 5 lbs to 50 lbs requires roughly 10–15 linear feet of floor space and can run over $1,000 for the iron alone. A single pair of adjustable dumbbells occupies less than two square feet and handles the same weight range.
However, to stop at the space argument would be doing adjustable dumbbells a disservice– where they really shine is in their versatility. A 45 minute session could have you perform presses, curls, rows, lunges, or deadlifts– all at different weights. With a fixed-weight set, you’ve got five different dumbbells cluttering your floor mid-workout. With adjustable dumbbells, you can just dial the weight in and keep moving.
What I tell my clients:
Don’t think too hard about the brand. Focus on two things — the weight range and the adjustment mechanism. You want a set that starts light enough for isolation work (12–15 lbs minimum) and goes heavy enough to challenge compound movements (50 lbs minimum for most women, 70–90 lbs if you’re already lifting consistently). The adjustment mechanism should be fast — slow dials break your training rhythm.
The Bowflex SelectTech 552s and the POWERBLOCK Elite series are definite front-runners in this category– though I am also biassed towards the NÜOBELL 580. The Bowflex has a slightly faster dial; the POWERBLOCK is more durable under heavy use. All three will serve you well for years.
Action step: Before you buy, write down your current working weights for your five most common movements. Make sure the set you choose covers those — plus at least 20 lbs overhead for growth.
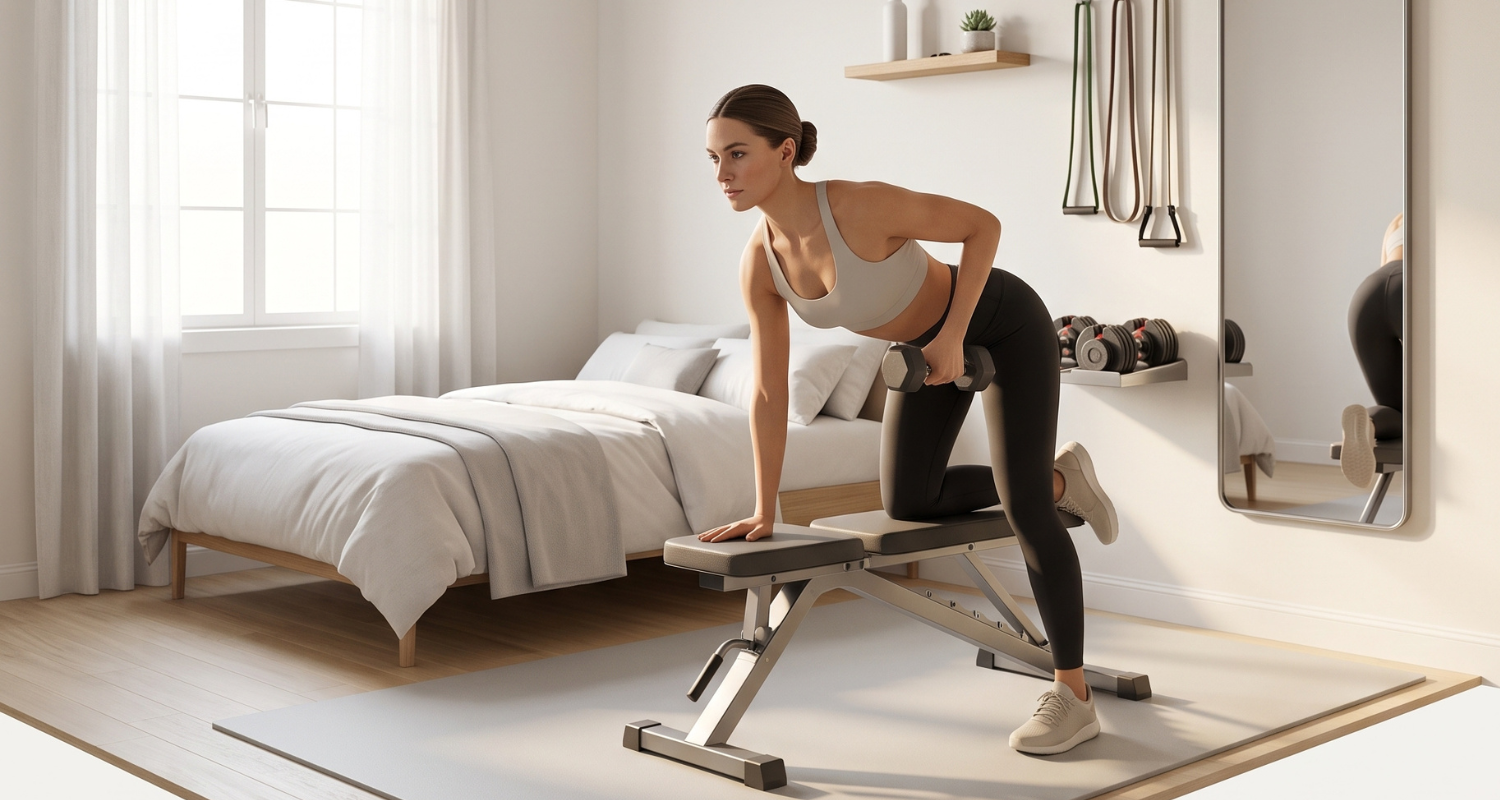
2. Foldable Benches: The Best Investment That Lives Against Your Wall
A weight bench usually comes as a static fixture on wheels. And most people either settle on it occupying a central strip of their gym floor indefinitely, or they skip it entirely. Both are mistakes.
The right foldable bench has the power to change the game entirely. Most folding benches today are rigid under load, can handle up to 600–800 lbs, adjust to multiple incline positions, and fold flat to lean against a wall when not in use. When folded and stored away– it’s only 6 inches deep. When in use– about 4 feet by 1.5 feet. This means it’s a useful size both when you need it and also when you don’t.
What you’re trading for that portability is mostly looks. Foldable benches are narrower than commercial benches in most cases (typically 10–11 inches vs. 12), and some have slightly less padding thickness. However, for 95% of the training you’ll do — pressing, rowing, step-ups, incline work — the trade-off is inconsequential.
What I tell my clients:
Find a foldable bench with at least five back pad adjustments (flat, 30°, 45°, 60°, 85° minimum) and a seat pad that adjusts independently. You’d be surprised how important that last feature is — without an adjustable seat pad, you’ll slide forward on any incline above 45°, which can compromise your pressing mechanics and puts unnecessary strain on your lower back.
The Flybird Adjustable Bench and the REP Fitness AB-3000 are both strong choices that fold genuinely flat. If budget allows, the REP AB-5000 adds commercial-grade padding while maintaining the fold.
Action step: After every session, fold the bench and store it. This isn’t just about space — it trains you to be intentional about when the bench is in use, which keeps your floor clear for mobility work, stretching, and any ground-based training.
3. Wall-Mounted Folding Racks: A Full Power Rack That Disappears
This is the one of my favorite pieces of space-saving home gym equipment, both visually and functionally. Wall-mounted folding squat racks — sometimes called fold-flat racks or wall-mounted power racks — are literally that: a fully functional rack system that folds flush against the wall when not in use, extending only 3–5 inches from the surface.

When deployed, you have access to everything a freestanding rack does: J-hooks for squats and bench press, safety spotter arms, pull-up bar, and optionally, band pegs and cable attachments. When stored, they fold away and the floor beneath them is completely clear.
The only real trade-off installation. Wall-mounted racks bolt directly into wall studs and, in some configurations, require a floor anchor as well. NOTE: This is a must — these racks support hundreds of pounds under load, and a proper installation is a safety requirement, not a suggestion. If you’re renting, or if you’re not comfortable with the installation, a freestanding rack in the smallest footprint you can find is the better call.
For those of you who can install permanently, the PRx Performance Profile® Squat Rack is the industry darling in this category. The Titan Fitness Fold Back Wall Mount Squat Rack offers comparable functionality at a lower price point with a slightly heavier fold-out profile.
What I tell my clients:
If you’re going to barbell train at home, this is the best path that doesn’t require you to sacrifice your floor plan. It takes a couple of hours to install and after that, your training space has real functional and aesthetic options: gym when you need it, open floor when you don’t.
Action step: Before purchasing, use a stud finder to confirm your wall has standard 16-inch stud spacing. Most wall-mounted racks are built around this, but confirm before you buy. If your studs are 24 inches apart, contact the manufacturer directly — some models accommodate this, some don’t.
4. Resistance Bands: The Underestimated Powerhouse That Fits in a Drawer
To preface: I would never use resistance bands as a substitute for free weights. They train differently — the resistance increases as the band stretches, which means peak tension at peak extension rather than consistent throughout the range. For certain movements, especially isolation work, that’s actually an advantage. For others, like heavy compound lifts, bands complement but don’t replace.
In terms of space-saving home gym equipment, resistance bands *are*, without a doubt, the most storage-efficient training tool out there. A full set mind you— covering light, medium, heavy, and extra-heavy resistance — fits in a bag the size of a large clutch. Hung on a wall hook or folded into a bin, they take up virtually zero meaningful floor space.
Used strategically in-tandem with your free weights, bands can drastically expand your training options. Band-assisted pull-ups let beginners work through the full range of motion while building strength progressively. Band-resisted push-ups increase load without equipment. Hip circle bands (loop bands) are almost indispensable for glute activation work before lower body sessions. Pallof press variations with an anchor point are among the most effective core stability exercises available. With a little creativity, your options are nearly endless.
For practical use it helps to have something to anchor them to– but not to worry, many bands come with a door anchor — a foam-padded loop that threads through the door hinge, creating a secure anchor point at any height. If you have a wall-mounted rack, you already have anchor points built in.
What I tell my clients:
Zero-in on a set, not individual bands. You’ll be grateful for the variety later. Look for latex bands with reinforced ends (not the thin figure-8 style, which snap more easily and have limited versatility). Fit Simplify and WODFitters both make reliable sets in the $25–45 range that hold up under regular use.
Action step: Add a small command hook or a designated nail on your gym wall specifically for band storage. The biggest reason people stop using bands is that they end up at the bottom of a bin and feel like a hassle to retrieve. Visible storage means consistent use.
5. Compact Cardio Equipment: When Vertical Storage Changes Everything
Cardio equipment is where space limitations most often derail a home gym plan. Treadmills and ellipticals are massive, expensive, and — in most apartments and smaller homes — simply not viable. But dismissing cardio entirely means leaving a significant piece of your fitness picture unaddressed.
The category that solves this most effectively is compact rowing machines, particularly those designed to store vertically. A rowing machine, when horizontal, typically runs 8 feet long and 2 feet wide — a real footprint commitment. The same machine designed with a vertical storage option stands upright against a wall, occupying roughly 2 square feet of floor space.
The Concept2 RowErg (formerly the Model D) with its standard monorail can be separated into two pieces and stored vertically in minimal space — it’s been a staple of serious home gyms for decades for exactly this reason. The Hydrow Wave is shorter by design and stores upright natively. The NordicTrack RW900 folds vertically with a single pull.
Beyond rowing, consider the assault bike (air bike) if you want high-intensity interval capacity in a small footprint. The frame is compact, there are no rails extending behind it, and the training output — full-body, metabolic, brutal in the best way — rivals anything a treadmill delivers for cardiovascular conditioning.
Jump ropes deserve mention here too. A quality weighted jump rope is four square feet of floor space (the area you’re jumping in) and stores in a pocket. For conditioning work between strength circuits, or as a dedicated cardio session when you’re short on time, a jump rope is the most undervalued cardio tool in the home gym toolkit.

What I tell my clients:
If you’re choosing between a compact rower and any full-size cardio machine, the rower wins on almost every metric that matters in a home gym: footprint, training versatility (it trains the posterior chain as hard as it trains cardio), and durability.
Action step: Measure your ceiling height before ordering a rower with vertical storage. Most stand 7–8 feet when vertical. A standard 8-foot ceiling clears this — barely. Know before you order.
6. Multi-Functional Equipment: One Purchase, Multiple Training Modalities
Multi-functional doesn’t mean compromise. Done right, it means exceptional return on every dollar and every square foot.
The pull-up bar is the simplest example. A doorframe pull-up bar requires no permanent installation, costs $30–60, and enables pull-ups, chin-ups, hanging leg raises, and inverted rows with a suspension trainer clipped to it. Three to four significant movement patterns from one piece of equipment that disappears into the doorframe.
Suspension trainers (TRX and its equivalents) are worth a more detailed look. The entire system stores in a bag the size of a small backpack. Anchored to a pull-up bar, a wall mount, or a door anchor, they enable push, pull, hinge, and core exercises at a difficulty level scaled entirely by your body angle. A TRX system doesn’t replace free weights, but it meaningfully extends your training capacity in zero additional floor space.
The cable machine category has seen genuine innovation in recent years with compact, wall-mounted cable systems. The Archon Fitness Single Stack Cable Machine and similar options mount to the wall (or to a power rack’s upright), provide adjustable cable angles, and fold mostly flush when not in use. A full cable column in a commercial gym occupies 9–12 square feet. A wall-mounted version: 2–3.
What I tell my clients:
Multi-functional equipment should pass one test before you buy it: does it allow you to train the same movement patterns you would with the single-purpose tools it’s replacing? If yes, buy it. If it asks you to modify the movement to fit the equipment, pass.
Action step: Audit your current or planned equipment list and ask how many movement patterns each item enables. A piece that trains two or three patterns efficiently beats two pieces that each train one — and saves significant space and money in the process.
7. Under-Bench and Vertical Storage: The Space That’s Already There

The final piece of the puzzle isn’t a piece of equipment — it’s how you store pieces of equipment. Most home gym spaces have a significant amount of usable storage that goes entirely unaddressed: the vertical space on walls and the floor space underneath equipment.
Under-bench storage is the simplest form of space saving home gym equipment to implement. A foldable bench, when deployed, creates a cavity beneath the frame that can hold a surprising amount: resistance bands, a foam roller, a lacrosse ball, gliding discs, a jump rope, small weight plates. Low-profile storage bins — the kind designed for under-bed storage — slide directly under most bench frames and keep smaller items organized and accessible.
Wall-mounted storage takes this further. A set of J-hooks rated for 50+ lbs can hold a loaded barbell horizontally against the wall when not in use, above head height, clearing significant floor space. Weight plate storage pegs mounted at waist height keep plates off the floor and accessible. A simple pegboard panel — a 2×4 foot section mounts easily to studs — creates a customizable organizational system for bands, straps, belts, and accessories.
The vertical dimension of your gym is almost always underused. Think in terms of zones: floor level (mats, equipment in use), waist level (benches, kettlebells, primary equipment), and above-waist (wall storage for barbells, plates, and accessories). Building out all three zones means you’re using your space three-dimensionally — the way every well-designed gym, regardless of size, actually functions.
What I tell my clients:
Spend one hour on storage organization before you order your next piece of equipment. The odds are good that the room you think is “full” can absorb more once it’s organized properly. Knowing exactly what you have and where it lives also prevents the common mistake of buying duplicate accessories because the ones you own were buried.
Action step: Install at minimum two pieces of wall storage before you consider yourself done: a barbell wall mount (or hooks on your rack) and a plate storage system. Those two installations alone eliminate the most common floor-space offenders in every home gym I’ve helped build.
Related Post: How to Set Up a Home Gym: The Complete Beginner’s Guide
The Bottom Line on Space-Saving Home Gym Equipment
With all this said and done, remember: this whole approach isn’t about training less effectively but choosing your equipment purpusefully. Often it’s believed that to achieve the best results you need more equipment– which usually consumes substantial floor space. Your job is to be more intentional about what earns a place in your space — and then optimize it with an environment that’s functional, organized, and built around your training life.
All of this equipment is how you build a home gym that works at full capacity in 150 square feet, 200 square feet, or whatever space you’ve got to work with. You’re not compromising — you’re creating a purpose-built environment. And a purpose-built environment is the foundation that a training life is built on.


Leave a Reply