
You have a room sitting there right now — holding an old mattress, a few boxes, and the quiet guilt of unused potential. You’ve thought about turning it into a spare bedroom home gym, but you’re not sure what fits, what actually works in a small space, and whether you can make it look like something other than a cluttered storage room with a kettlebell in it.
Here’s what I tell my clients who are in exactly this position: that room is the single most valuable space in your house. A spare bedroom home gym done right isn’t just a convenience — it’s the environment that makes consistent training possible. And consistent training is what actually changes your body.
This guide walks you through everything: dimensions, layouts, equipment choices, dual-use strategies, aesthetics, storage, and three complete budget builds. By the end, you’ll have a clear picture of exactly what to do with that room.
What Spare Bedroom Dimensions Actually Mean for Your Workout Space
To start this process, it’s essential that you measure the room. The best spare bedroom home gym requires accuracy and intention. Don’t guess or eyeball the space, take the time to understand the numbers. You’ll be surprised how much more perspective you’ll gain on your equipment options when you have a clear picture of the limitations of the bedroom.

Most spare bedrooms fall into one of three size categories, and your category determines everything else:
Small spare bedrooms (8×10 to 10×10 ft / 80–100 sq ft)
These dimensions are typical among apartments and older homes, and while it can feel cramped for a potential home gym, you’d be shocked by how much you actually have to work with. With a little bit of strategy this space can easily be converted for strength training, yoga, cycling, or banded work. The only trade-off is that you can’t have equipment that requires a “safety zone” in multiple directions- unfortunately it takes up too much space.
Mid-size bedrooms (10×12 to 11×13 ft / 120–143 sq ft)
are the sweet spot for most people. This is enough space for a power rack or cable machine, a mat area, and basic storage — without the room feeling cramped. If your spare bedroom is in this range, you have genuine flexibility.
Larger spare bedrooms (12×14 and up / 168+ sq ft)
give you options that smaller rooms don’t: a treadmill or rower alongside strength equipment, a dedicated stretching zone, a small bench and dumbbell setup. You can build a genuinely comprehensive gym in this footprint.
Practical takeaway:
The first thing you need to buy is tape. Dedicate an afternoon to tape your potential equpment’s footprint with painter’s tape. Label the “use zone” specifically for the space you’ll be occupying while using the equipment. For a barbell on a rack, that’s at least 7 feet of barbell width plus 2–3 feet on each side for your stance and movement. Seeing it on the floor first saves you from an expensive mistake.
Make sure you account for the ceiling height in your measurements. There’s nothing worse than purchasing equipment you were confident would function well on the gym floor only to discover it’s “too tall” for your ceilings. The key is to track everything to get everything right the first time. Most homes have 8-foot ceilings, which is fine for most equipment but rules out pull-up bars mounted too high, overhead pressing on a platform, or any jump training without modification. Measure floor to the lowest point (often a light fixture or ceiling fan) and keep that number in mind.
Layout Options Based on How Much Space You’re Working With
The layout of a spare bedroom home gym isn’t about aesthetics first — it’s about function. Equipment should be arranged so your workout flows, not so it photographs well.
For small rooms (under 100 sq ft):
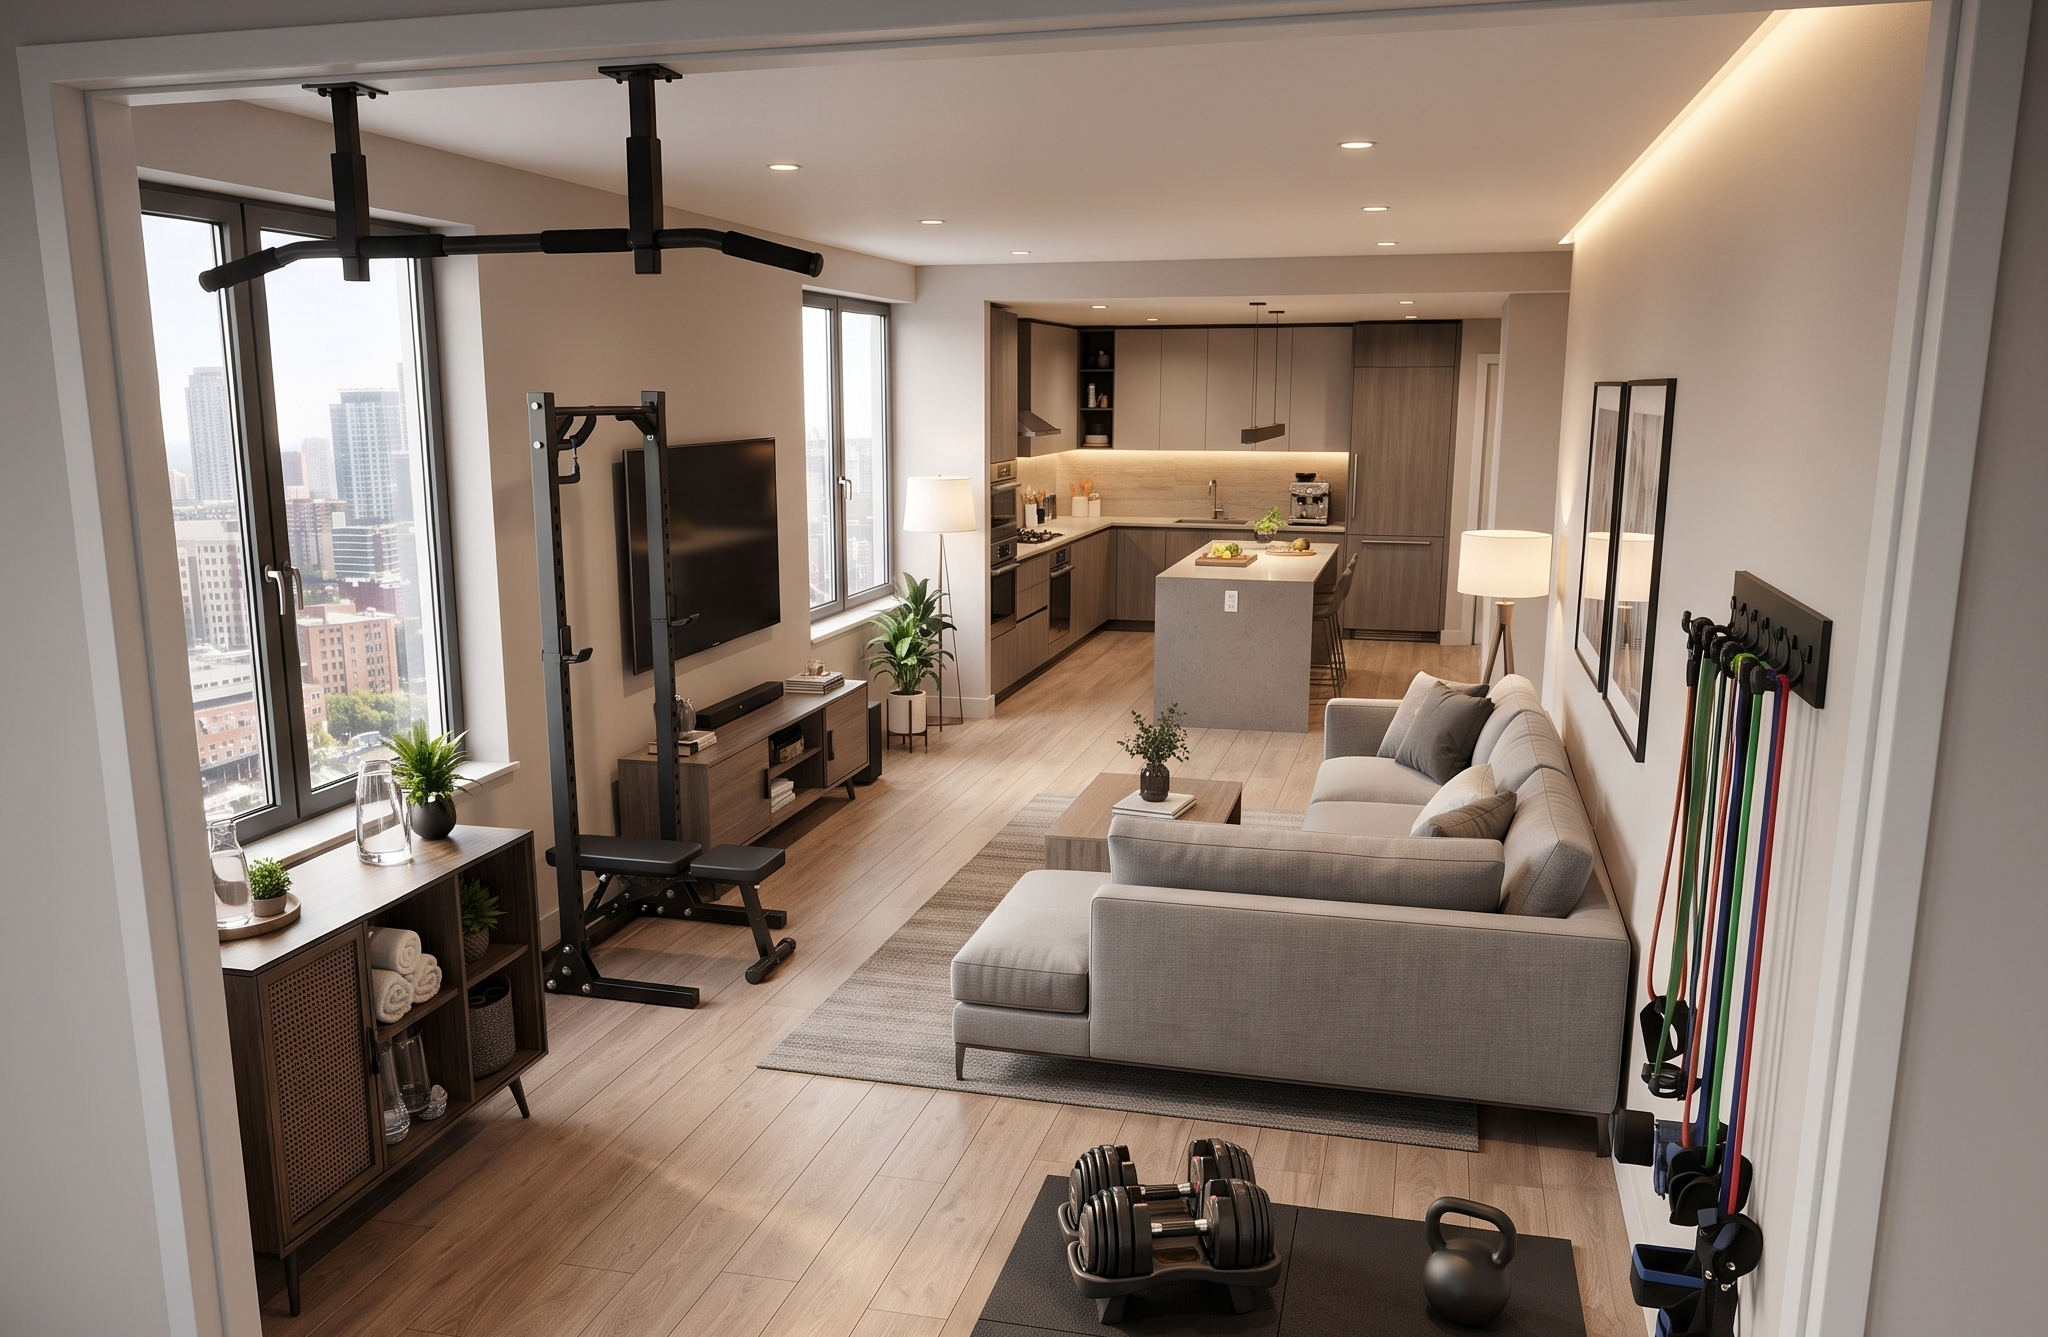
With such limited space, it’s key that you set up your largest piece, be it a compact rack, a wall-mounted fold-down bench, or a set of adjustable dumbbells on a small rack– against the longest wall. The center of the room should be open as a movement zone– essentially where you perform all of your mat work, banded exercises, step ups, etc.
Remember; the center of the floor shouldn’t house any equipment! This setup would effectively restrict the flow of the space and turn what should be a functional gym into an unnecessary obstacle course.
For mid-size rooms (120–143 sq ft):
You have enough space to create two distinct zones: a strength zone and a conditioning zone. The strength zone holds your rack, bench, or cables — anchored to a wall. The conditioning zone is a 6×8 ft mat area for stretching, bodyweight work, core training, and light cardio. These zones can coexist without interfering with each other if you’re intentional about the layout.
Keep in mind where and how the door swings. A door that opens into the room needs clearance — don’t position equipment within its arc.
For larger rooms (168+ sq ft):
You can add a third zone: dedicated cardio. A compact treadmill, rower, or stationary bike fits against the third wall without competing for the same space as your strength setup. In larger rooms, lighting matters more — a room this size can still feel oppressive with a single overhead fixture. [LINK: home gym lighting guide]
Practical takeaway:
Take your visual understanding of the space to the next level by drawing the layout on graph paper (1 square = 1 foot) before touching anything. Place the entry/exit last. Your workout should take you through the space logically — warm-up zone to strength zone to conditioning zone — not zigzagging around equipment.
Equipment That Actually Fits a Spare Bedroom (And What to Skip)
Not every piece of fitness equipment belongs in a spare bedroom, but the pieces that do can help you accomplish your fitness goals far more effectively than you think. Most people assume you need lots of space and fancy pieces of equipment to see the best results– but this is markedly false. The equipment that fits into a spare bedroom home gym are pieces that share two qualities: a small footprint and a high function-to-space ratio.
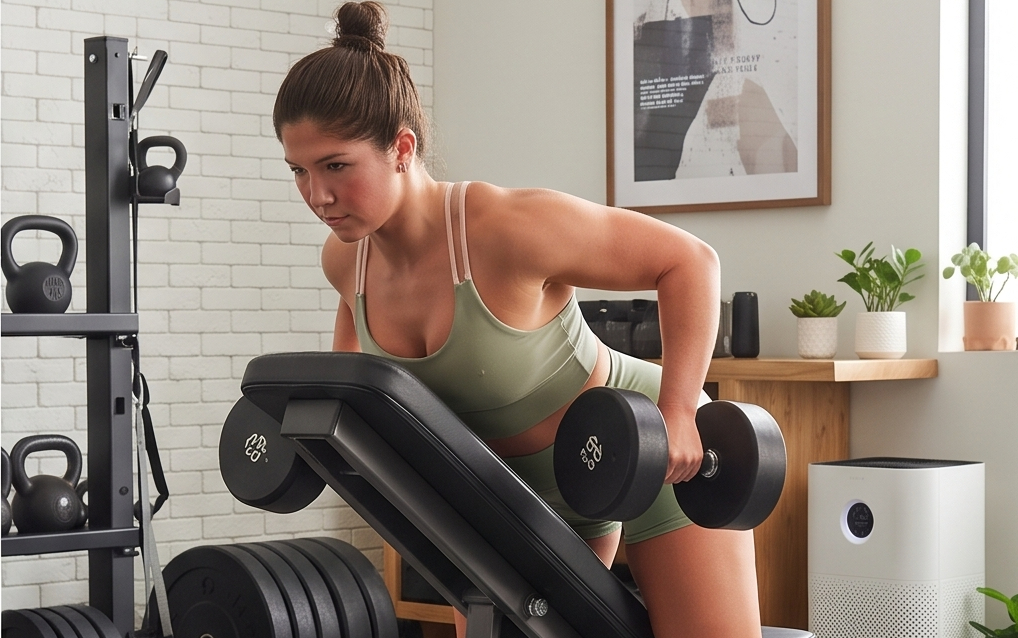
Adjustable dumbbells
are quite possibly the best investment for a spare bedroom gym. A set like Bowflex SelectTech 552s or PowerBlock Elites replaces 15–17 pairs of fixed dumbbells and takes up roughly 2 square feet of floor space. For a room where every square foot counts, owning a pair is a power play that opens up so many possibilities.
Related Article: Best Adjustable Dumbbells for Home Gyms
Compact power racks and squat stands
can work in spare bedrooms if you choose wisely. A full power rack with spotter arms typically needs a 4×4 ft footprint plus barbell clearance — which is doable in a mid-size or large room, but tight in small ones. For smaller bedrooms, a wall-mounted folding rack that collapses flat is your best bet, a squat stand that can be moved to the center of the room and stored away is also an option.
Flat/incline adjustable benches
fold down to roughly 18 inches wide and can be stored upright against a wall. You’ll definitely need this piece, even compared to a fixed bench that can’t move (in essence dead square footage).
What to skip in spare bedrooms:
- Plate-loaded cable machines (large footprint, high ceiling requirement),
- full Smith machines (non-negotiable space hogs),
- wide-frame treadmills (most require a 3×7 ft footprint plus 3 feet behind for safety),
- and multi-station home gyms designed for garage spaces.
These pieces work beautifully in larger dedicated spaces. In a spare bedroom, they’ll dominate the room and limit what else you can do.
For cardio in tight spaces:
A folding treadmill, compact rowing machine, or under-desk cycling pedals work well. If cycling is your priority, a smart trainer with your road bike takes up significantly less room than a dedicated stationary bike and delivers a better experience.
Practical takeaway:
Also before buying anything, look up its assembled dimensions (not box dimensions) and its “use zone” — the additional space required to actually operate it safely. Many manufacturers list this in the product specs. If they don’t, that’s a red flag.
Related Article: Essential Home Gym Equipment vs Optional
Making It Work as Both a Guest Room and a Home Gym
The dual-use spare bedroom is the most common setup I see, and it’s completely achievable — with the right approach. The key is designing for conversion, not compromise.
The fold-and-store principle:
Every piece of equipment you choose should be capable of being cleared, folded, or repositioned within 10 minutes (I would say 5 minutes honestly). If converting the room for guests takes longer than that, it won’t happen, and you’ll end up with a gym that nobody can sleep in and a guest room nobody wants to work out in.
A wall-mounted fold-down rack is a must-have here. It mounts flush to the wall, folds out when you’re training, and collapses back to 8 inches of depth when guests arrive. Pair it with a folding bench that stores in a closet and an adjustable dumbbell set on a small corner stand, and you have a complete strength setup that can be cleared in under five minutes.

For the bed:
A Murphy bed — the wall-mounted kind that folds down — is the obvious solution, but it requires installation and a meaningful investment. The most practical middle ground would be a quality daybed or sofa bed along one wall. During workouts, it functions as a surface for your phone, water bottle, and towel. When guests arrive, it functions as their sleeping space. Choose a frame with legs tall enough to store your yoga mat, resistance bands, and small accessories underneath.
Closet strategy:
The closet is your best friend in a dual-use room. Install a second hanging rod lower for guest clothing, and dedicate one full section to organized equipment storage — hooks for resistance bands, a shelf for foam rollers and accessories, a rack for small plates. When the gym mode switches to guest mode, the closet holds everything that doesn’t belong in a sleeping space.
Practical takeaway:
Walk through your guest conversion mentally before buying anything. Ask: “Can I make this look like a normal bedroom in 15 minutes?” If the answer is no, redesign before you spend.
Aesthetics That Work for Both — Because Your Guests Will Notice
Here’s the honest truth: most home gyms look bad. Rubber flooring, exposed metal, and a wall of equipment sends a signal that the room has been given up on — that it’s been resigned to function at the expense of everything else.
A spare bedroom home gym should look intentional. Not like a commercial gym. Not like a storage room with aspirations. Like a space that someone thought through. The key is balancing intentional style and functionality.

Flooring:
Interlocking rubber tiles in a dark neutral — charcoal, slate, dark brown — do double duty. They protect the floor and look sophisticated rather than industrial. Avoid the bright-colored gym flooring that signals “I bought this from a sports supply store.” If you’re keeping the existing carpet or wood floor for guests, use a gym mat that defines the workout zone visually and rolls away when not needed.
Color:
Paint the room a color with intention. Deep green, charcoal, warm navy — colors that feel energizing and grounded at the same time. Avoid bright white (too sterile, shows every scuff) and bright yellow or orange (exhausting to spend an hour in). The right wall color makes a room feel like a decision was made, not a default accepted.
Mirrors:
A full-length mirror or two leaned against the wall serves a real training function (checking form) while making the room feel larger and more like a designed space. Frame them or lean them at an angle — propped against the wall looks intentional; rattling on a hook looks like an afterthought.
Lighting:
The overhead light in most spare bedrooms is insufficient for training. Add a floor lamp or wall sconces if you can — layered lighting makes any room feel better and allows you to shift from “bright workout mode” to “calm sleep environment” for guests. Smart bulbs with adjustable warmth cost very little and transform the experience of the space. [LINK: best home gym lighting setups]
Practical takeaway:
Spend $100 on the aesthetics before you spend $1,000 on equipment. A well-lit, thoughtfully colored room with clean flooring makes every piece of equipment look better and every workout feel better.
Storage Solutions That Keep a Small Bedroom from Feeling Claustrophobic
Storage is the difference between a spare bedroom home gym that functions and one that accumulates chaos. Small rooms punish bad storage decisions quickly.
Vertical storage is your primary strategy
Wall-mounted pegboards, slatwall panels, and utility hooks take equipment off the floor and put it on walls you’re not using anyway. A pegboard panel mounted between studs can hold resistance bands, jump ropes, foam rollers, small accessories, and even light kettlebells — keeping 15+ items completely off the floor.
The plate storage problem
Weight plates on the floor are dangerous (trip hazard) and look terrible. A wall-mounted plate tree or a vertical plate storage rack keeps plates organized, accessible, and out of the walking path. If you’re using bumper plates for Olympic lifting, a low horizontal rack along the wall works better than vertical trees, which can tip.
Resistance bands
These tangle themselves into chaos if you don’t solve the storage problem intentionally. Individual hooks or a pegboard with labeled hooks keeps them accessible and organized. A small over-door hook organizer works in a pinch.
The “guest bin” strategy
Keep a storage bin or basket that holds your gym accessories — chalk, straps, lifting belt, extra hair ties, bands — that you wouldn’t want guests to see scattered around. Before guests arrive, do a two-minute sweep: accessories into the bin, bin into the closet. Done.
Under-bed storage for dual-use rooms
If you have a daybed or platform bed, the space underneath is premium storage. Rolling bins keep yoga mats, light dumbbells, and folded resistance bands out of sight but instantly accessible.

Practical takeaway:
Go to the hardware store and buy a pegboard, mounting hardware, and an assortment of hooks before your equipment arrives. Having storage infrastructure in place first means equipment has a home from day one — not from the day you get frustrated.
Related Article:
Before and After: What a Real Spare Bedroom Transformation Looks Like
The before version of this room is familiar: a twin mattress on a basic frame, a dresser with no purpose, boxes from the last move stacked in one corner, and overhead lighting that makes everything look vaguely tired. It’s a room that no one sleeps in and no one particularly wants to be in.
The after version serves a real purpose — and it shows.
Small room transformation (10×10): The mattress and dresser are gone. A wall-mounted fold-down rack occupies one wall. Charcoal rubber tiles cover the center 8×8 feet. A full-length mirror leans against the opposite wall. A small adjustable dumbbell stand sits in the corner next to a low bench. A pegboard above it holds bands, a jump rope, and accessories. The room has one floor lamp for ambient lighting and one daybed along the third wall for guests. Total visual footprint of equipment when folded: minimal.
Mid-size room transformation (11×12): The furniture is replaced with a compact power rack against the far wall, a 6×8 rubber tile zone in the center, a wall-mounted storage system for plates and accessories, and a folding bench stored against the side wall. An adjustable dumbbell set lives on a stand next to the rack. The room has been painted a deep green. Smart bulbs overhead. A small bookshelf on the fourth wall holds a Bluetooth speaker, water bottles, and a few training books. It looks like a gym that belongs in a home — not a garage that got moved indoors.
Practical takeaway:
Take “before” photos of your room today. The visual evidence of what you’re transforming is a more powerful motivator than you’d expect.
Three Complete Spare Bedroom Home Gym Builds: $500, $1,000, and $2,000
The $500 Build — Foundation First
This build is for the person who wants to start training consistently, not perfectly.

- Adjustable dumbbells (15–50 lb range): $180–$220. This is the non-negotiable anchor of the build. Everything else is secondary.
- Adjustable flat/incline bench: $100–$130. Look for one that folds for storage.
- Resistance band set (5 levels): $30–$40. Bands add exercises that dumbbells can’t replicate and take up zero meaningful space.
- Interlocking foam or rubber tiles (4×6 coverage): $40–$60. Even a small workout zone needs protection.
- Full-length mirror (leaned, not mounted): $50–$70. Form checking is training — don’t skip this.
- Pegboard + hooks (hardware store): $30–$40.
Total: $430–$560. This setup supports a complete upper and lower body strength program, conditioning circuits, mobility work, and everything most people actually need to transform their physique. [LINK: home gym beginner equipment guide]
The $1,000 Build — Real Training, Real Results

- Adjustable dumbbells (full range, 5–90 lbs): $350–$400
- Folding adjustable bench (heavy-duty): $150–$200
- Pull-up/dip station (freestanding): $150–$200
- Rubber tile flooring (covering full room): $100–$150
- Resistance bands + accessories: $50
- Wall-mounted storage (pegboard or slatwall): $60–$80
- Lighting upgrade (floor lamp + smart bulbs): $60–$80
Total: $920–$1,160. This is a serious home gym. The pull-up station adds a vertical pulling movement that the dumbbell setup can’t replicate as effectively, and the full-room flooring makes the space feel finished rather than provisional.
The $2,000 Build — Long-Term Investment

- Adjustable dumbbells (5–90 lbs, quality set): $400
- Compact power rack or folding wall rack: $400–$600
- Olympic barbell + bumper plates (200 lb set): $400–$500
- Heavy-duty adjustable bench: $200–$250
- Full rubber tile flooring: $150–$200
- Wall-mounted plate tree + accessory storage: $80–$100
- Lighting + mirror: $100–$150
Total: $1,730–$2,200. This is the build that stays with you for a decade. The barbell and rack open up every major compound lift — squats, deadlifts, bench press, overhead press, rows — and the quality of every component means you won’t be replacing things in 18 months.
If you’re building your home gym piece by piece, it’s easy to focus on individual decisions—lighting here, equipment there—but miss the bigger picture. The truth is, your results are shaped by how the entire environment comes together.
If you want to get it right from the start, I’d recommend working through a complete setup plan so every choice supports the next.
→ Read: How to Set Up a Home Gym: Beginner’s Guide
The Room That Makes You
Here’s the thing no one says often enough about home gyms: the environment you train in shapes the person you become. It’s not separate from the transformation — it is the foundation of it.
A spare bedroom that becomes a real gym is a declaration. It says that your training isn’t contingent on perfect weather, a gym membership you may or may not show up to, or the social friction of exercising in public when you’re tired or inconsistent. It says that the conditions for growth exist inside your own home, on your own schedule, without negotiation.
That room is not wasted space. It is the most purposeful room in your house.
Whether you’re starting with $500 or working toward the full $2,000 build, the first step is the same: decide that the room is for training, and start treating it that way.
Your spare bedroom home gym is closer than you think. Let’s build it right.


Leave a Reply