Home gyms have their intrinsic benefits; no commute, 24/7 access, privacy, no unnecessary fitness equipment, etc. It can be pretty sweet having your own gym space- however there’s a hindrance that can make even these benefits seem useless- and that’s clutter. If you don’t understand home gym organization clutter will consume your fitness paradise and most likely keep you from your fitness goals. Let’s be real- to get the most out of your home fitness journey, small home gyms organization isn’t optional, it’s essential.
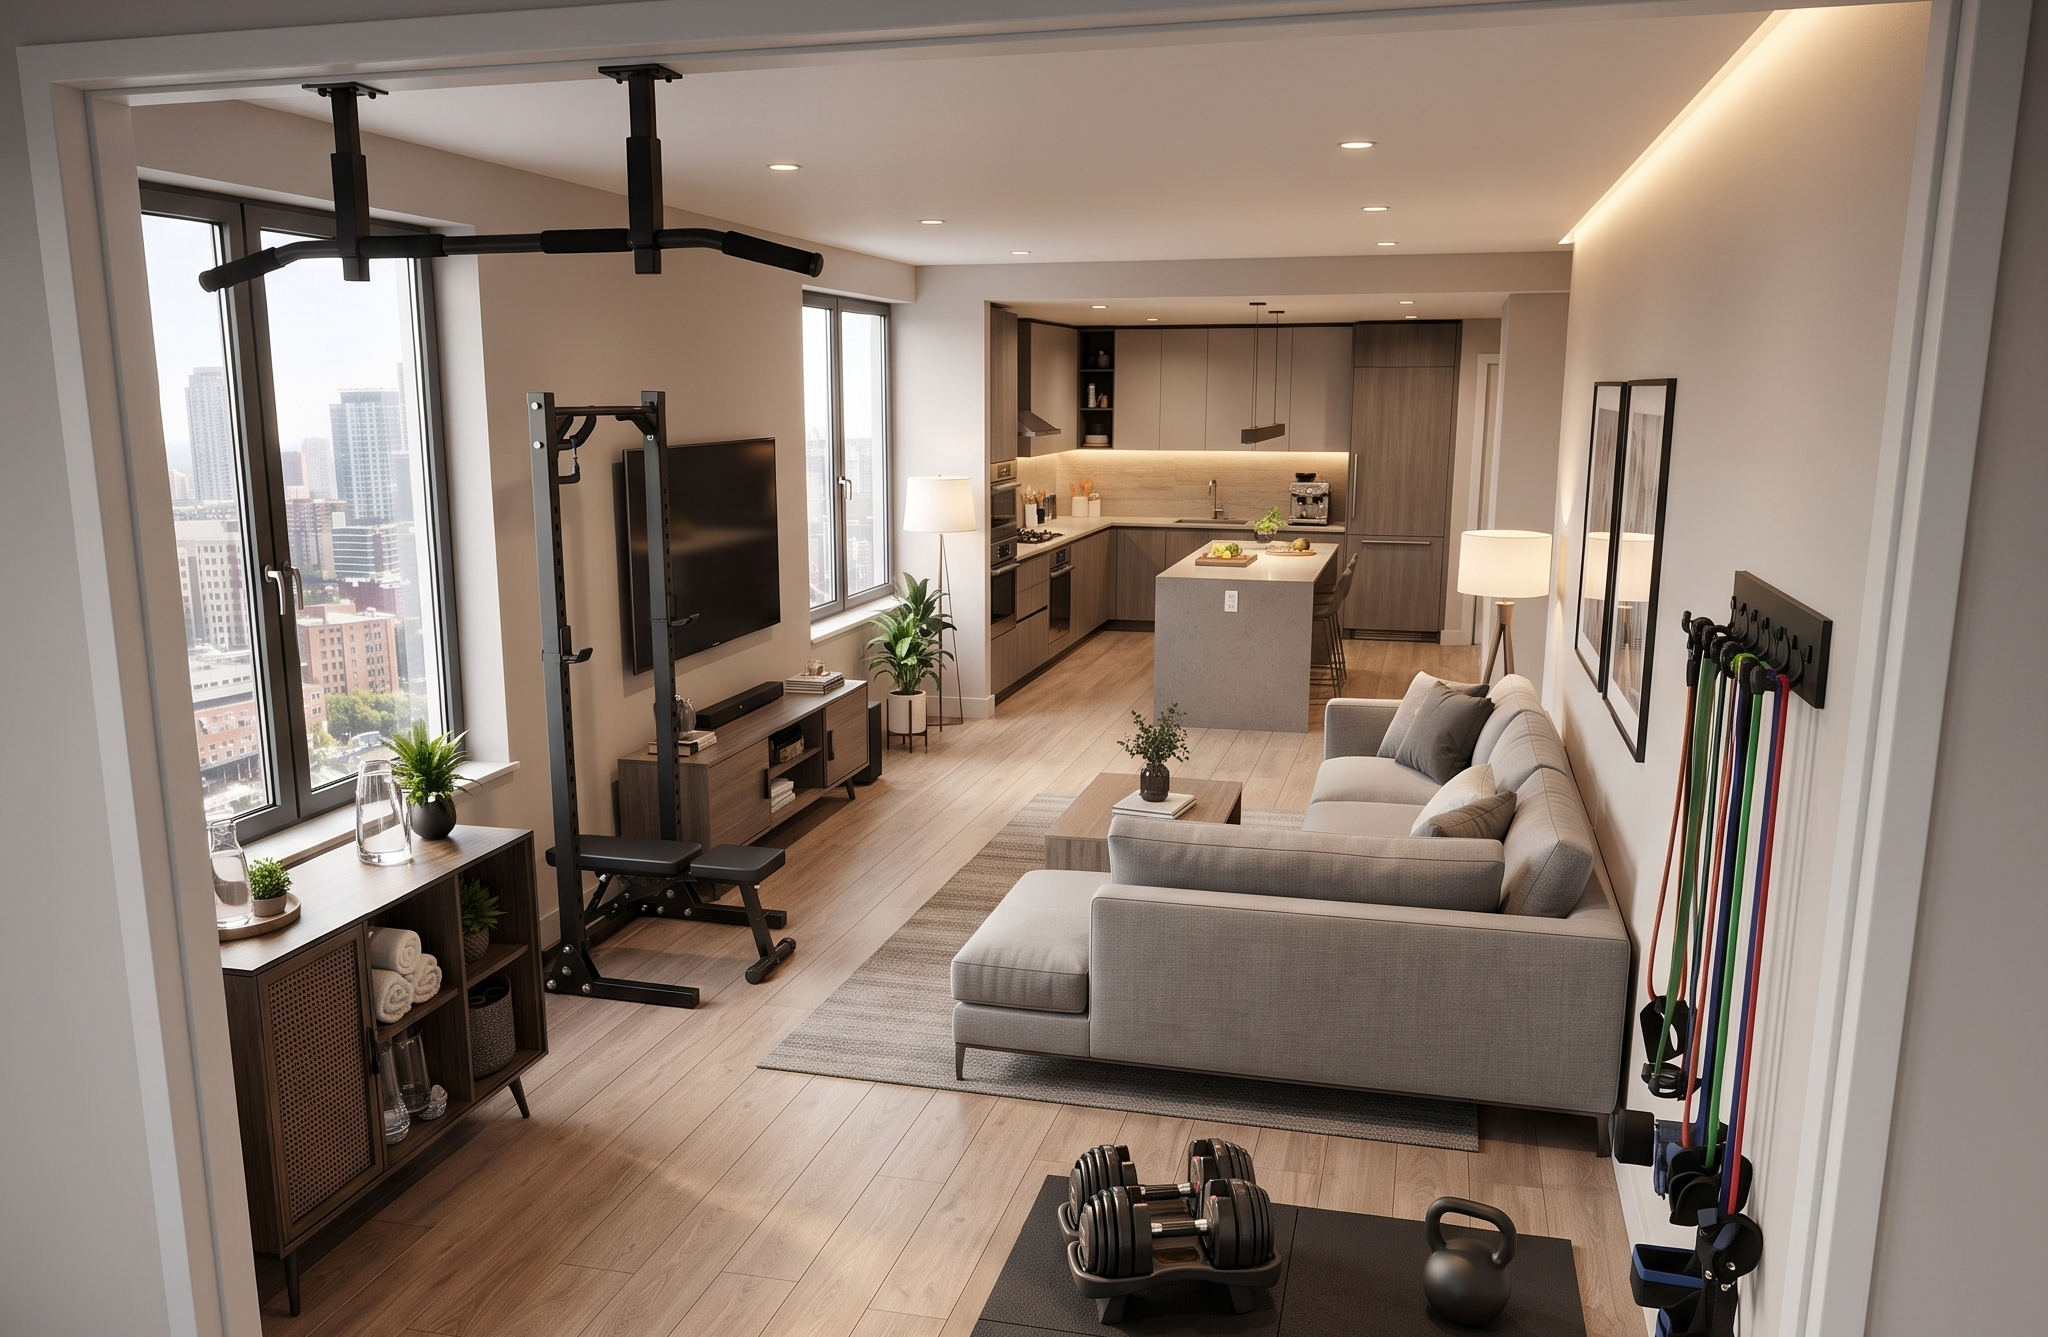
The average home gym is only 100-150 square feet or less- occupying spare bedrooms, garage space, or basement corners not designed with fitness in mind.
Creating a proper organization system will completely transform both exercise efficiency and consistency. A well organized will do wonders for equipment setup time- making workouts that much easier to begin, finish, and make a part of your regular routine.
Safety improves when equipment has designated homes rather than creating trip hazards. Finally, a clean, organized environment enhances motivation—walking into an orderly gym space mentally prepares you for focused training rather than triggering avoidance due to visual chaos.

Assess Your Space Before Organizing Anything
The first move before bringing order to any space is getting a lay of the land. Jot down the length, width, and ceiling height, all dimensions that will decide the type of storage units to use and what kind of equipment will go in them.
It’ll benefit you to also measure the doorway dimensions because nothing’s worse than purchasing equipment that can’t make it through the door. Save yourself the trouble!
If you’re feeling reeeally technical, measure everything else; document the location of electrical outlets, windows, light fixtures, and any permanent fixtures like radiators or built in shelving. You can create a basic floor plan using graph paper or a smartphone app to better visualize your space.
Figure out how much minimum clear floor area is necessary; the best workouts require at minimum 6×6 feet of open space for bodyweight or stretching exercises. Subtract this from your total square footage to determine your actual storage capacity. Note any irregularities: sloped ceilings, protruding pipes, or uneven flooring that might affect equipment placement.
Identify potential vertical and corner space
Many underestimate the potential of vertical storage space, leaving 60-70% of usable space in favor of other disorganized methods. If you check the walls for substantial open space, you have prime real estate for mounted storage. Empty corners can serve as stable anchor points for multi-directional storage solutions. Even the space above doorways can great spots for shallow storage or hooks that won’t interfere with daily use.
Measure the depth of available wall space—even 6-8 inches allows for pegboard systems or shallow shelving that keep small equipment accessible without consuming floor area. Document which walls can support weight-bearing hardware by locating studs with a stud finder, marking them with painter’s tape for future reference.
Prioritize “Useful” Equipment for Better Small Home Gym Organization
One of the best ways to organize your home gym (or any space for that matter) is by making your space as efficient as possible. When efficiency and function comes first, it gives us permission to let everything else go. One would be surprised how much space is freed up when confronted with the simple questions “do I actually use this?” or “how many ways can I use this?”. Here are a few tips to approach both an efficient and functional home gym space.
Choose Only that Which is Essential
I know this tip is going to be hard for some, but it will change your workouts and home gym for the better. If you’ve heard of the 80/20 rule, apply it to your gym inventory: find the 20% of items that produce 80% of your fitness results and discard the rest.
To put this into practical steps; for the next 30 days keep a list of the exercise equipment you use during your workouts. Once you’ve identified these items, it’ll also be very clear which pieces you haven’t used during the month. With both categories in mind, either commit to programming them into workouts or remove them from your space.
Recognize the difference between aspirational equipment (bought with good intentions but rarely used) and functional equipment that aligns with your current workout routine.
Aspirational equipment can always be stored for future use, including duplicate pieces, but the key is to remove them from your home gym. Multiple yoga mats, unused resistance band sets- either store it or donate the rest.This culling process typically recovers 25-40% of storage space while eliminating decision fatigue about what to use.
Multi-Purpose Equipment can Help Reduce Clutter
If you’re the kind of person that has a hard time getting rid of things, try removing the need altogether. Consider purchasing multi-purpose equipment that serve multiple purposes! With an inventory of less equipment that perform more functions, you’ll essentially have less items to throw away and more that hold significant value long term.
Adjustable dumbbells replace entire racks of fixed-weight pairs, condensing 200+ pounds of equipment into a footprint under two square feet. A quality adjustable bench transitions between flat, incline, and decline positions, eliminating the need for multiple benches. Resistance bands with interchangeable handles provide progressive resistance across dozens of exercises while occupying drawer space. Plyo boxes with multiple height options replace step platforms and separate box heights. Suspension trainers (TRX-style systems) mount to a single anchor point yet facilitate over 300 exercises, replacing cable machines and some free weight movements. Kettlebells inherently offer more exercise variety than dumbbells of equivalent weight due to their offset center of gravity. Before purchasing specialized equipment, research whether existing gear can accomplish the same training stimulus—often the limitation is knowledge rather than equipment.
How Upgrading Equipment can Improve Organization
In life, there are instances to justify buying new things- and in this case, strategic organization is one of those reasons. Strategic equipment upgrades solve storage problems while maintaining or improving training quality. Replacing a traditional barbell and separate weight plates with a single loadable dumbbell system if you don’t perform barbell-specific lifts. Consider upgrading from a folding treadmill that never actually gets folded to a walking pad that slides under furniture. The possibilities don’t end with just heavy weighted equipment either; think about switching bulky resistance band sets with fabric loop bands that stack flat in a drawer.
Consider upgrading to space-efficient alternatives: maybe a wall-mounted pull-up bar is more beneficial choice (and cost effective) than a freestanding power tower, or a doorway-mounted system instead of a pull-up station. Upgrade from multiple fitness mats to one premium, foldable thick mat that serves for yoga, stretching, and floor exercises. Replace a large foam roller with a collapsible or shorter travel version if space is critical. The investment pays dividends when upgraded equipment genuinely gets used more frequently because it’s easier to access and store, whereas the original equipment created friction that reduced workout consistency.
The Power of Vertical Space in Small Home Gym Organization
A storage strategy that’s changing the home gyms forever isn’t the latest cabinet or bench, but units that utilize wall space like never before. This take on storage will both free up floor space for training, but also change the aesthetic nature of your home gym for the better.
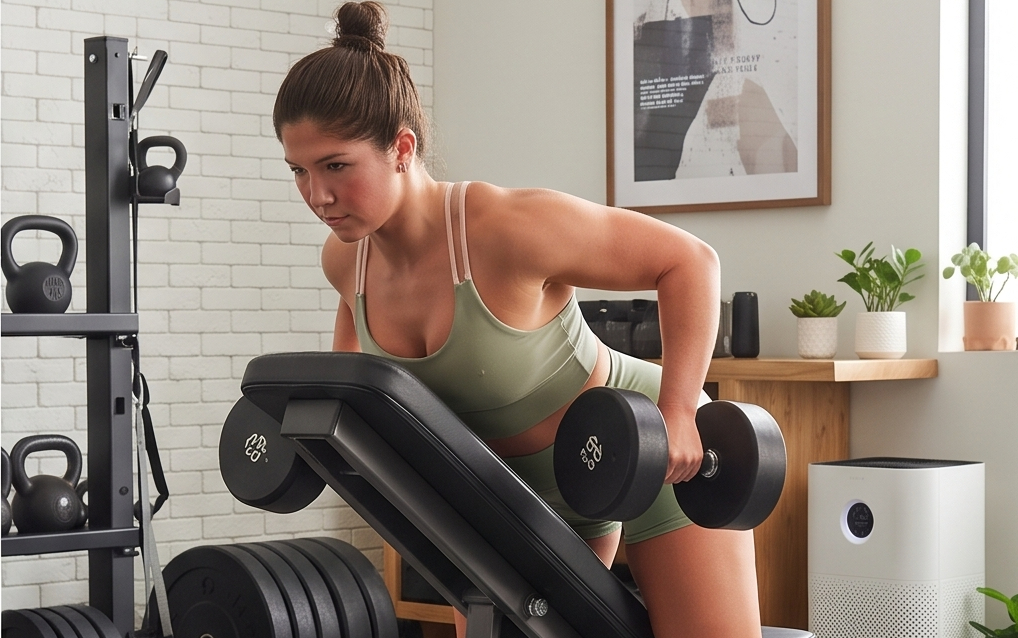
Wall-Mounted Racks for Dumbbells and Kettlebells
Believe it or not there are several wall-mounted options for even your heaviest pieces of equipment:
- Dumbbell mounts: dumbbell rack set at mid-torso height (36-42 inches) makes picking up dumbbells very easy (regardless of the weight).
- Kettlebell holders: pegs or cradle-style mounts work well for holding kettlebells while adding an unexpected flair to your home gym aesthetic. These mounts are usually installed 12 to 18 inches apart at waist height for easy accessibility.
- Adjustable dumbbells: For adjustable dumbbells, dedicated wall-mounted cradles keep them secure and off workout surfaces. Position weight storage along walls perpendicular to your primary workout zone rather than behind it, maintaining clear sightlines and preventing the need to navigate around equipment mid-workout.

Pegboards and Hooks for Bands and Accessories
Pegboard systems are a great way to store equipment vertically as your inventory grows. Items like resistance bands, jump ropes and stretch straps can now be seen, organized, and accessed easily.
Usually a pegboard sheet (about 24×48 inches) is installed across wall studs using 1 inch spacers behind the board to allow for peg insertion. You can also opt for heavier metal pegboard, a nice option for heavier equipment and withstanding the elements (particularly the humidity in garage gyms).
There are a variety of different hooks to utilize; J-hooks for resistance bands and jump ropes, basket hooks for small items like wrist wraps and lifting straps, straight pegs for hanging yoga mats and foam rollers with straps. Try grouping similar items together—all bands in one section, all mobility tools in another—to create visual organization that speeds equipment location.
Optimize Ceiling Storage for Limited Space
Ceiling storage is a unique option for infrequently used pieces of equipment or ones that are flat and light. These overhead racks mounted directly to ceiling joists are great for holding yoga mats, light medicine balls, foam rollers, and other miscellaneous items. This form of storage works best when it’s set up towards the outside of the workout space rather than high traffic areas necessary for jumping or pressing overhead.
Avoid storing heavy equipment (kettlebells, weight plates, heavy dumbbells) overhead regardless of hardware strength; the risk of mounting failure creates unacceptable hazard potential. For low ceilings under 8 feet, skip ceiling storage entirely except for minimal items like resistance band door anchors on adhesive hooks. Always use hardware rated for 3-4 times the actual weight load, install directly into joists rather than drywall, and inspect mounting points quarterly for any signs of stress or movement.
Smart Floor Storage Solutions for Small Home Gyms
Now let’s talk about the most common, easily mishandled form of storage- floor storage. Nearly every adult has some type of bin, draw, or dresser used for storing items. And that being the case we all know how easily these methods can become disorganized, cluttered, or even damaged due to misuse. Our goal here is to work smarter and not harder- and we can accomplish this by using smarter storage solutions.
Compact Shelving and Storage Towers
Vertical storage towers excel at minimizing floor space while maximizing storage capacity with height. Here are a few tips to optimize this storage option:
- Position the heaviest items on bottom shelves for stability and easier loading—store 25+ pound plates, medicine balls, and sandbags at floor level or one shelf up. Reserve upper shelves for resistance bands, yoga blocks, gloves, and other lightweight accessories that won’t tip the unit if weight distribution becomes uneven.
- Consider corner shelving units to make use of every inch of space available. An open frame in this instance will serve you better than an enclosed cabinet. This visibility will also help you remember where you store forgotten items all while providing flexibility as your collection grows.
Rolling Carts for Flexible Storage
Mobile storage units are all about one thing: adaptability. The nature of fitness and your own fitness journey is always changing. As routines change, so too is how their equipment is organized- which is where rolling carts/ mobile units excel. A three-tier rolling cart with locking casters can hold 30-50lbs of small equipment- all in the space under two square feet. Rolling carts also allow you to position units strategically, creating more space on the gym floor or creating active shelving during a workout.
For weight plate storage, dedicated plate trees on wheels allow you to reposition heavy loads without lifting individual plates. The mobility advantage comes with a tradeoff: wheeled storage requires flat, stable flooring and shouldn’t hold equipment during active use due to potential rolling.
Pro tip: Park carts in consistent locations to maintain organizational systems—random placement defeats the purpose of having designated storage.

Make Use of Benches and Racks with Built-In Storage
Equipment that serves dual functions as both workout tool and storage solution maximizes efficiency in constrained spaces. Adjustable benches with integrated storage compartments underneath the seat hold resistance bands, workout gloves, and small accessories within arm’s reach during training.
- Squat stands and power racks with built-in weight plate holders keep plates organized vertically while maintaining them at the exact location needed for loading barbells.
- Plyo boxes with hollow interiors store jump ropes, agility ladders, and other flat equipment invisible to the eye while the box remains functional.
- Storage benches designed for entryways adapt well to gym spaces—the padded top serves for seated exercises while the interior holds yoga blocks, straps, and foam roller segments.
When selecting new equipment, prioritize designs incorporating storage features: dumbbell racks that include a top shelf for accessories, or kettlebell stands with hooks for resistance bands. This approach removes the need for separate storage furniture, reducing both cost and spatial footprint. Ensure built-in storage doesn’t compromise the primary function—a wobbly bench with storage is worse than a stable bench requiring separate storage. Weight capacity remains critical; verify that storage features don’t reduce the structural integrity needed for heavy lifts or dynamic movements.
Small Home Gym Organization for Accessories and Gear
A way to approach small home gym organization is by storing equipment as you would in a shop- with categorized bins and drawers. This method works wonders for removing confusion, greatly reducing time spent finding and returning equipment, and ultimately reinforcing a clear, consistent system that will make future cleanliness effortless.
Storage Bins for Resistance Bands and Cables
Containerized storage prevents small accessories from tangling, disappearing, or degrading prematurely. Clear plastic bins with snap lids allow visual inventory without opening, reducing time spent searching for specific resistance levels or band types. Dedicate separate bins to different accessory categories: one for loop resistance bands, another for tube bands with handles, a third for cable attachments if you have a cable system. Bin sizes between 6-12 quarts work for most home gym accessories—large enough to prevent overstuffing but small enough to fit on shelves or under benches. Stackable bins maximize vertical space on shelves, but avoid stacking more than three high—deeper stacks make accessing lower bins inconvenient enough that you’ll avoid using that equipment. Place your most frequently used accessories in the most accessible bin position.
Drawer Systems for Wraps, Gloves, and Straps
The use of drawers cannot be understated: a shallow drawer organizer can do wonders for keeping small personal items tidy, accessible, and away from dirty floor equipment. And you have a variety of types to choose from; fabric storage cubes with built-in drawers, plastic drawer towers, even repurposed office drawer units offer compartmentalized storage in space as compact as 12×12 inches.
You can label specific drawers based on unit types, lifting and wrist straps in one, gloves and grip aids in another, etc. For items that benefit from staying flat—lifting belts, knee wraps, compression sleeves—drawer storage prevents creasing that compromises material integrity and fit. Small dividers within drawers further separate items; silicone ice cube trays work surprisingly well for organizing individual items like earbuds, resistance band door anchors, or small carabiners. Position drawer systems on or near your shelving units rather than across the room, creating a centralized gear station that consolidates preparation time.
Pro tip: For your sake, remember to wipe down gloves and wraps before storing to prevent odor and bacterial growth—drawer storage in an enclosed space amplifies smell issues if items aren’t maintained.
Labeling Tips to Tie Everything Together
For some, even the thought of labeling is a chore, but the benefits far out-weight the minor labor upfront. Labeling will help establish and maintain organizational systems by removing the need to decide where items belong. Use a label maker or printed adhesive labels for a more professional look, or painter’s tape and permanent marker for a faster, more direct approach. Here are some organization tips to help your labeling experience:
- Label bins and drawers with specific contents rather than vague categories—”Loop Bands: Light/Medium/Heavy” is more useful than “Bands.” For resistance bands stored in bins, label both the bin exterior and add small tags to individual bands indicating resistance level, as visual differences between bands aren’t always obvious.
- On pegboards, outline tool shapes with paint markers or vinyl tape to create shadow organization—the visual placeholder immediately indicates where each item belongs and when something is missing.
- Color-coding adds another organizational layer: assign colors to workout types (red for strength accessories, blue for mobility tools, green for cardio gear) using colored bins, labels, or tape.
- Label shelves instead of items when dealing with uniform equipment like weight plates—mark shelf positions for “45lb,” “25lb,” “10lb” so plates always return to proper locations.
Create Workout Zones for Effective Organization
Small home gym organization isn’t just about the storage units you use, but how you organize the floor space itself. Go to any gym and you’ll clearly see this principle; the cardio machines are grouped together, dumbbells are racked in their own designated area, machines grouped with machines, etc. This layout creates a flow that makes the gym floor easy to navigate and easier to clean. So why should a home gym be any different? Utilizing these principles will make the space much more manageable, but also increase workout program adherence.
Strength, Cardio, and Mobility Zones
As mentioned before, dividing your space into functional zones creates mental and physical structure that streamlines workouts. Of all the types of fitness, strength training will require the most room with sturdy flooring. If possible set aside at least 6×8 feet for free weight exercises with enough vertical space for overhead presses (and wall space for potential storage).
Cardio requires less square footage due to the use of singular machines (treadmill, row machine, stationary bike, etc.). a 3×6 foot area works perfectly for most cardio machines, positioned near windows or fans for ventilation. If your cardio consists of jump rope or bodyweight circuits, this zone overlaps with your open floor space.
Lastly a mobility zone requires the least amount of space- an area of 5×5 feet is all you need to accommodate a yoga mat and accessories for stretching, foam rolling and mobility drills. It’s in your best interest to position this zone away from heavy equipment to create psychological separation between high-intensity training and recovery work. Store yoga blocks, foam rollers, lacrosse balls, and stretching straps along the perimeter of this zone.
Budget-Friendly Small Home Gym Organization Ideas
While the aforementioned organization tips are great, purchasing new units to organize a home gym can add up. It’s important to consider all of the options afforded to you- including DIY storage solutions. This creative approach will let you personalize your storage units for your training needs, but also save you several dollars in the process. If you’re also interested in creating your own DIY fitness equipment check out this article “DIY Fitness- How to Build DIY Home Gym Equipment on a Budget”. Below are a few ideas to help you explore your options and offer potential projects for the near future:
DIY Storage Solutions
- Construct a simple dumbbell rack from 2×4 lumber and plywood—two vertical supports with angled crosspieces create cradles for dumbbell pairs, total material cost under $30 for a rack holding 5-6 pairs.
- PVC pipe cut into 12-inch sections and mounted horizontally to a board creates weight plate holders; secure the board to wall studs for a plate storage system costing $15-20.
- Repurpose wooden pallets as wall-mounted storage by sanding rough edges and attaching them horizontally to create shelves for kettlebells and accessories.
- Build a pegboard frame from 1×2 furring strips, attach pegboard with wood screws, and mount the entire assembly to wall studs for under $25.
- Create resistance band storage by screwing coat hooks into a wooden board mounted inside a closet door.
- For foam roller storage, cut sections of 6-inch PVC pipe, sand the edges, and mount them horizontally to walls as open-ended sleeves.
- Construct a simple medicine ball rack from cinder blocks stacked with 2×10 boards between layers—no tools required, extremely stable, costs $40-50, and doubles as a step platform.
How to Stay Organized Indefinitely
Having an organized system for a small home gym is great, but it means very little if you lack the routine and discipline to keep the space clean. Here are some tips that will (with time and repetition) help your home gym stay organized for the long-haul.
Simple Daily and Weekly Reset Habits
- Return every item to its designated location immediately after each workout (2 minutes maximum)
- Wipe down equipment before storing to remove sweat and prevent material degradation
- Straighten resistance bands and cables before placing in bins to prevent tangling
- Realign weight plates by size and return dumbbells in ascending order
- Push mobile carts back to designated wall positions
- Weekly: scan for migrated items and return them to proper zones
- Weekly: empty bins to remove dust, check pegboard stability, verify wall-mount security
- Bi-weekly: test open floor space by standing in center—you should move freely in all directions
- Monthly: remove unused equipment, evaluate failing storage solutions, assign homes to new items
Storage Rules That Prevent the Return of Clutter
- One-in-one-out rule: remove an existing item before acquiring new equipment of similar size
- Everything has a home: no item enters without a predetermined storage location
- Visibility rule: use open storage over closed cabinets—hidden items get used 40% less
- Floor rule: nothing stored directly on floor except during active use
- Arm’s reach rule: frequently used equipment stays within easy reach of workout zones
- Ten-second rule: retrieving and returning any item should take ten seconds or less
- Enforce consistently during first 90 days when systems are most vulnerable
Adapting Your Organization System as Your Gym Grows
- Run quarterly audits to identify what’s working versus what creates friction
- Assign storage locations immediately when adding new equipment
- Reorganize priority placement as training focus shifts (strength to mobility, etc.)
- Implement containment at 80% capacity: purge items, improve storage efficiency, or limit acquisitions
- Expanding spaces: maintain organizational density, use extra room for better workout zones
- Shrinking spaces: prioritize equipment with maximum training value per square foot
- Document your system with photos—visual references simplify restoration after disruptions
- Best systems feel effortless because they align with natural movement patterns and training habits
Conclusion
A well-organized small home gym removes friction between intention and action. When equipment is visible, accessible, and returned to consistent locations, you eliminate the mental resistance that derails workout consistency. Organization isn’t about achieving magazine-worthy aesthetics—it’s about creating functional space that supports your training goals within real-world constraints. The best organizational system is the one you’ll actually use, which means designing around your natural habits rather than fighting them. Your gym will never stay perfectly organized every single day, and that’s acceptable. What matters is having systems simple enough that restoration takes minutes, not hours.
As your training evolves, your organization will evolve with it. The goal isn’t permanent perfection but sustainable functionality—a space that consistently invites training rather than creating reasons to avoid it. Start with what frustrates you most about your current setup, solve that single problem, and build from there. Small home gym organization isn’t a destination you reach; it’s a practice that makes every workout more accessible and enjoyable.


Leave a Reply