
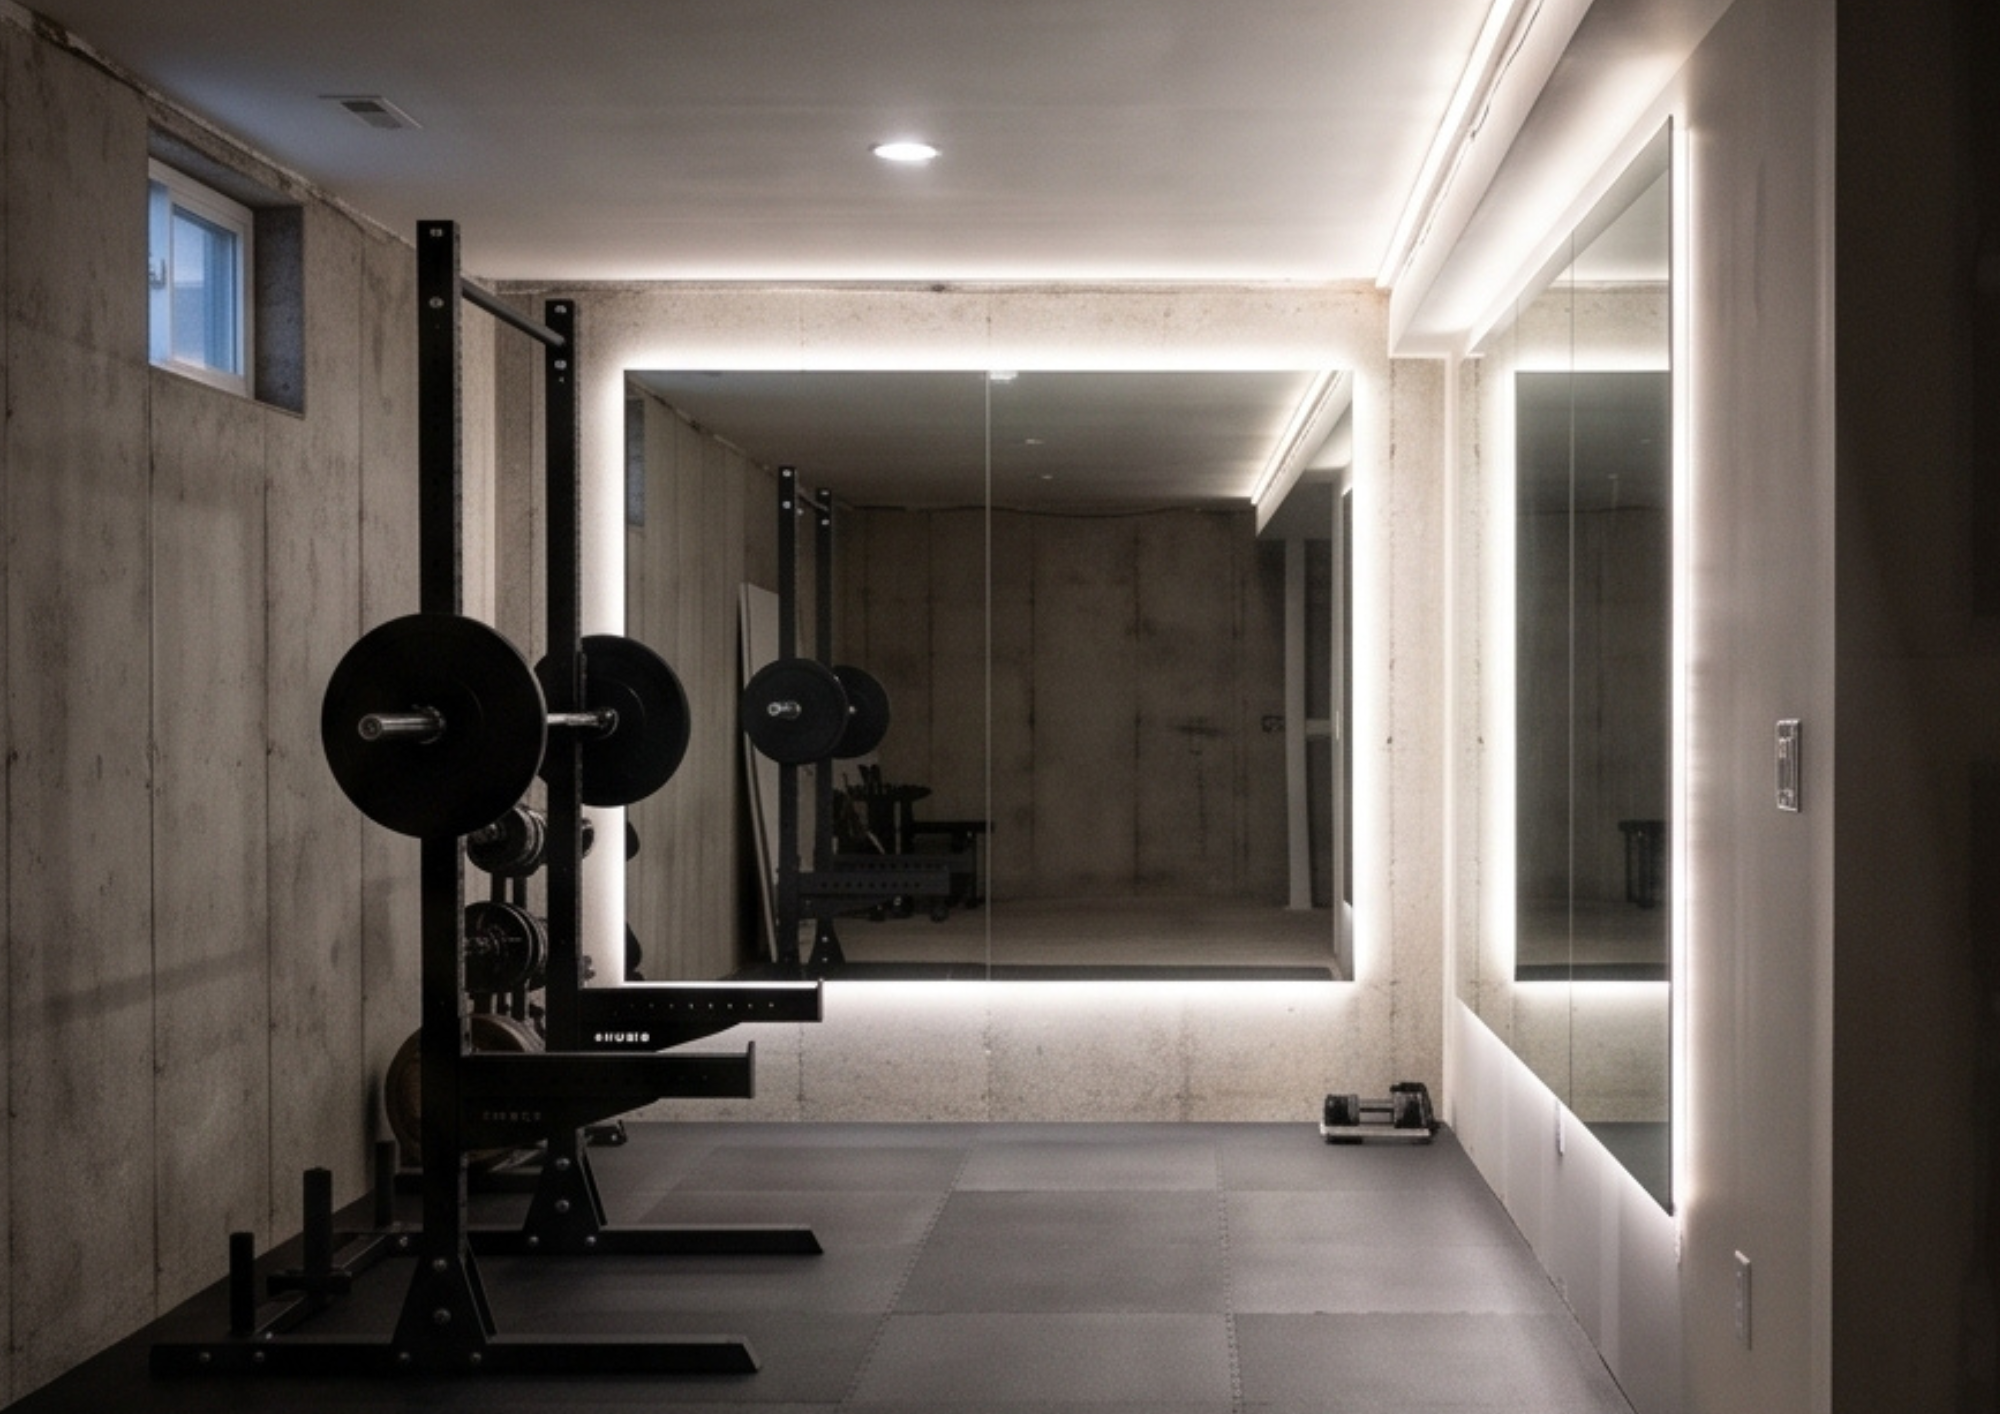
Most home gym builds get the mirror wrong in the same way.
Not the wrong mirror — though that happens too. The wrong sequence. The rack goes in first because it’s the anchor piece and everything arranges itself around it. The bench goes in front of the rack. The dumbbell rack goes against the most convenient wall. The flooring goes down around the equipment that’s already there. And then — six months into the build, once the training zone is fully established and the equipment is exactly where it ended up — the mirror arrives.
It gets leaned against whatever wall has space.
That wall is almost never the right wall. It’s the wall the dumbbell rack should have gone on. It’s the wall that faces the bed instead of the training zone. It’s the wall that receives no natural light because the window is on the opposite side of the room. The mirror that arrives last and goes wherever it fits is the mirror that never quite works — never quite reflects the right angle, never quite makes the space feel larger, never quite provides the form feedback that justified the purchase in the first place.
The home gym mirror that works correctly is the one that was planned first and placed deliberately — before the equipment, before the dumbbell rack, before any decision about where things go made the right mirror wall unavailable.
This guide covers everything. What mirrors are actually available and which ones work in a training environment. How to size a mirror for a specific room. Where to place it so it does all three things a training mirror should do. How to mount it so it stays there safely under the conditions a home gym produces. And which mirror type belongs in which home gym aesthetic.
Start here. Place everything else around it.
What a Mirror Actually Does in a Home Gym
Before the buying decision, the sizing question, and the mounting hardware — the functional case for why a mirror belongs in a home gym at all. Because the most common objection to a gym mirror is that it feels like vanity. It isn’t. A training mirror serves three functions that have nothing to do with appearance and everything to do with training quality, safety, and the long-term quality of the environment the athlete returns to every morning.
Form Feedback
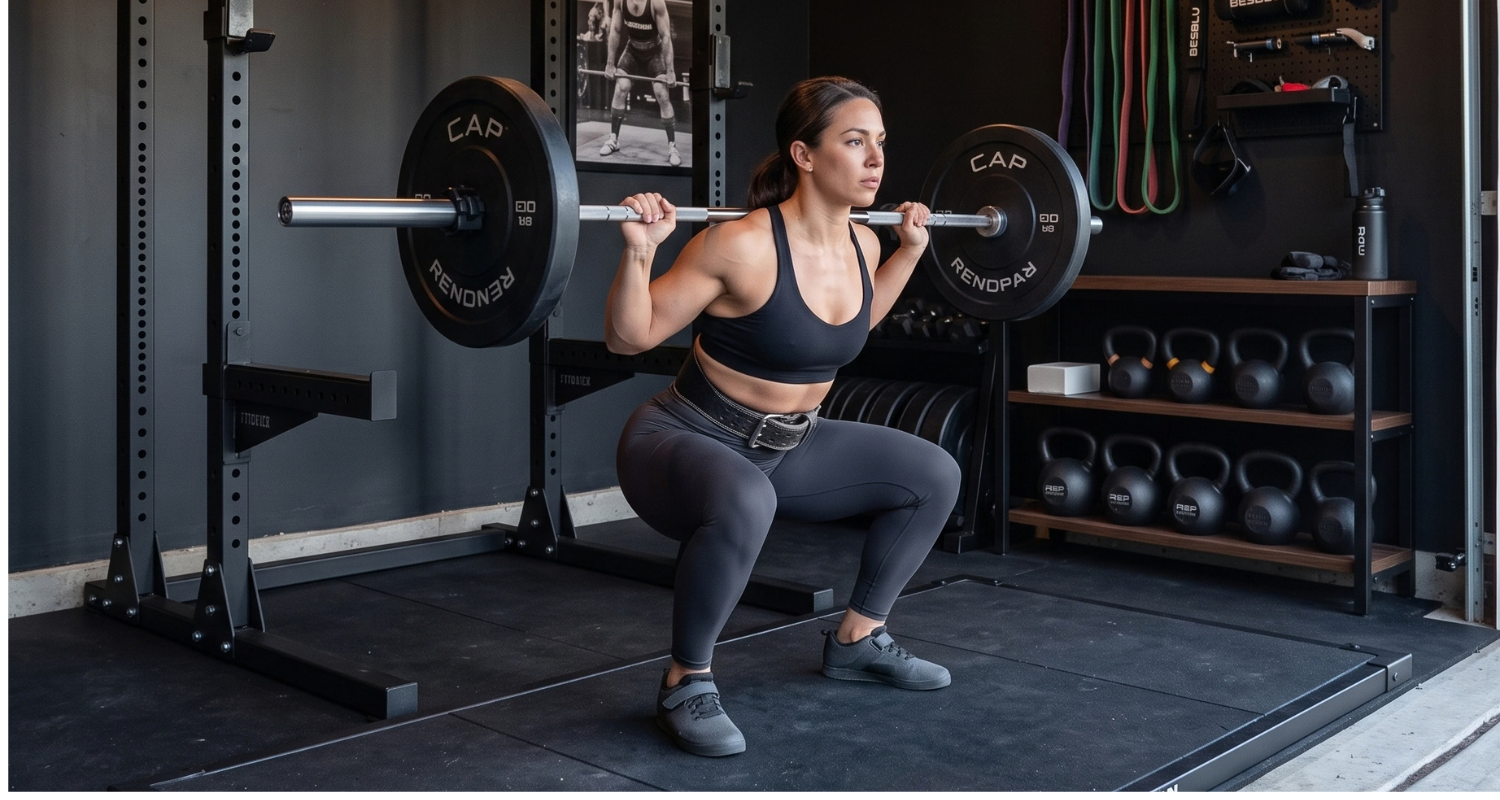
This is the primary function and the most practically valuable. The mirror catches the hip shift in the squat that the athlete can’t feel because the proprioceptive system has adapted to the pattern — the subtle lateral weight transfer that has been present for months and will eventually become a knee problem if it isn’t corrected. It catches the elbow flare in the overhead press that feels straight but isn’t. The forward lean in the deadlift. The knee cave in the lunge. Real-time visual feedback during a working set produces form corrections that post-session video review cannot — because the correction happens in the moment, in the movement, before the next rep begins rather than after the session ends. This is why commercial gyms cover every wall with mirrors. Not for aesthetics. Because the feedback they provide reduces injury rate and improves training quality simultaneously across every athlete in the facility.

Spatial Expansion
Spatial expansion is the second function and the most immediately visible effect of a correctly placed mirror. A full-length mirror mounted flush on the primary training wall makes any home gym feel twice as large as it is. This is not a perception trick — it is a documented spatial effect that influences the quality of the training environment in ways that directly affect how often an athlete returns to the space. A training room that feels cramped and limited produces sessions that feel cramped and limited. A training room that feels open and complete — even when it is a ten by twelve foot spare bedroom — produces sessions that feel worthy of the effort required to show up for them. The mirror is the single most cost-effective way to change the felt size of a home gym without changing its actual dimensions.
Design Signal
A wall-mounted mirror in a home gym communicates intentionality in a way that almost no other single element can. It tells anyone who enters the space — and more importantly the person who trains in it every morning at 5am — that this room was built for a specific purpose with a specific level of care. The mirror is the detail that most reliably separates a gym that was assembled from a gym that was designed. Its presence is the difference between equipment in a room and a training environment.
All three of these functions depend entirely on two decisions: what mirror is chosen and where it is placed. Get both right and the mirror multiplies the value of every other decision in the gym. Get either wrong and it becomes an expensive piece of glass leaning against a wall that was never the right wall.
Mirror Types: What’s Available and What Actually Works
The home gym mirror market contains five distinct product categories with meaningfully different performance characteristics, price points, and appropriate use cases. Understanding what each type is — and what each type isn’t — prevents the most common and most expensive mirror purchasing mistakes.
Wall-Mounted Frameless Glass Mirror Panels
The standard recommendation for most home gym applications and the option that most consistently delivers all three mirror functions at the highest level.
Frameless glass panels mount directly to the wall with standoff hardware, J-clips, or adhesive mirror mounting strips depending on the panel size and weight. Available in standard sizes from 48 by 72 inches — the minimum effective training mirror size — to custom full-wall coverage systems that cover an entire training wall from floor to ceiling. The frameless edge reads as professional and studio-grade in a way that framed mirrors rarely achieve in a training context — the absence of a frame maximizes the reflective surface and creates the clean, uninterrupted reflection that Performance Studio and Clean Minimalist gyms specifically require.
The installation commitment is the primary consideration. Frameless glass panels of meaningful size — anything over 48 by 72 inches — require anchoring into wall studs rather than drywall anchors and benefit significantly from professional installation at the larger sizes. The permanence of wall mounting is appropriate for dedicated training rooms, basement gyms, and garage conversions where the mirror will remain in that position indefinitely. It is less appropriate for rental properties or shared living spaces where wall modification is restricted.
HONYEE 48″x24″ 3PCS Wall Mounted Frameless Glass Mirror

Framed Full-Length Mirrors
Slim-frame mirrors in matte steel, brushed chrome, natural wood, or powder-coated finishes — available in wall-mounted or leaning configurations. The appropriate choice when the mirror serves a dual function: training tool and design element in a shared living space where the mirror is visible during non-training hours.
The frame’s design contribution matters significantly for home gym aesthetics where the mirror is visible from a living area. A natural ash wood frame in a Naturalist living room gym reads as furniture. A slim matte steel frame in a Clean Minimalist spare bedroom reads as architectural detail. The frame transforms the mirror from pure function into a considered design element — which in shared spaces is a meaningful practical advantage.
Leaning configurations of framed mirrors require anti-tip hardware — a strap or bracket that anchors the top of the mirror to the wall — for training environments. An unanchored leaning mirror in a space where dynamic training movements occur is a safety hazard regardless of how stable it appears at rest.
BEAUTYPEAK 76″x34″ Rectangle Full Body Floor Mirror

Interlocking Mirror Tiles
Individual mirror squares or rectangles — typically 12 by 12 or 12 by 18 inches — that install across a wall surface to create large-area mirror coverage at lower cost than full glass panels.
The cost advantage is real and meaningful. The visual result is not competitive with full panels at any price point. The seams between individual tiles are visible in the reflection — and they become more visible over time as tiles shift incrementally under the thermal expansion and contraction of a garage or basement environment. A mirror tile wall that looks acceptable in the first month of installation looks noticeably seamed and misaligned by month twelve. The visible grid of tile seams across a reflection during a heavy squat set is a distraction that the primary training mirror should never create.
Mirror tiles are appropriate as a secondary or accent mirror — on a side wall, in a storage or accessory zone — where the reflection quality matters less than the additional coverage. They are not appropriate as a primary training mirror in any home gym that takes the training environment seriously.
DELMA 16″x12″x12 pc Interlocking Tile Mirrors

Acrylic or Polycarbonate Mirror Sheets
Lightweight flexible mirror alternative manufactured from optical-grade acrylic rather than glass. Marketed as the safe, shatterproof, easy-to-install alternative to glass panels for home gym applications.
The safety advantage is genuine in high-impact environments where glass breakage is a realistic risk. The optical quality is not. Acrylic mirror sheets introduce a slight but immediately perceptible distortion to the reflection — the flexible nature of the material means the reflective surface is never perfectly flat, and a reflection that is slightly distorted is a reflection that is unreliable for form checking. The squat that looks like it’s reaching depth in a distorted acrylic reflection may not be. The press that looks locked out may be short. The feedback that is the mirror’s primary function becomes unreliable precisely when accuracy matters most.
Do not use acrylic mirror sheets as a primary training mirror. The safety advantage does not outweigh the optical disadvantage for form feedback purposes. Maintain appropriate clearance between glass mirrors and equipment paths — which is the correct safety solution — rather than accepting optical distortion as the price of breakage prevention.
DUMOS 4 Pack Wall Mirror Tiles

Freestanding Mirrors
Full-length mirrors on a floor stand — the kind sold in bedroom furniture retailers for use as a dressing mirror. No installation required, fully portable, immediately available.
The portability is the only genuine advantage. Freestanding mirrors are insufficiently stable for training environments where dynamic movements, floor vibration from dropped weights, and the general kinetic energy of an active training session create conditions under which a freestanding mirror will eventually fall. A freestanding mirror that falls during a heavy training session is a serious safety event. The installation avoidance that makes freestanding mirrors appealing is not worth the stability compromise in a space where serious training happens.
Use a freestanding mirror as a temporary placeholder while planning the permanent mirror installation — not as the permanent solution itself.
GLSLAND 71″x31″ Full Length Standing Mirror

How to Size Your Mirror Correctly
The most common mirror purchasing mistake is buying a mirror that looks large in the product image and arrives too small for the wall and the training zone it needs to serve. Mirror sizing for a home gym has specific functional requirements that bedroom mirror sizing does not — and applying bedroom mirror logic to a training mirror purchase produces a mirror that fails its primary purpose.
The Functional Minimum
A mirror that doesn’t show the full body during a standing movement cannot perform its form feedback function. The minimum effective size for a primary home gym mirror is 48 inches wide by 72 inches tall. At this size a standing athlete of average height can see their full body from head to mid-shin during standing movements — sufficient for squat depth checking, overhead press alignment, and the majority of standing compound movements. Narrower than 48 inches and the mirror misses the lateral field of view needed to check stance width and elbow position simultaneously. Shorter than 72 inches and the mirror clips the lower body on taller athletes or requires the athlete to stand further back from the mirror to see their full body — which reduces the quality of the form feedback.
Calculating Wall Coverage
For primary training wall mirrors the coverage calculation is straightforward. The mirror should cover at minimum the central two-thirds of the wall directly behind the primary training zone — the section the athlete faces during primary movements.
A training wall that is ten feet wide requires a mirror of at least 80 inches width for adequate coverage. A training wall of eight feet wide requires at least 64 inches. A six-foot-wide training zone requires a minimum 48-inch-wide mirror. These are minimums — wider coverage always produces better spatial expansion and better peripheral form feedback.
Full Wall Coverage — When it Justifies the Investment
Floor-to-ceiling, wall-to-wall mirror coverage is the most complete solution available and produces the most dramatic spatial expansion and form feedback quality. It is appropriate for dedicated training rooms where the mirror wall is the primary design investment, Performance Studio configurations where the mirror is the anchor piece of the entire aesthetic, and basement gyms where the low ceiling and enclosed space benefit most from the full depth illusion that complete wall coverage creates.
Full wall coverage systems require professional installation for panels exceeding two panels wide or any single panel over 80 inches in any dimension. The installation investment of $150 to $300 is appropriate at this scale — the cost of an incorrectly installed full-wall mirror system falling is significantly higher in every sense.
The Ceiling Height Consideration
In rooms with ceilings below eight feet a mirror that extends to the full ceiling height creates a visual expansion that makes the room feel taller — a significant quality-of-environment improvement in basement gyms particularly. In rooms with ceilings above nine feet a mirror that stops at 84 inches reads as correctly proportioned for the space without requiring floor-to-ceiling coverage.
Quick Reference by Room Type
- Spare bedroom — minimum 48 by 72 inches, ideally 60 by 80 or larger.
- Living room corner — minimum 24 by 72 leaning or 36 by 72 wall-mounted.
- Garage — minimum 48 by 72, ideally the full primary wall width.
- Basement — minimum 48 by 72, full wall coverage where ceiling height and budget allow.
- Apartment — minimum 24 by 72 leaning with anti-tip anchor, wall-mounted where lease terms permit.
Where to Place the Mirror
Mirror placement is the most consequential decision in this guide and the one with the most specific, actionable guidance that most home gym resources either skip or address generically. The mirror placed correctly multiplies the value of the training environment. The mirror placed incorrectly — wherever it fit after everything else was already established — provides a fraction of its potential value regardless of its quality or size.
Related Post: Home Gym Design Ideas (Beautiful and Functional Spaces)
The Foundational Principle — Mirror Wall Before Equipment
Before any equipment finds its permanent position in the training space, identify the mirror wall. Decide which wall will carry the mirror, confirm the stud placement supports the mounting plan, and establish the visual line the athlete will face during primary training movements. Then position the equipment around that decision.
This sequence feels counterintuitive because the rack is the more expensive and more logistically demanding piece to position. But the rack can go anywhere that has ceiling clearance and stud support for the anchor points. The mirror wall has specific requirements — facing the training zone, not reflecting the non-training elements of the room, receiving or reflecting good natural light — that not every wall satisfies. Start with the wall that meets those requirements and position the rack in front of it.
The Training Zone Orientation Rule:
The mirror should reflect the athlete during primary movements from the front — not from the side and not from behind.
The primary training zone should be positioned so the athlete faces the mirror during squats, pressing movements, rows, and any exercise where form checking at the primary joint angles matters most. This means the rack, the bench, and the primary mat zone are positioned in front of the mirror wall rather than beside it or with the mirror behind the athlete.
A side mirror — positioned perpendicular to the primary training direction — provides a different angle that is useful for specific movements like lateral raises or side-on squat depth checking. It does not substitute for the primary front-facing mirror.
The Window Relationship
Position the primary mirror to reflect the room’s best natural light source where the layout allows. A mirror installed on the wall opposite the primary window reflects daylight across the training zone and makes any home gym feel significantly brighter during morning training sessions. The reflected natural light creates the quality of illumination that artificial lighting can supplement but never fully replicate. A mirror adjacent to the window reflects the wall beside the window — missing the light source entirely. A mirror on the same wall as the window reflects the back wall of the training zone — useful for depth perception but not for light amplification.
When window placement and training zone orientation create a conflict between the optimal mirror wall and the optimal equipment wall, prioritize the mirror wall. Lighting quality and spatial expansion affect every session. Equipment wall positioning is an organizational preference.

What the Mirror Should not Reflect
A training mirror reflects everything in its field of view — including the elements of the room that are not part of the training zone. The bed in a spare bedroom that the mirror captures in its lower left corner. The sofa in a living room that appears in the reflection during every squat. The garage storage shelving that is visible behind the athlete during deadlifts. These reflections create a visual connection between the training zone and the domestic or storage function of the room that persistently undermines the quality of both.
Position the mirror so its reflection shows the training zone, the athlete, and the wall behind the athlete — nothing else. In a spare bedroom this means angling or positioning the mirror so it does not capture the bed in its reflection field. In a living room this means the mirror faces the training zone wall rather than the seating area. In a garage this means the mirror is positioned so the storage shelving and the garage door mechanism are outside its reflective field.
Placement by Room Type
In a spare bedroom the mirror goes on the wall opposite the window — facing the training zone and reflecting the natural light. Mount it before the equipment is positioned. Confirm it does not capture the bed in its reflection field before finalizing the position.
In a living room corner the mirror goes at the boundary between the mat zone and the living area — leaning at a slight angle or wall-mounted flush on the training zone’s primary wall. It should face the training zone rather than the seating area. From the sofa it reads as a design element. From the mat zone it reads as a training tool.
In a garage the mirror goes on the back wall or the wall perpendicular to the open door — positioned so the athlete faces the outdoor environment or the primary light source during training. In the Naturalist garage the mirror reflects the open door and the garden beyond. In the Athlete Cave garage the mirror is on the wall perpendicular to the rack — present for form checking without competing with the inward-focused atmosphere of the space.
In a basement the mirror goes on the longest wall, as large as the wall and the budget allow. In a low-ceiling basement a floor-to-ceiling mirror on the longest wall is the single highest-return upgrade available — it transforms the spatial quality of the space more completely than any other investment at a comparable cost.
The Safety Clearance Rule:
Maintain a minimum of three feet between the mirror surface and any barbell path, dumbbell swing, kettlebell arc, or dynamic movement.
A mirror that can be struck by equipment during a failed lift or an overzealous swing is a mirror that will eventually be broken — and a large glass panel breaking under those circumstances is a serious safety event. Plan equipment placement with mirror clearance as a hard constraint rather than a preference. If the training zone cannot accommodate both a correctly sized mirror and a safe clearance zone simultaneously the room is telling you something important about either the mirror size or the equipment arrangement.
How to Mount a Mirror Safely
Mirror installation in a home gym is not bathroom mirror installation. The dynamic load environment of a training space — floor vibration from dropped weights, the kinetic energy of heavy compound movements, the temperature and humidity fluctuation of garage and basement environments — places demands on mirror mounting hardware that static residential installation does not account for. The installation that holds a bathroom mirror perfectly for twenty years may not hold a training mirror for five under training conditions.
The Stud Requirement
Any mirror panel over 30 pounds — which includes most glass panels 48 by 72 inches and larger — must be anchored into wall studs rather than drywall anchors alone. Drywall anchors are rated for their static load capacity — the weight of an object hanging in still conditions. They are not rated for the dynamic load environment of a training space where the wall receives vibration from barbell drops, conditioning equipment, and the general energy of high-intensity training sessions.
Locate wall studs with a stud finder before purchasing any mirror mounting system. Standard residential stud spacing is 16 inches on center in most construction — confirm the specific spacing in the wall before ordering a mirror whose mounting hardware assumes a particular stud position. In garage walls, basement walls with furring strips over concrete, and any wall with irregular construction, stud positions may not follow the standard spacing and must be confirmed individually.
The French Cleat System
The most stable and most flexible mounting solution for large gym mirrors and the one worth considering for any mirror wider than 48 inches. A horizontal wooden rail — typically a 1 by 4 or 1 by 6 inch board cut to the mirror width — is secured into multiple studs across the full width of the mirror with structural screws. The mirror hangs on the cleat rather than being anchored directly to studs at specific points — which distributes the mirror’s total weight across more anchor points than standard clip mounting allows and makes the installation significantly more resistant to the dynamic load environment of a training space.
The additional advantage of the French cleat is flexibility. The mirror can be repositioned horizontally without new holes — slide it left or right on the cleat as the training zone arrangement evolves. Removal is simpler than with direct-mount hardware. And the cleat itself can be repositioned to a different height by filling and repainting the existing screw holes — a single additional step that most direct-mount systems cannot accommodate.
Standard Mounting Hardware
J-hooks, L-clips, and standoff hardware anchor smaller mirrors directly into studs at specific mounting points. Appropriate for mirrors under 48 inches wide when stud spacing is favorable and the combined panel weight is under 30 pounds. Always install with a level — a mirror installed even fractionally off-level is immediately and permanently visible in the reflection during every training session. Use a long level across the full width of the installation rather than a short level at a single mounting point.
The Leaning Mirror Installation
For living room, shared space, and rental property installations where wall modification is restricted, a framed full-length mirror leaning against the training zone wall with anti-tip hardware provides adequate stability for most training environments without permanent modification.

Anti-tip hardware consists of a furniture strap or L-bracket that connects the top of the mirror frame to the wall at a single stud or a wall anchor rated for the mirror’s weight. Without anti-tip hardware a leaning mirror in a training space is a safety hazard — it will fall, and it will fall during a training session when the floor vibration and the kinetic environment of the space are at their highest. Install the anti-tip strap before the first training session with a leaning mirror in the space. This is not optional.
*When to Hire Professional Installation
Full wall coverage mirror systems. Any single panel over 80 inches in any dimension. Basement full-wall installations where the ceiling height and the floor-to-ceiling span require precise panel alignment across multiple mounting points. Any installation where the combined mirror weight exceeds 50 pounds.
The professional installation cost of $150 to $300 for large mirror systems is the most consistently worthwhile installation investment available in a home gym context. The cost of a 70-pound glass panel falling from the wall during a training session is significantly higher in every dimension — financial, physical, and the quality of the training environment for the duration of the repair.
The Post-Installation Safety Check
After completing any mirror installation apply firm lateral pressure to the mirror surface from multiple positions across its width. The mirror should not flex, shift, creak, or produce any sound from the mounting hardware under this pressure. Any movement indicates insufficient anchoring — identify the specific failure point and address it before the first training session in the space. A mirror that moves under manual lateral pressure will eventually fail under the dynamic load environment of an active training space.
Mirror Recommendations by Archetype
The home gym aesthetic determines the appropriate mirror type, frame finish, size ambition, and placement philosophy more directly than room type or budget. Each of the five archetypes in the SOMA framework has a specific mirror profile — the choice that serves both the training function and the aesthetic identity of the space simultaneously.
Athlete Cave
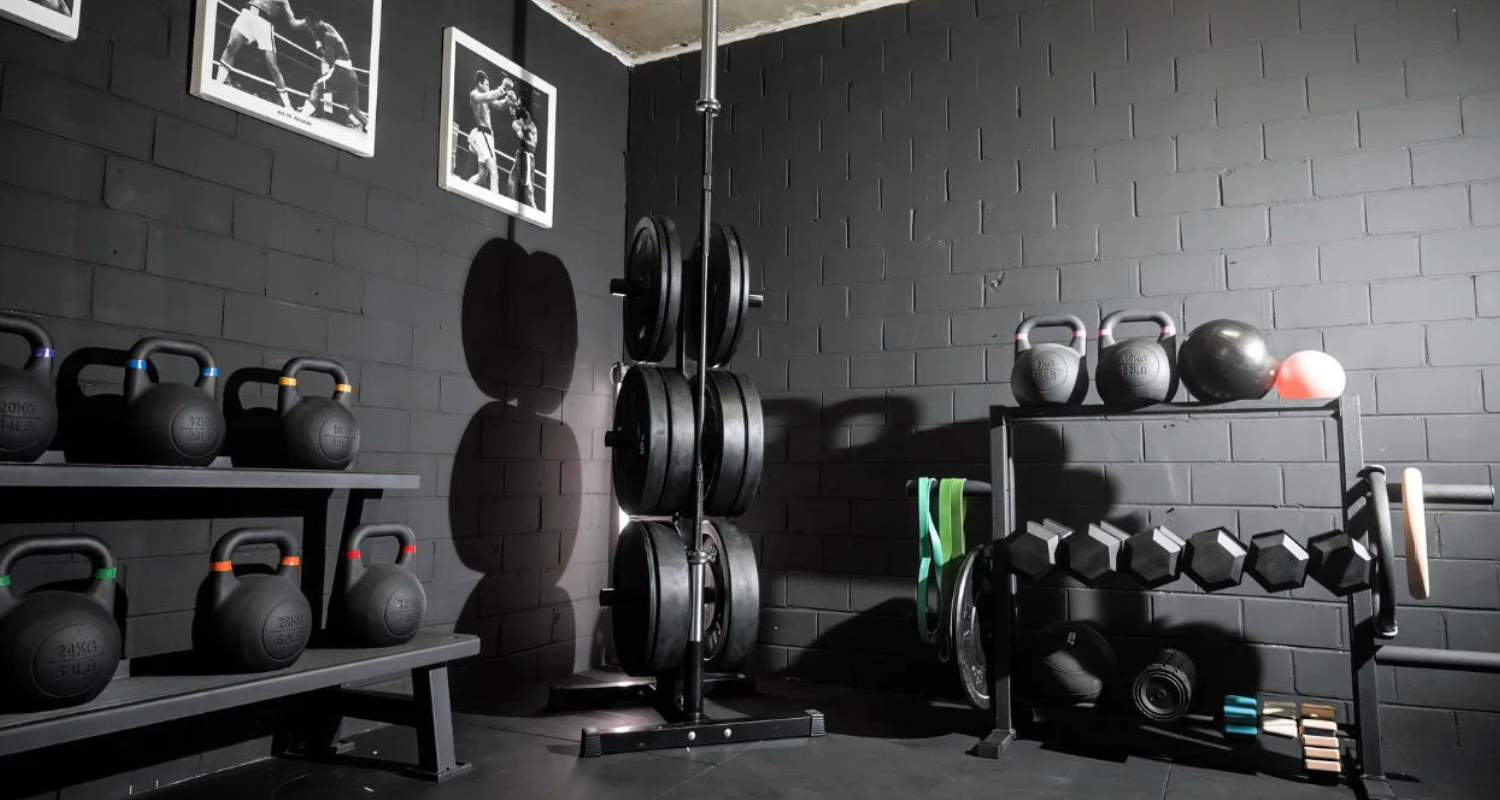
The Athlete Cave is the only archetype where the mirror is optional rather than essential — and the only one where omitting it is a legitimate aesthetic choice rather than a budget concession.


The Athlete Cave trains without an audience. The dark walls, focused lighting, and sealed atmosphere of this space are specifically designed to eliminate external input and direct all attention inward toward the work. A mirror introduces a visual feedback loop that some serious Athlete Cave athletes find distracting during maximum effort lifting rather than useful. The decision to include or exclude a mirror in the Athlete Cave is a personal training preference rather than an aesthetic requirement.
When a mirror is included in the Athlete Cave it should be frameless, wall-mounted, and positioned on the wall perpendicular to the primary lifting direction rather than directly facing the rack. This placement makes the mirror available for form checking on accessory and isolation movements — the exercises where visual feedback is most useful — without creating a front-facing reflection during heavy compound lifts where many serious lifters prefer to train by feel rather than by sight.
Related Post: The Athlete Cave Basement Gym: Design, Setup, and Training Guides
Related Post: The Athlete Cave Garage Gym: Design, Setup, and Training Guides
Clean Minimalist
The Clean Minimalist mirror is the first decision in the entire build — not the last. Frameless, wall-mounted, as large as the wall and the budget allow. Minimum 48 by 72 inches. Ideally 60 by 80 or larger depending on the wall width available.


Position it opposite the window where possible. The reflected natural light across a pale-walled, pale-floored training zone is the defining visual image of the Clean Minimalist gym and the quality that makes this space feel complete rather than assembled. The mirror wall should be identified before the equipment is positioned — every other placement decision in a Clean Minimalist gym follows from the mirror wall rather than preceding it.
Related Post: The Clean Minimalist Living Room Gym: How to Build a Training Space That Disappears When You Need It To
Related Post: The Clean Minimalist Spare Bedroom Gym: Design, Setup, and Training Guides
Naturalist
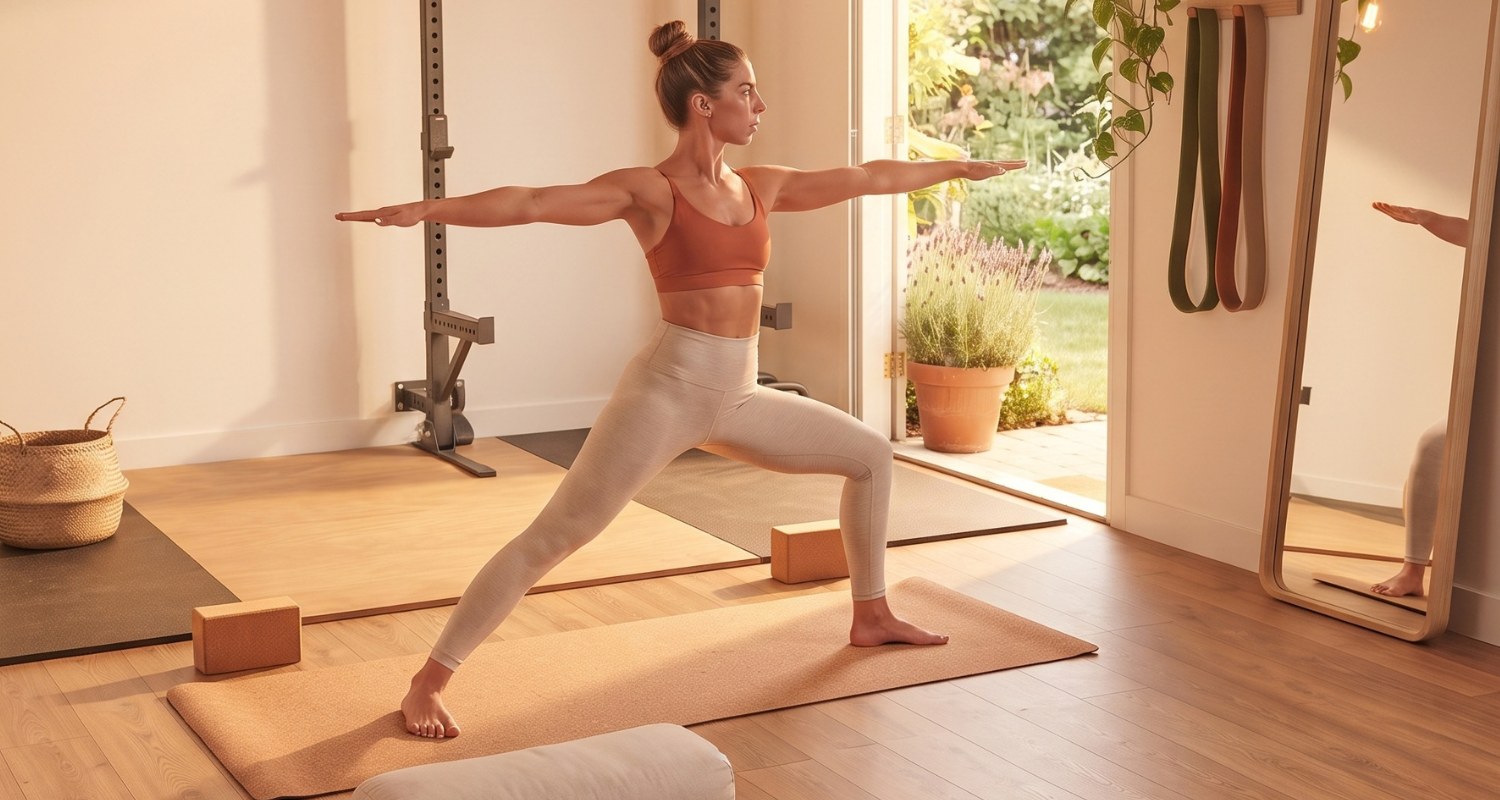
The Naturalist mirror is the one archetype where the frame is as important as the glass. A slim natural wood frame — ash or oak in a warm natural finish — leaning at a slight angle or wall-mounted flush. The frame transforms the mirror from a functional training tool into a design element that belongs in the warm, organic material language of the Naturalist space.


A frameless mirror in a Naturalist gym reads as Performance Studio — clean, precise, and slightly cold in the warm context of cork floors and terracotta plant pots. A natural wood frame reads as considered and intentional — the mirror that belongs here the same way the natural wood floating shelf and the wood dowel hooks belong here. Choose the frame before choosing the glass size — the frame constrains the available standard sizes and the decision about leaning versus wall-mounted determines the anti-tip hardware requirements.
Related Post: The Naturalist Living Room Gym: Training in a Space That Breathes
Related Post: The Naturalist Spare Bedroom Gym: Design, Setup, and Training Guides
Industrial Loft
The Industrial Loft mirror is frameless or slim matte steel frame — wall-mounted, not leaning. In the Industrial Loft the mirror is a functional tool with no aesthetic pretension beyond the honesty of its materials and its mounting. Its presence should be practical and direct — the right size for form checking, mounted flush to the wall, positioned for maximum training utility rather than for maximum design contribution.

In a brick-walled Industrial Loft garage or basement the mirror mounted on the brick surface creates a visual contrast — precise flat glass against rough raw brick — that reads as intentional industrial design rather than as a gym addition. This contrast is appropriate and worth planning for specifically.
Performance Studio
The Performance Studio mirror is the anchor piece of the entire aesthetic and the first purchase in the build before any equipment, any flooring decision, and any other design commitment. Full wall coverage, frameless, floor to ceiling where the ceiling height allows and the budget supports.


The Performance Studio without a full mirror wall is not a Performance Studio. It is a room with good lighting and tidy equipment storage. The mirror is what makes this space what it is — the element that doubles the perceived size of the room, reflects the directional LED lighting across the training zone, and communicates that this space was designed for performance at the same level as a boutique fitness studio. Size as generously as the wall and the budget allow. Install professionally. Make it the first thing in the room, not the last.
Mirror Maintenance and Longevity
A quality wall-mounted glass mirror maintained appropriately lasts indefinitely. The mirrors most commonly replaced in home gym environments are the ones that were compromised by the installation or maintenance decisions made in the first year — not by the glass itself failing.
Cleaning
Streak-free glass cleaner applied with a microfiber cloth after every training session. Sweat, chalk dust, and skin contact residue accumulate on a training mirror significantly faster than on a bathroom mirror — the proximity of the athlete to the reflective surface during heavy training means the glass receives more contamination in a single session than a bathroom mirror receives in a week. A mirror cleaned after every session looks correct at all times and provides reliable form feedback at all times. A mirror cleaned monthly looks correct for approximately the first week after each cleaning and progressively degraded for the three weeks following.
Never use abrasive cleaners, paper towels, or dry cloths on the mirror surface. Abrasive cleaning materials scratch the reflective coating — the scratches are visible in the reflection and accumulate permanently over time.
Surface Protection
Maintain the three-foot equipment clearance at all times — not as a preference but as a non-negotiable safety and longevity practice. Never lean equipment against the mirror surface. Never allow chalk to accumulate on the mirror surface without cleaning — chalk residue dried on glass is significantly harder to remove than chalk residue cleaned immediately after the session.
Material Longevity Comparison
Glass panels last indefinitely with appropriate mounting and maintenance — there is no degradation of reflective quality over time in a quality glass mirror. Acrylic mirror sheets scratch progressively over the life of the installation and the reflection quality degrades noticeably within two to three years of regular training use. Mirror tiles lose adhesive bond over time — particularly in temperature-variable environments like garages and basements — and require periodic re-adhesion or replacement of individual tiles. The higher initial cost of quality glass panels is the correct long-term investment for any home gym where the mirror is expected to serve its function for more than three years.
The Mirror That Was There From the Beginning
The gym that plans the mirror first builds a different space than the gym that places it last.
Not a better-looking gym — though it is usually that too. A gym that was designed from a specific decision about what the athlete should see when they train, where the natural light should fall, and what the room should look and feel like during every session from the first one to the hundredth. The mirror is the element that forces those decisions to happen early — before the rack locks in the layout, before the dumbbell rack claims the best wall, before the training zone is established without a clear answer to the question of what it’s oriented toward.
Get that decision right and every other decision in the gym follows more naturally. The rack positions itself in front of the mirror. The bench angles toward it. The lighting is chosen to look correct in the reflection as much as on the wall. The gym that was built around a mirror is the gym that was built with intention from a specific center point outward.
That is the difference between a room with equipment and a training environment. The mirror is often what makes it.
Leave a Reply